
*This post may contain affiliate links.*
Christmas is my favorite time of year, hands down.
So when I found out I was pregnant with Little Bear, the first thing I decided to knit was a set of Christmas stockings for our first Christmas as a new little family. (Enough of my family either knits or crochets, so I knew we wouldn’t be short on baby blankets.)
I wanted something that would look like a set without totally matching, and for it to be bright but not too red-and-green. I found this pattern from Canadian Living on Ravelry that was really easy to customize to what I wanted.
Difficulty:
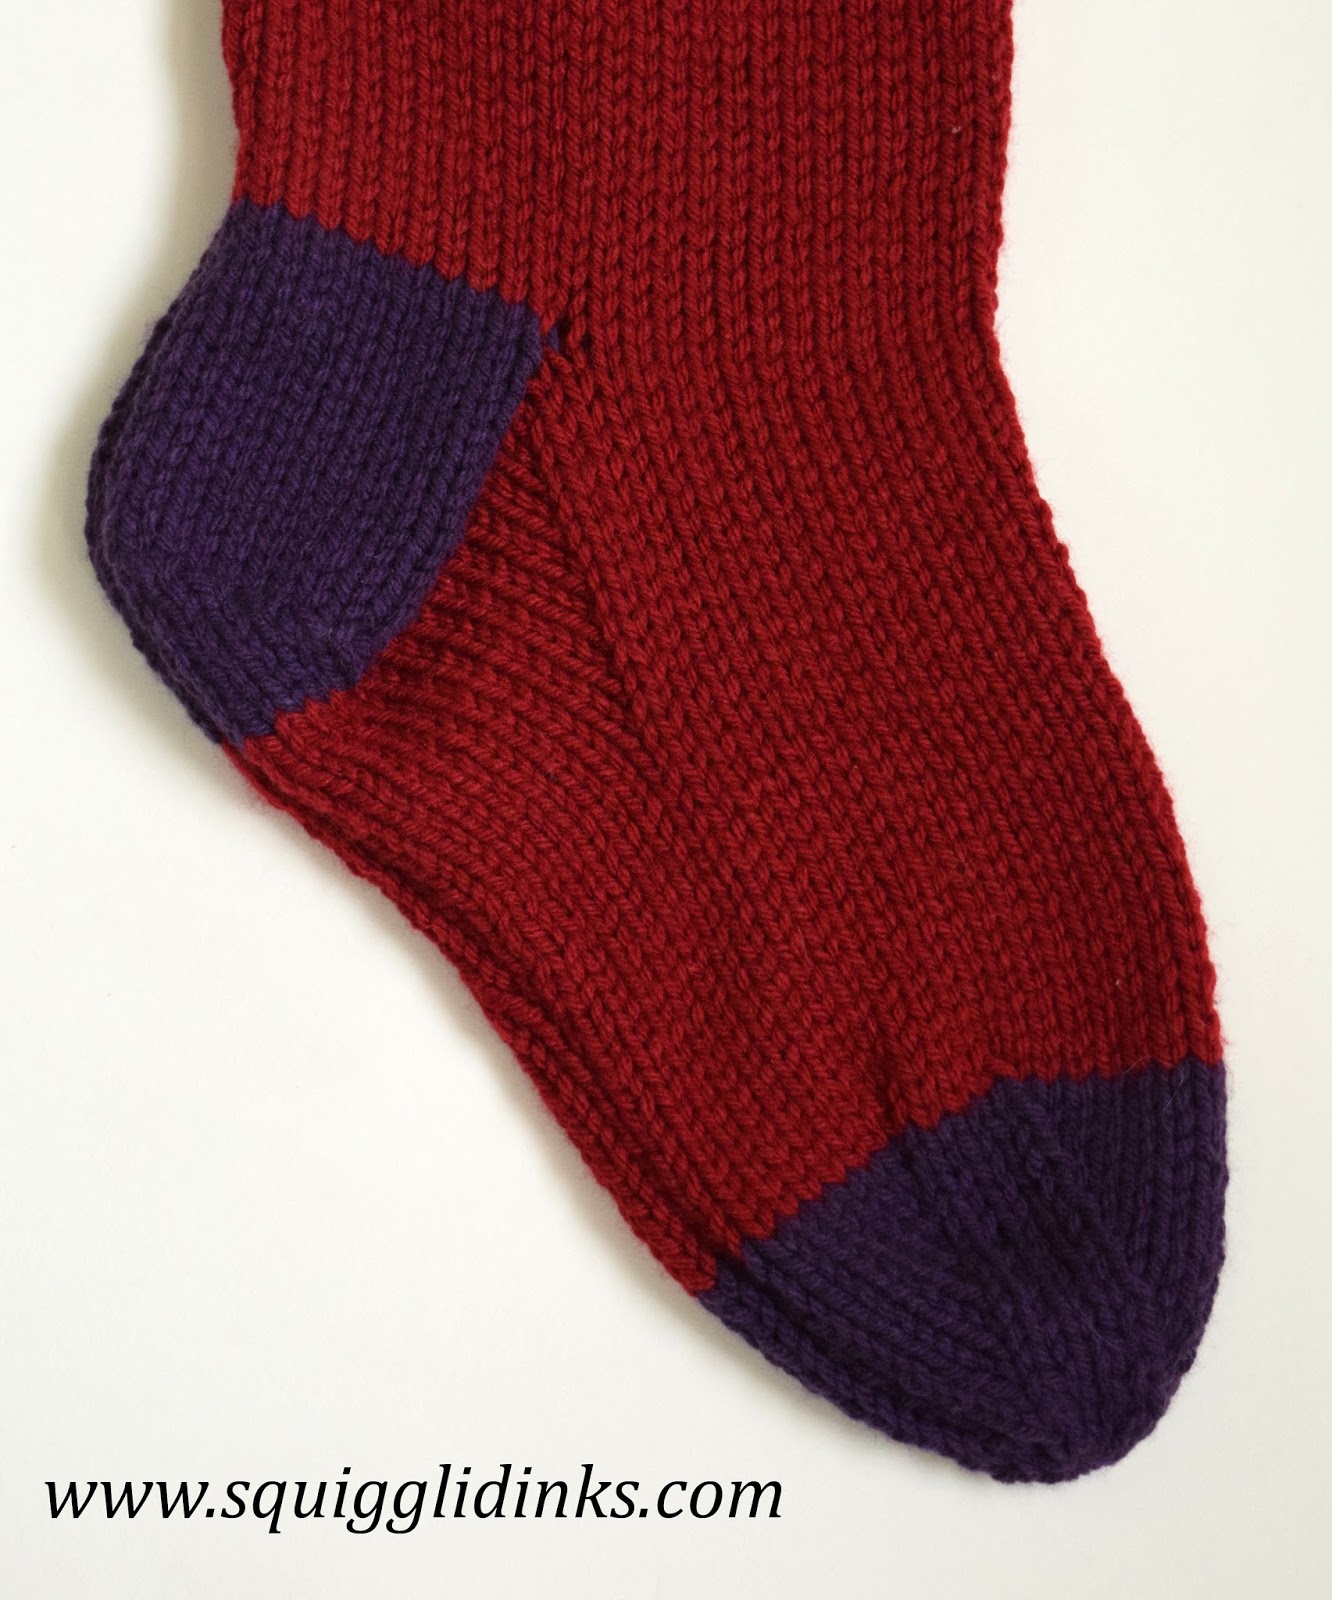
- Intermediate. This is a really simple stocking pattern, but you do need to be willing to do a little shaping at the toe and heel.
What You’ll Need:
- Size 7 (4.5mm) knitting needles
. These stockings are knit flat on straight needles and then sewn up the side, which was a huge point in their favor.
- Worsted weight yarn. I used Lion Brand Vanna’s Choice and Loops and Threads Impeccable. I don’t remember the actual color names, but I used a red, green, blue, and purple. Each stocking uses one main color and one contrasting color, so I varied whose stocking had which colors: my husband’s is blue with red, mine is purple with green, Little Bear’s is green with blue, and Munchkin’s is red with purple.
- Yarn needle
 |
| Stocking is knit flat and then sewn up the side. |
Skills you’ll need:
- Knit and purl stitches
- Knit two together (k2tog)
- Slip slip knit (ssk)
Download the original pattern here. My own alterations to the pattern are as follows:
Knit pattern as directed, following their instructions for stitches but ignoring their instructions for colors.
Rows 1-6: contrasting color
Rows 7-25: white
Row 7 (I changed the stitch pattern slightly in this row to make holes to pass a ribbon through for hanging): k3, yo, k2tog, k to 4 from end, yo, k2tog, k2
Rows 26-81: main color
To shape heels, use contrasting color yarn, not white. This is the same for both left and right heels.
The last set of instructions before shaping the toe (after it says “46 sts now on needle”): Ignore the instructions for working some of the stitches in the contrasting color. Work that row in the main color, plus the following 2 rows as instructed.
To shape toe, use contrasting color yarn, not white.
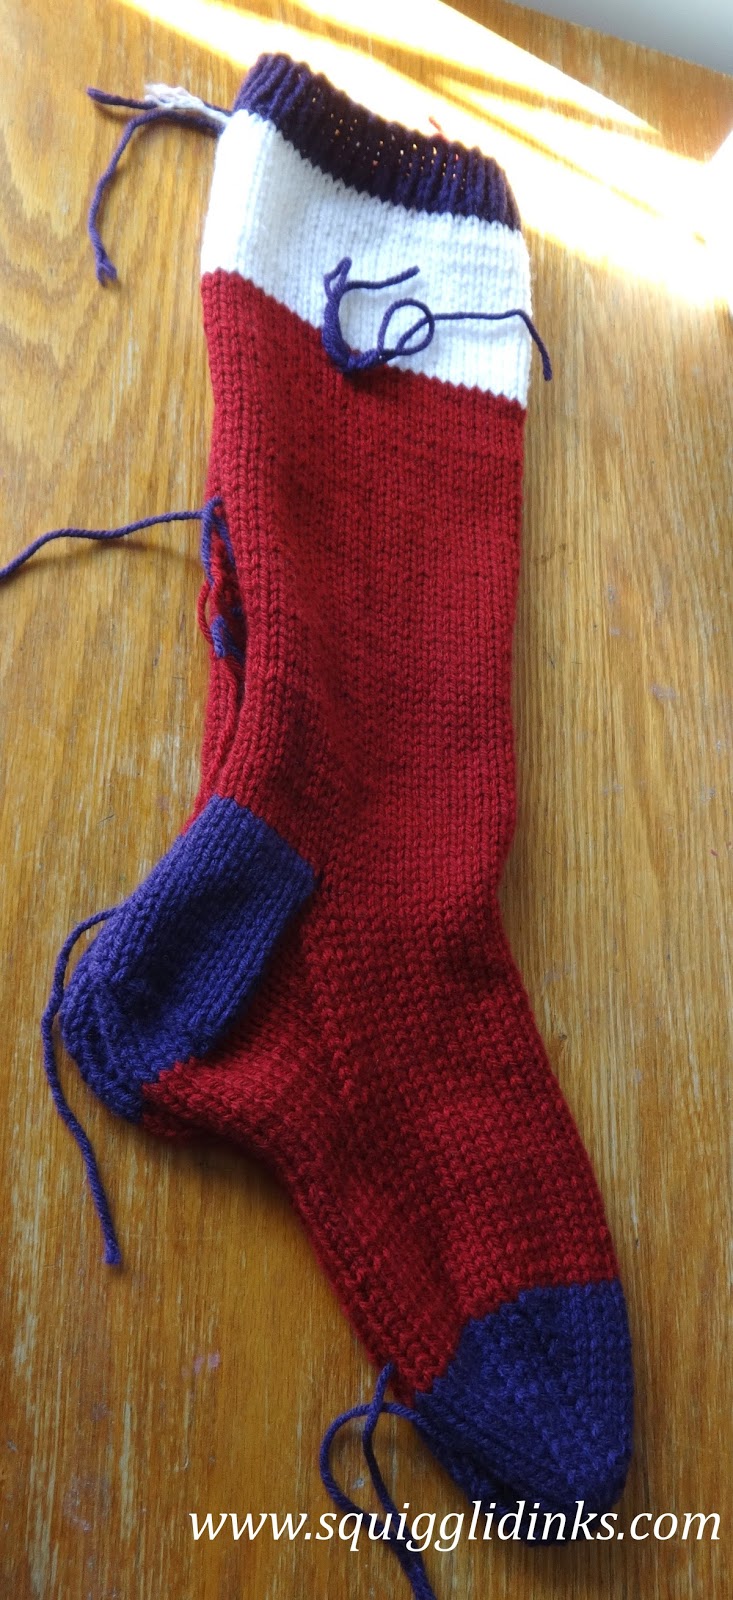
After knitting the basic stockings and sewing them up, I double stitched a snowflake onto each one, centering it on one side of the stocking. You can see in the picture above that I tied a piece of the purple yarn where I would need to center the snowflake. (I tied it just above where the top of the snowflake design would go.)
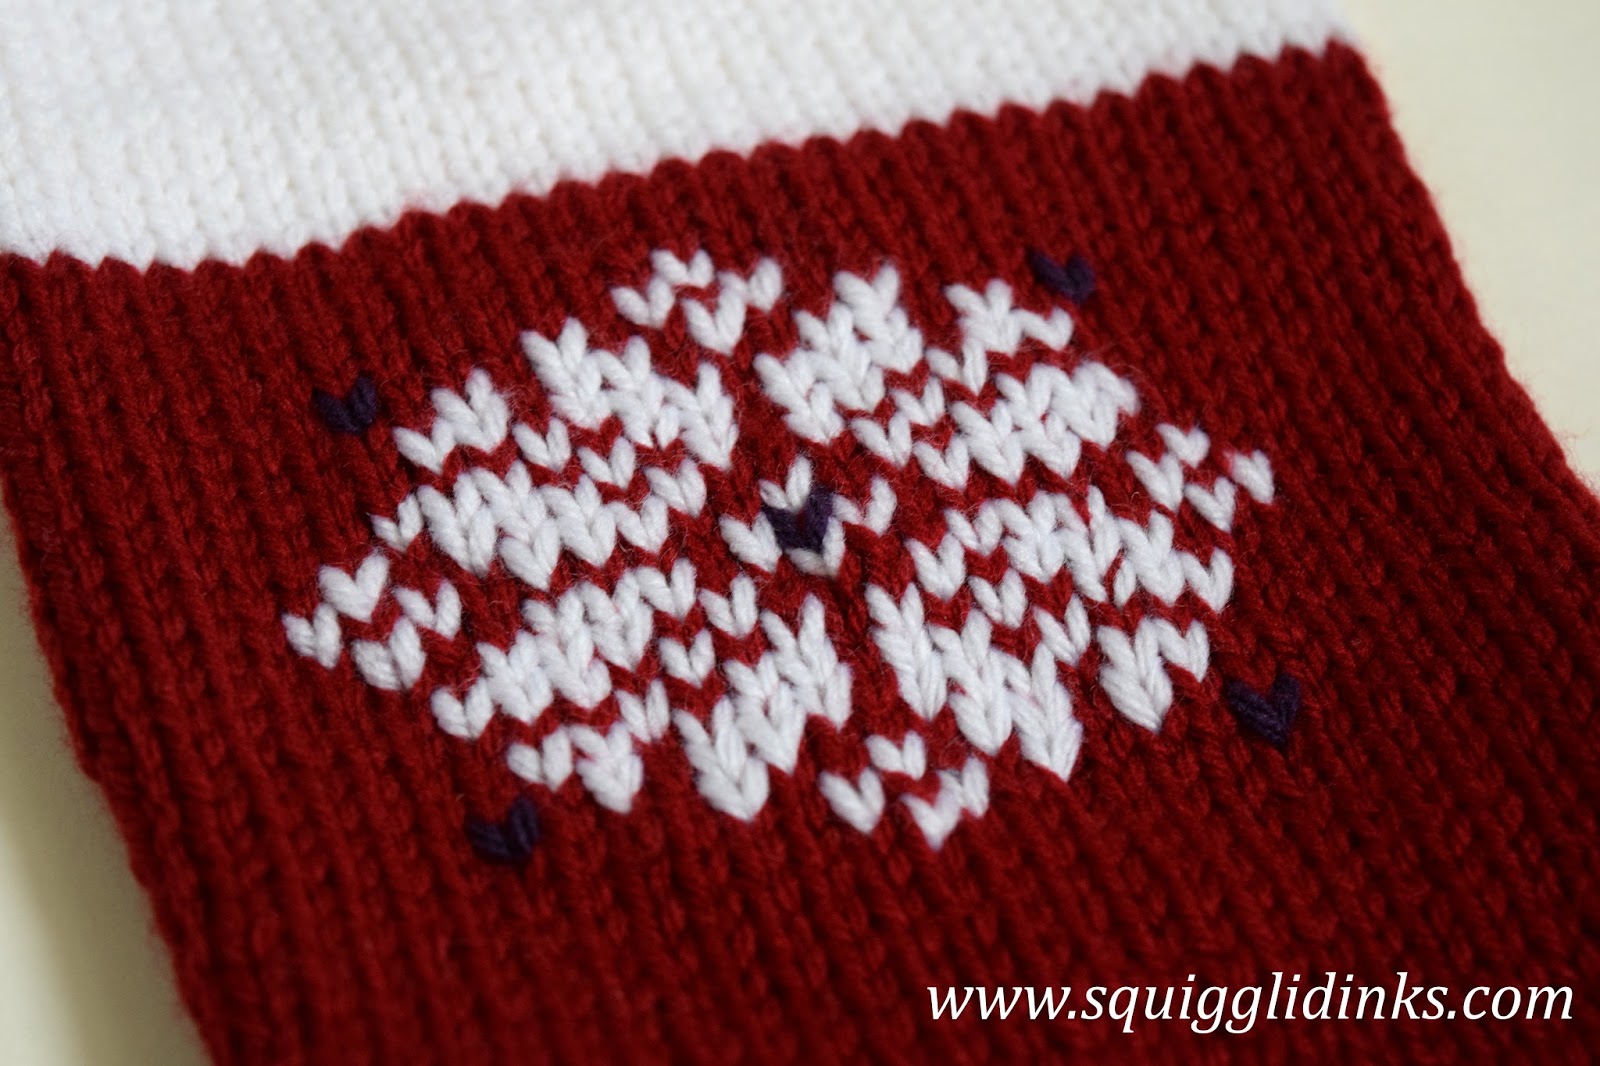
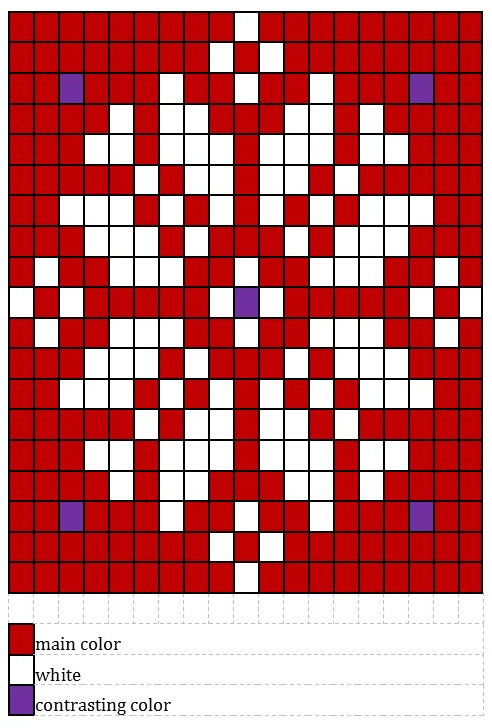
Here’s the color chart for the snowflake. I can’t take credit for it, but I have no idea anymore where I found it years ago. I think I figured it out from a picture in a magazine or something.
I also double stitched our names in black yarn into the white section. The first letter of each name was 15 stitches tall; all the rest of the letters were 10 stitches tall.
Note: My apologies for not having a tutorial for double stitching yet. If you want to know more about it, email me and I’ll be glad to chat!
You could knit the names and snowflake designs into the stockings as you go, just chart it out before you start. I made the first three stockings before Little Bear was born, since I wanted them to be ready for his first Christmas and I knew I wouldn’t have much time after he came along. We didn’t find out before he was born if he was a boy or girl, so I had to wait on filling in the name. I knit Munchkin’s while I was pregnant with him and added his name just in time for Christmas.
Here’s a shot of my husband’s and my stockings on Little Bear’s first Christmas.

We’re looking forward to showing the boys how to hang their stockings so that they can be filled on Christmas Eve!
What is your favorite Christmas item you’ve ever made?