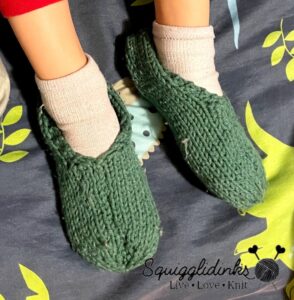
When my little Munchkin needed slippers this winter, I tried my hand at knitting them rather than buying a pair that he’ll either decide are uncomfortable or outgrow too quickly. There are a lot of awesome slipper patterns out there, but I hadn’t found any that worked for what I specifically wanted: knit (not crochet) with worsted weight yarn, that slipped on easily (but weren’t like big socks), and that were sized to fit a small 5 year old. Bonus points if it could be knit flat and constructed with minimal sewing. (I wasn’t in the mood for DPNs.) So I decided to make my own pattern.
This post comes with a disclaimer—it’s a tutorial, not a pattern. I don’t include all the right numbers for all the sizes you could possibly want. What I do include is how to figure the numbers out for yourself, so that you can use whatever yarn you want for whatever size you need. The numbers and steps that I used for Munchkin’s slippers will be in italics. I’ll walk you step-by-step through the measuring, math, and knitting.
Measure the Foot
You’ll need to start by measuring the length of the foot (toe to heel) and around the middle of the foot.
Munchkin’s foot (he wears a children’s size 10 shoe) was 6.25 inches long and about 6.5 inches around. (I measured in a couple of places and got both 6.5 and 6.75 inches, so I rounded down so that the slipper would be snug rather than loose.)
Find Your Gauge
Knit a gauge swatch (in stockinette stitch) with whatever yarn and needles you’re intending to use. You’ll need to figure it out in stitches per 1 inch (or per cm, if that’s how you measured your foot).
I used a generic worsted weight acrylic yarn from my stash and size 8 needles, which gave me approximately 4 stitches per inch.
Simple Math
Take the measurement from around the middle of the foot. For children’s slippers, subtract 1 inch. For adult slippers, subtract 2 inches. Multiply this by your stitches per inch.
For mine, I did:
6.5 – 1 = 5.5
5.5 x 4 = 22
A Little More Math
Those inches that you just subtracted will be increased back in halfway through. If you subtracted 1 inch, how many stitches will you need to increase? How many will you need if you subtracted 2 inches?
I subtracted 1 inch, and at 4 stitches per inch, I need to increase 4 stitches.
A note for later: it helps if your Simple Math number and your A Little More Math number (aka the total number of stitches you’ll need in the end) will add up to an even number.
Stitch Abbreviations
k = knit
p = purl
yo = yarn over
k1fb = knit 1 in front and back of stitch
k2tog = knit 2 together
Get Knitting
On straight needles, cast on the number your Simple Math gave you.
I cast on 22 stitches using the long-tail method. (The tail is necessary for sewing at the end.)
Row 1: knit.
Row 2: k2, purl until 2 stitches from the end, k2.
Repeat these two rows until piece measures half of the length of the foot (rounded up to the nearest quarter inch) from the cast on edge.
Munchkin’s foot length was 6.25 inches. Half of that would be 3.125, so I rounded it up to 3.25 inches, or with my gauge, approximately 18 rows.
Check your numbers here, because we’re about to increase. How many stitches do you need to increase? The instructions below will increase 4 stitches in 1 row. If that’s what you need, perfect! If you need more, you’ll repeat the row (which I’ll give instructions for in a second). If you need less, you can replace the (k1, yo, k1) with a k1fb so that you’re only increasing 2 stitches.
Increase Row: k1, (k1, yo, k1) in next stitch, knit to last 2 stitches, (k1, yo, k1) in next stitch, k1. (Increase of 4 stitches)
Next Row: purl.
This one increase was enough to compensate for the inch that I subtracted from Munchkin’s around-the-middle foot measurement.
Repeat these 2 increase rows as necessary.
If I’d been making an adult size (with 2 inches to make up for), I would repeat these 2 rows, so that I’d be up 8 stitches from my cast on number (since 4 stitches per inch x 2 inches = 8 stitches).
If I had a different gauge (3 stitches per inch, for example) and needed 6 stitches, I’d do a regular Increase Row first, then the second time through I’d do the alternate version with k1fb to increase 2 more.
Continue in stockinette stitch (knitting all right-side rows and purling all wrong-side rows) until piece measures the length of the foot.
I knit until I reached 6.25 inches, or about 14 more rows.
A smidge more math: is your total number of stitches divisible by 4 so that it comes out to a whole number? If it is, awesome! Skip this next bit. If not, keep reading.
Mine was not: 26 / 4 = 6.5
How many stitches would you need to decrease to get it to a nice round number?
I needed to decrease 2 to get to 24. Because 24 / 4 = 6.
Next Row: k1, k2tog, knit to last 3 sts, k2tog, k1.
Next Row: purl.
That should have gotten you to a number that would divide nicely by 4. Now everyone gets in on the decreasing:
Decrease Row 1: k2tog to end of row.
Decrease Row 2: purl.
Repeat these 2 rows until you have less than 10 stitches.
I decreased twice. The first time decreased my stitches from 24 to 12, and then the second time decreased from 12 to 6.
(If you end up somewhere in the decreasing process with an uneven number, just k2tog to the last stitch in the row and k1.)
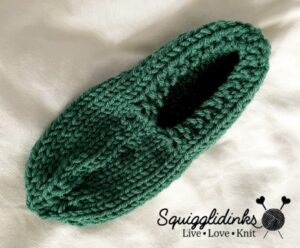
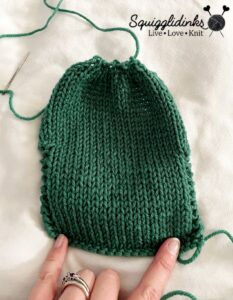
Cut a long tail. Thread through remaining stitches and pull snug. Fold slipper in half lengthwise. Sew sides together until you reach the increase stitches. (The narrow strip of garter stitch along each side should remain unsewn for the foot opening.)
Fold cast on edge in half and sew together using tail from cast on. Sew all ends under.
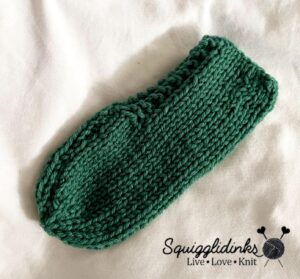
You can see from the photos that I didn’t use an invisible seaming technique. I was afraid that any ridge created by an invisible seam would be uncomfortable for Munchkin and that he’d refuse to wear the slippers, so I decided that I didn’t mind if the seam showed. Use whatever seaming technique you prefer.
Repeat with second slipper. Wear and enjoy!