

Following in my series of tutorials on decrease stitches, we have slip slip knit (ssk). Slip slip knit is another common decrease and is knit two together‘s opposite–where k2tog slants right, ssk slants left. This is important for certain clothing items that should look symmetrical, like sweaters, socks, and mittens, or even Christmas stockings. It is also a common decrease in lace patterns.
Here’s how to do it (photos first, and a video further down):
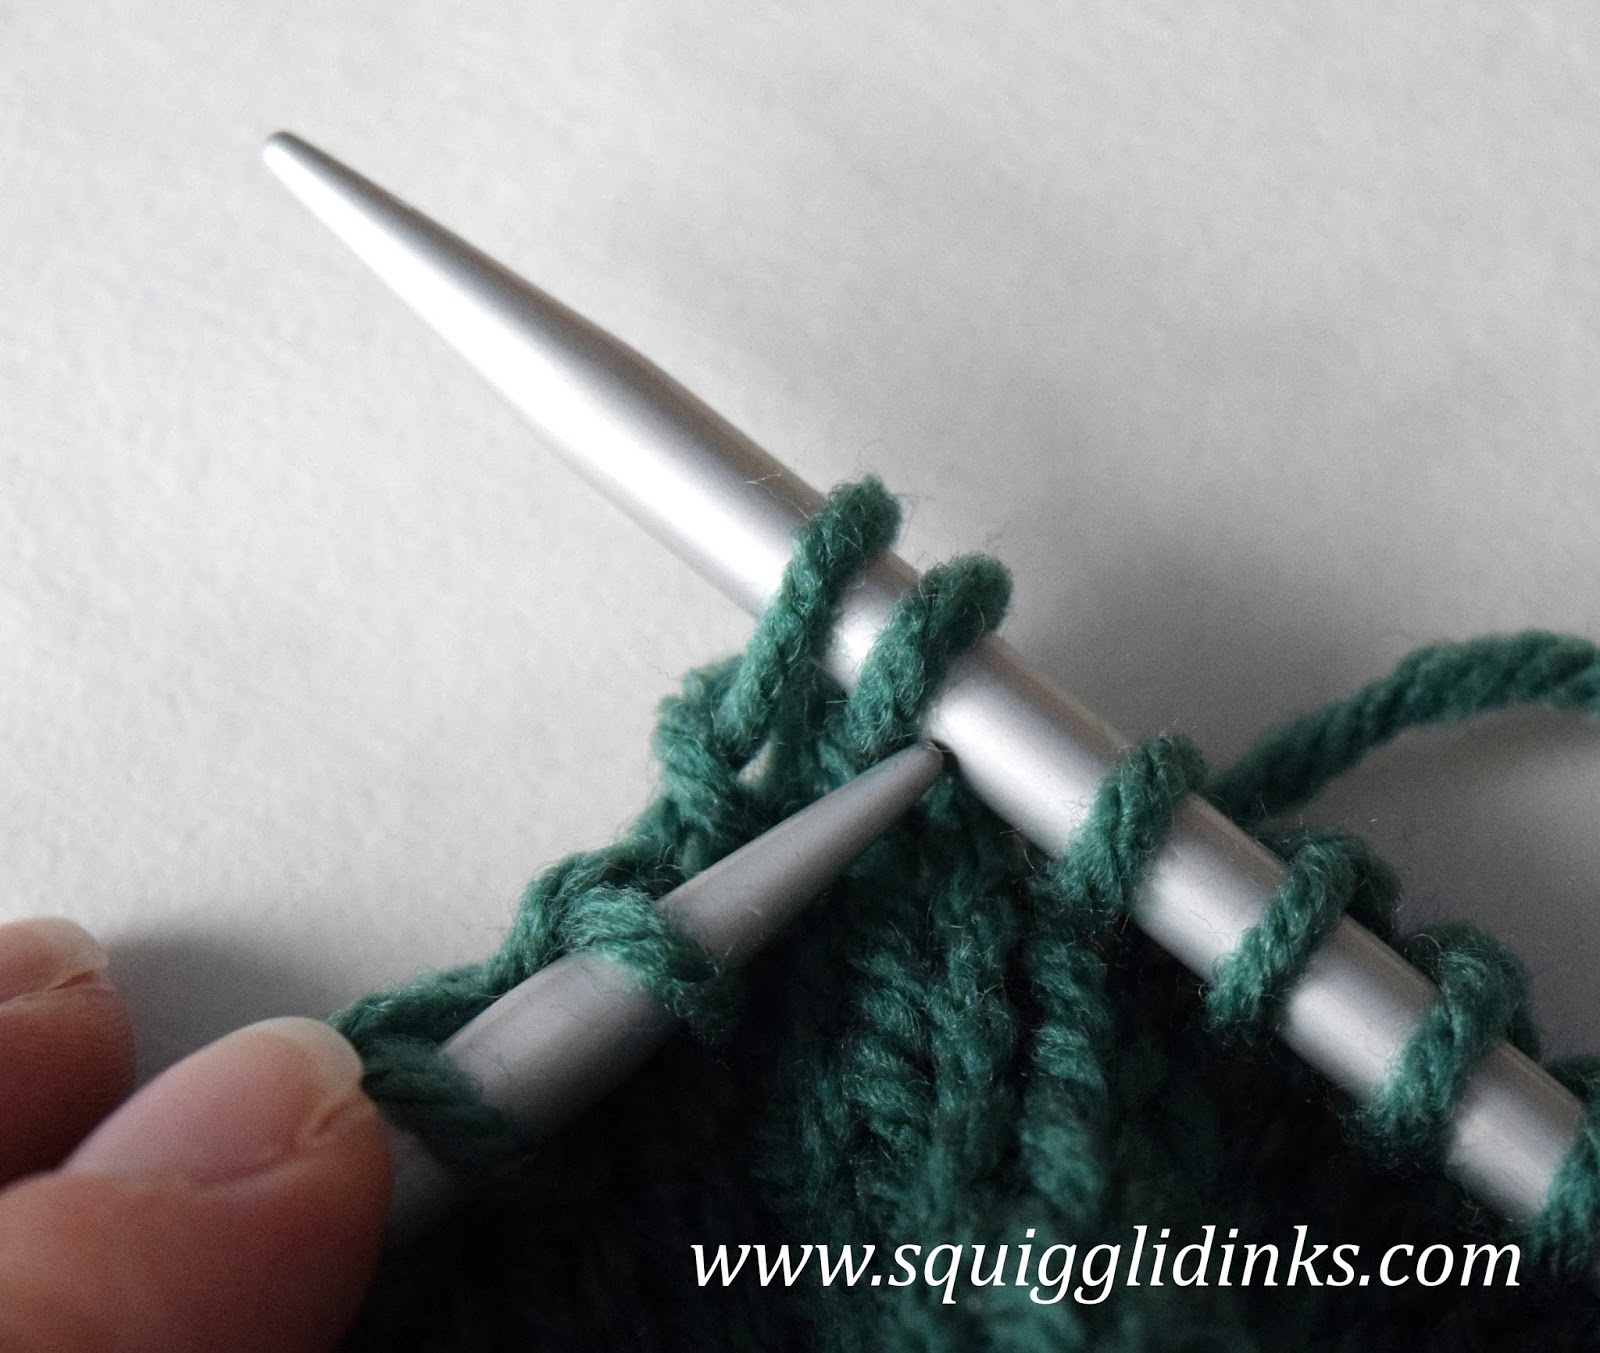
Slip the first stitch from the left needle knit-wise onto the right needle.

Repeat with the second stitch.


Now, take the tip of the left needle and slip it back through those two stitches, from right to left.
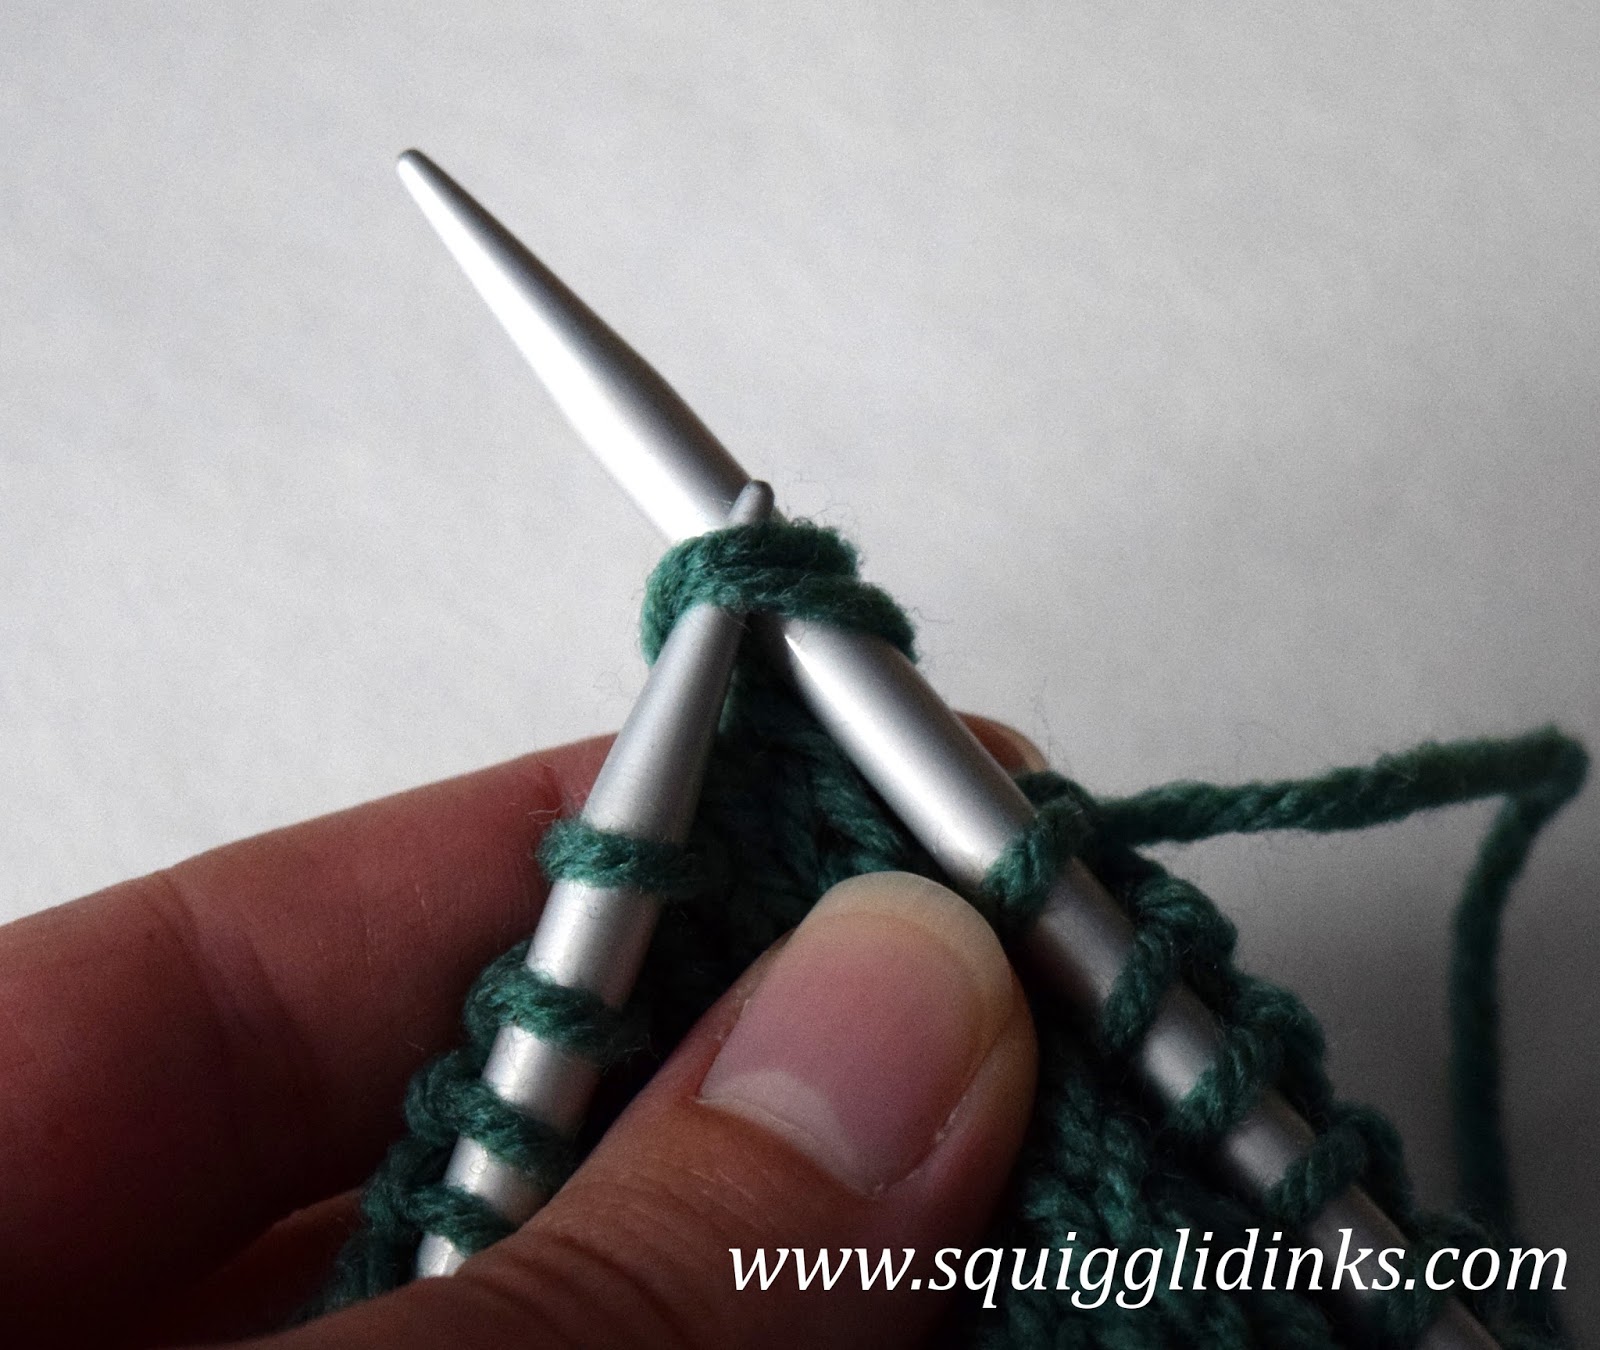
Slide them off the right needle. Their positions are now reversed.
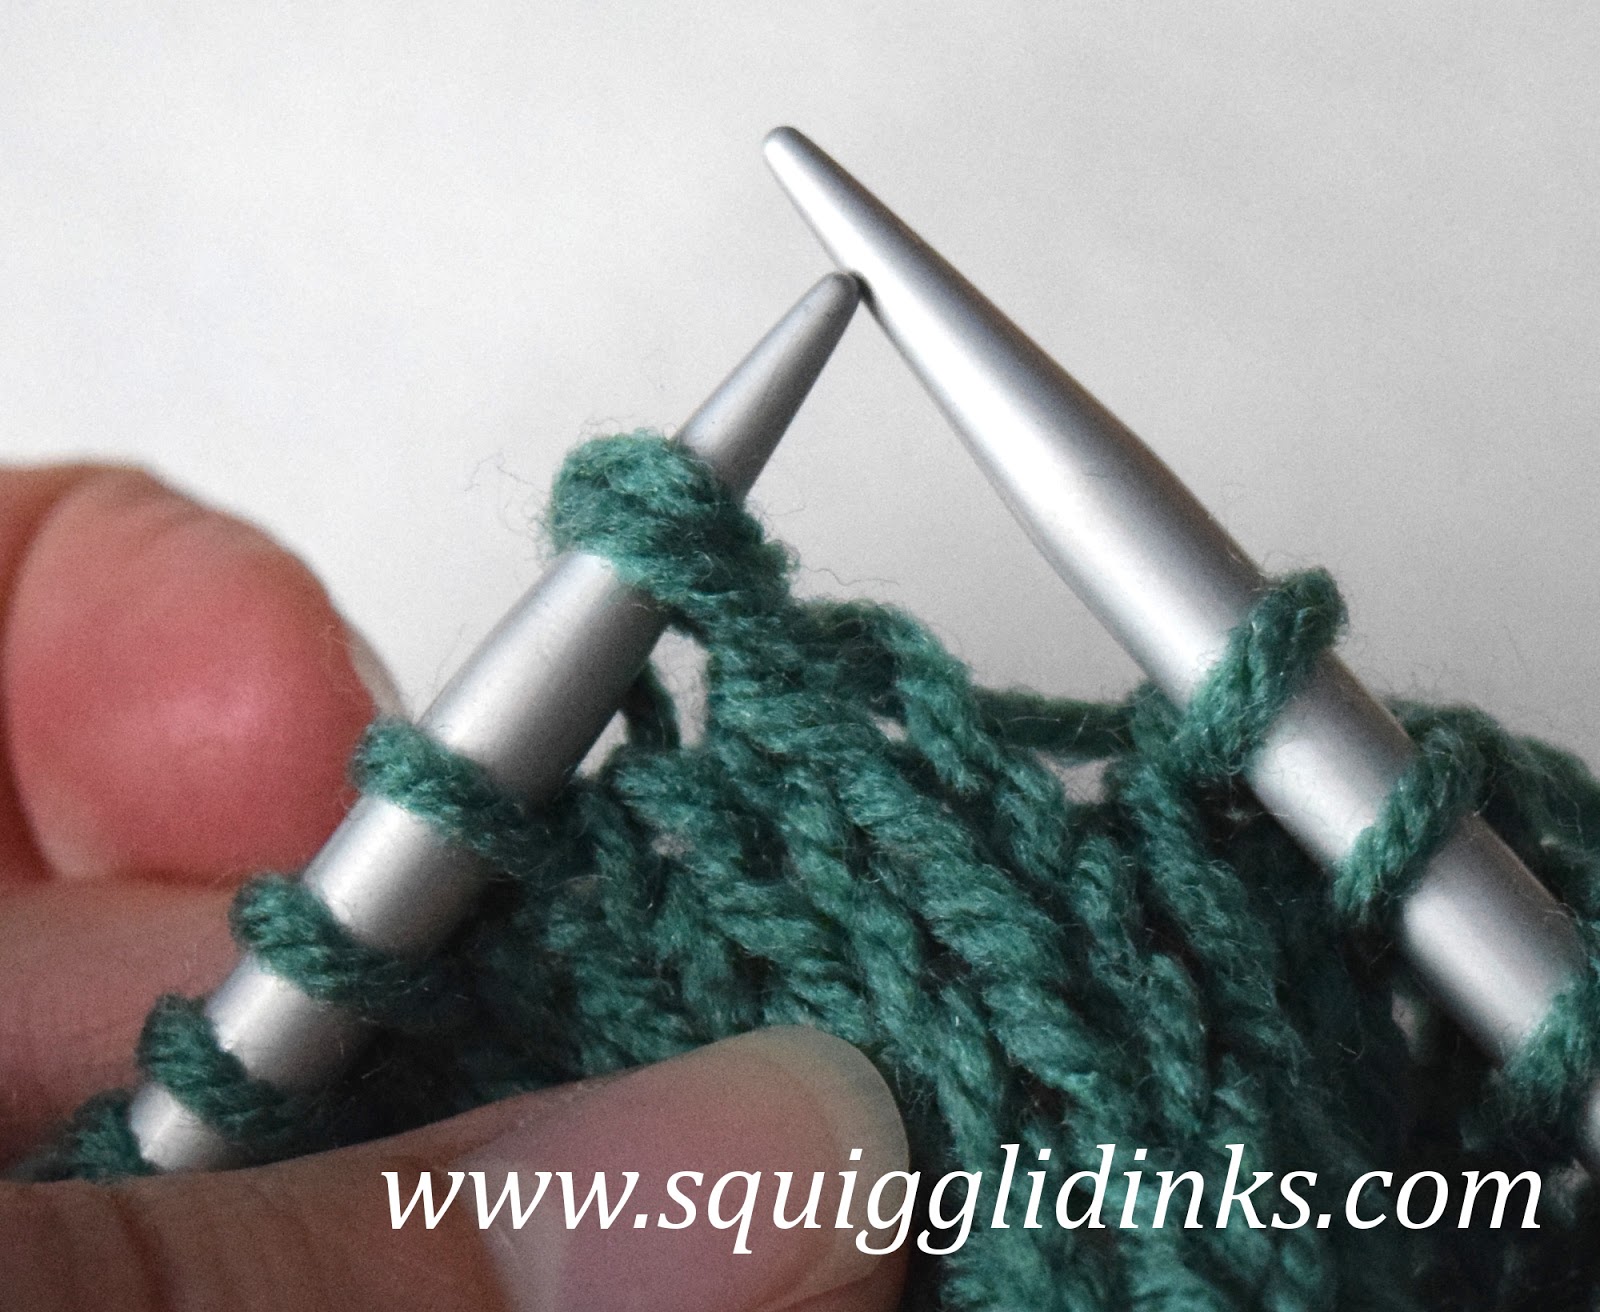
Now, knit these two stitches together.
(If this is new to you, you can either read my post on k2tog or follow these instructions: Slide the right needle through both stitches left to right as you normally would to knit, only you’re picking up two instead of one. Knit them as though they were one stitch.)

There is now only one stitch on the right needle instead of the two that were on the left. Notice that the stitch slants to the left:

Note: I do a shortened version of this (which I demonstrate in the video). Keep practicing the longer version if you want to avoid confusion. Otherwise, you can try this: Slip the two stitches from left to right needles as directed. Slide the tip of the left needle through them as directed, but don’t take them off of the right needle. Instead, wrap your yarn around the tip of the right needle where it is and knit the two stitches together.
And now the video:
Great job! I’d love to see what you’re working on with your new decrease stitches–tag me on Instagram (@squigglidinks)!