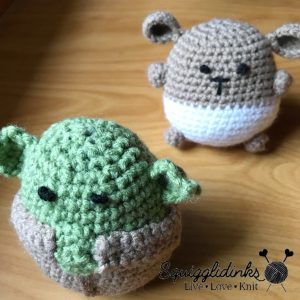
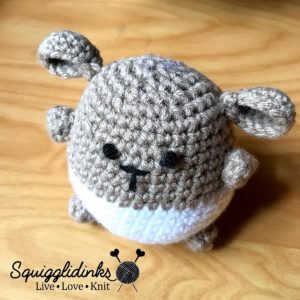
Munchkin loves hamsters. I’m not sure why. He loves all animals. When he was a toddler we used to stop at PetSmart when we were out running errands, just to look at all the animals. Then out of the blue, a few weeks ago, he adopted a hamster magnet as his new favorite toy. But, being a magnet, it was easily lost as soon as it was off the refrigerator. After several days of trying to find it, I decided to make him an amigurumi hamster which would be harder to lose. I followed a free pattern from Grace and Yarn with only a few modifications: I used a size F hook instead of the E hook she recommended, and I used french knots for eyes instead of safety eyes. (I make amigurumi so rarely that it’s not worth buying them.) I also ran out of white yarn, so I switched to taupe earlier than recommended.
Of course, you can’t make a little “stuffy” for one kid without making one for the other. When Little Bear saw what I’d made for Munchkin, he immediately asked for what I had anticipated. Well, he asked for a Jedi. First he wanted Anakin Skywalker, but I ruled out all humans—my amigurumi skills are limited to small, ball-shaped creatures. I used the same hamster pattern from Grace and Yarn to make Yoda, but with a few extra modifications.
This isn’t a full pattern; it’s just notes on the modifications I made to the hamster pattern. Leave any questions in the comments!
Abbreviations:
SC = single crochet
SC DEC = single crochet decrease
CH = chain
sts = stitches
Hook: F (3.75-4mm)
Yarn: Loops and Threads Impeccable in Taupe and Fern, plus scraps of brown and black.
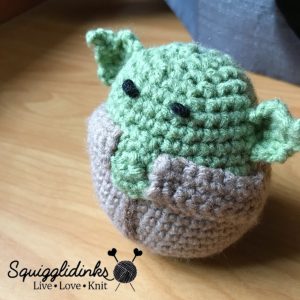
I followed the instructions for the hamster, using taupe instead of the hamster white for the bottom/Jedi robe. I switched to Fern where the instructions recommended changing to the second color. I continued an extra round or two beyond where they said to stop to sew on the face. Then I slip-stitched the walking stick (brown) down the front of the robe. I used french knots (black) for eyes, placing them a row or two higher than the hamster eyes would go. I finished the head and sewed the end under.
Clasped hands: Make a magic circle with 6 SC. I went on to SC twice in each stitch (12 sts total), but if I were doing it again I might not do that round. His hands look too big to me now. Use tail to sew the circle over the top of the walking stick.
Arms (make 2): CH 10. SC into second CH from hook, continue SC to end of row (9 sts).
Row 1: CH 1, turn, SC in all 9 sts.
Repeat Row 1 twice more. Cut yarn, thread through last stitch, use tails to sew arms horizontally from each side so that they overlap the hands slightly.
Ears (make 2): These are supposed to be slightly wonky, pointy triangles. I fudged my way through them, so feel free to do the same.
Row 1: CH 6. SC into second CH from hook and in next 4 sts (5 sts).
Row 2: CH 1, turn. SC in all 5 sts.
Row 3: CH 1, turn, skip first st, SC DEC twice to end of row (2 sts).
Row 4: CH 1, turn, SC DEC (1 st).
Row 5: CH 1, turn, SC.
Cut yarn, thread through last stitch, sew that end under. Use tail from beginning chain to sew chain edge to side of head in a C shape.
So that’s how I made a Yoda hamster for Little Bear. He loves it, and they love them even more because they watched me make them.