
I wasn’t a fan of the make one (m1) increase when I first tried it. I’ve always used k1fb, and it has worked well for almost every project. But m1 has the advantage of blending in a little better to the stitches around it, and sometimes you need that. After using m1 and its reverse, m1r, for the Himalaya blanket, I’ve come to like it a lot more. Practice makes perfect, they say, or at least makes me more comfortable with the stitch.
Here’s how to do it:
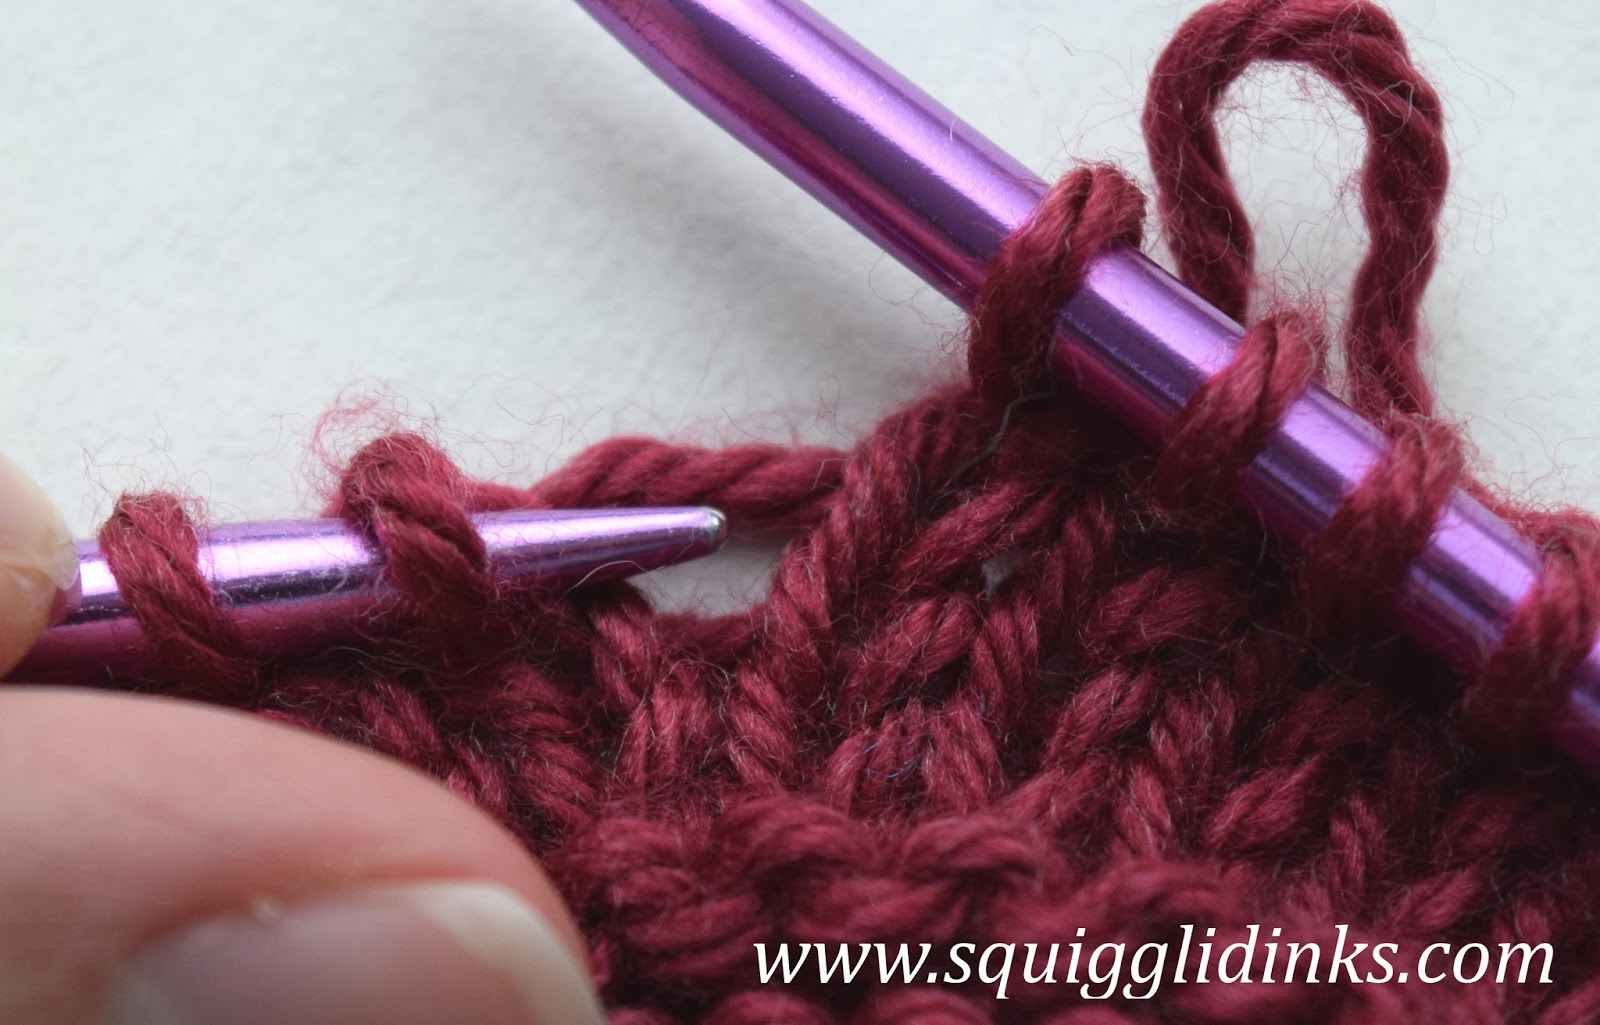
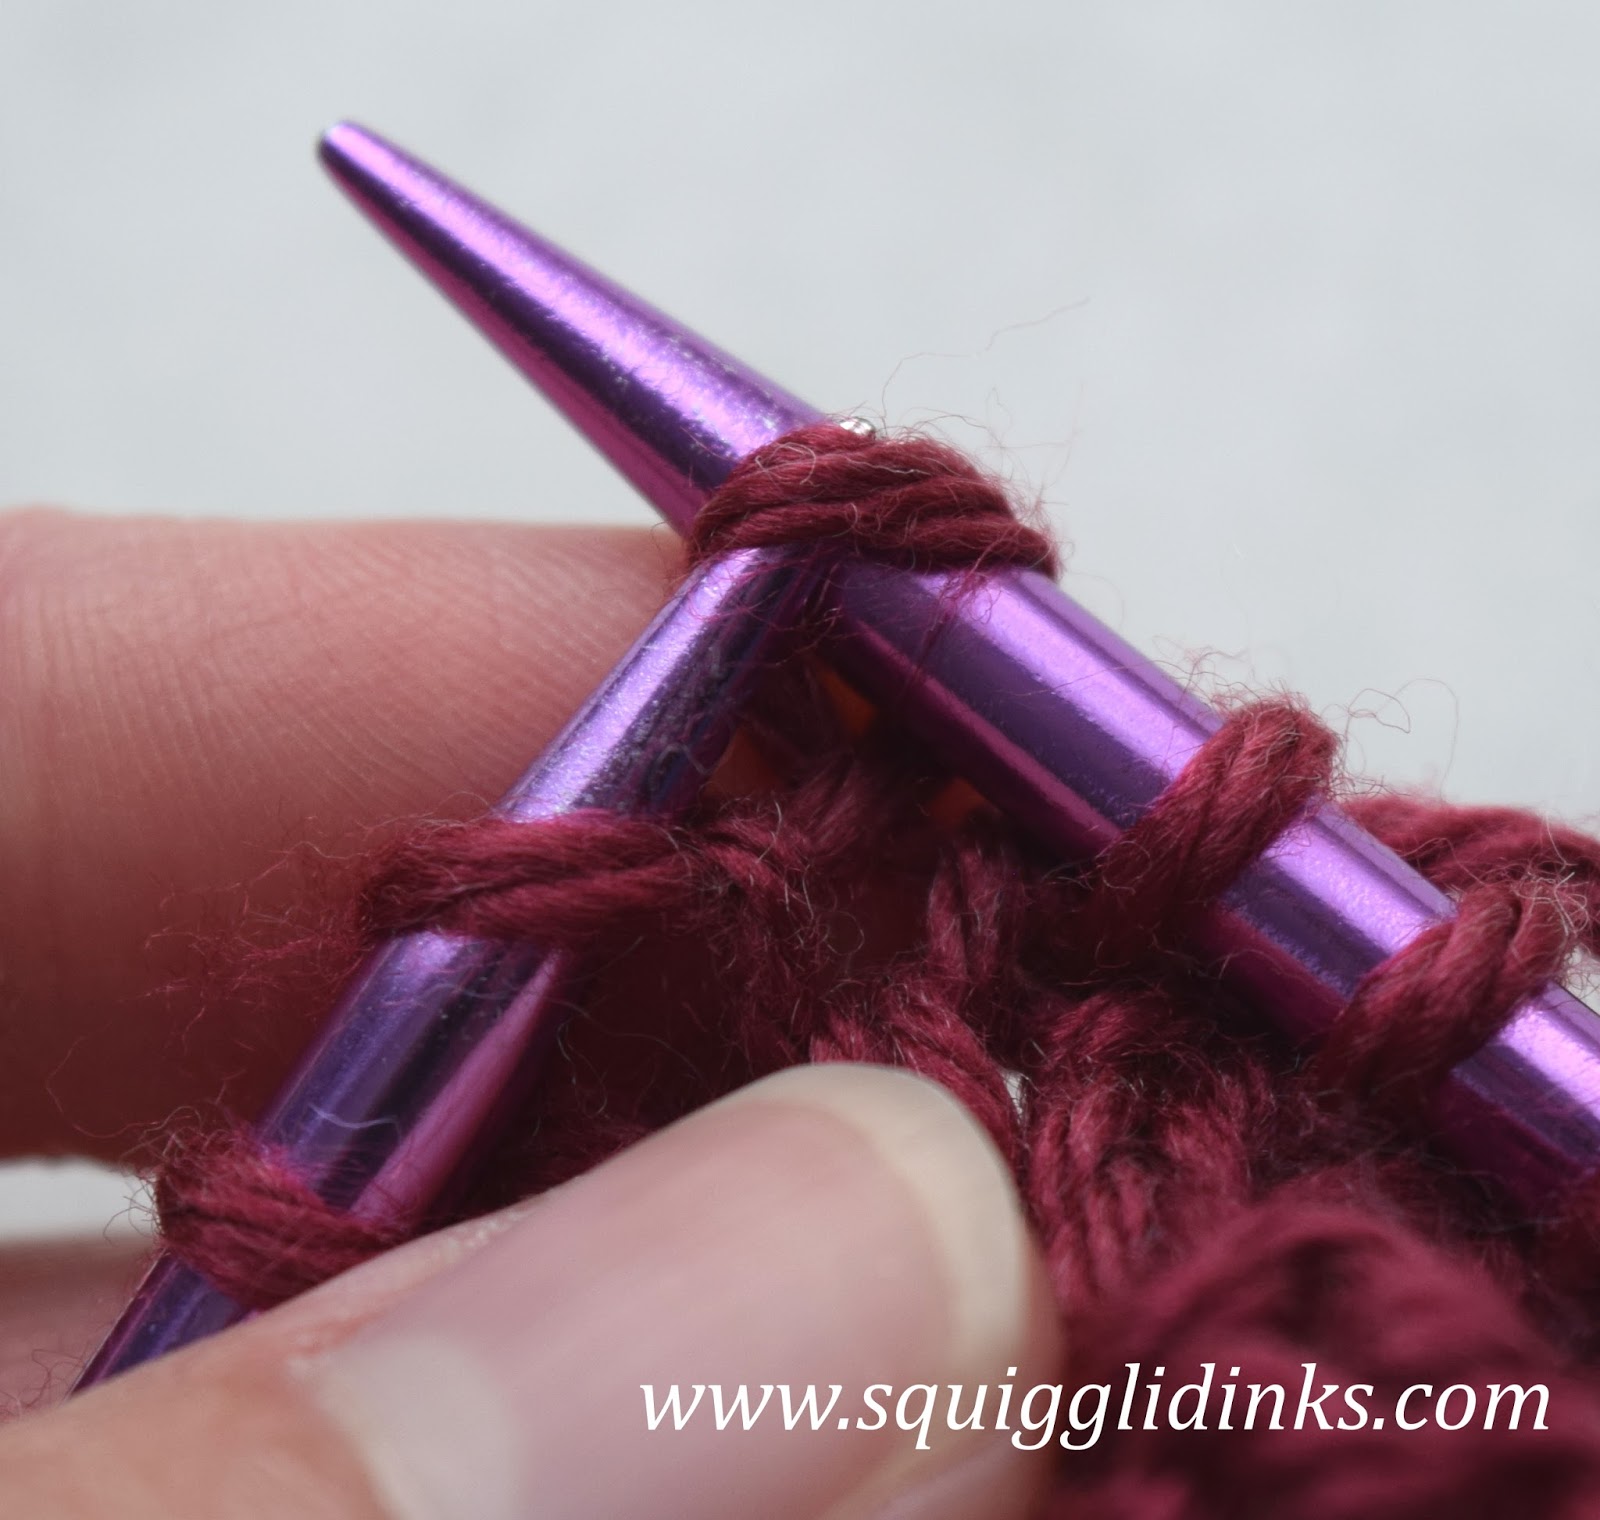
Pick up that loop of yarn with your left needle by inserting the needle below the loop moving FRONT TO BACK.
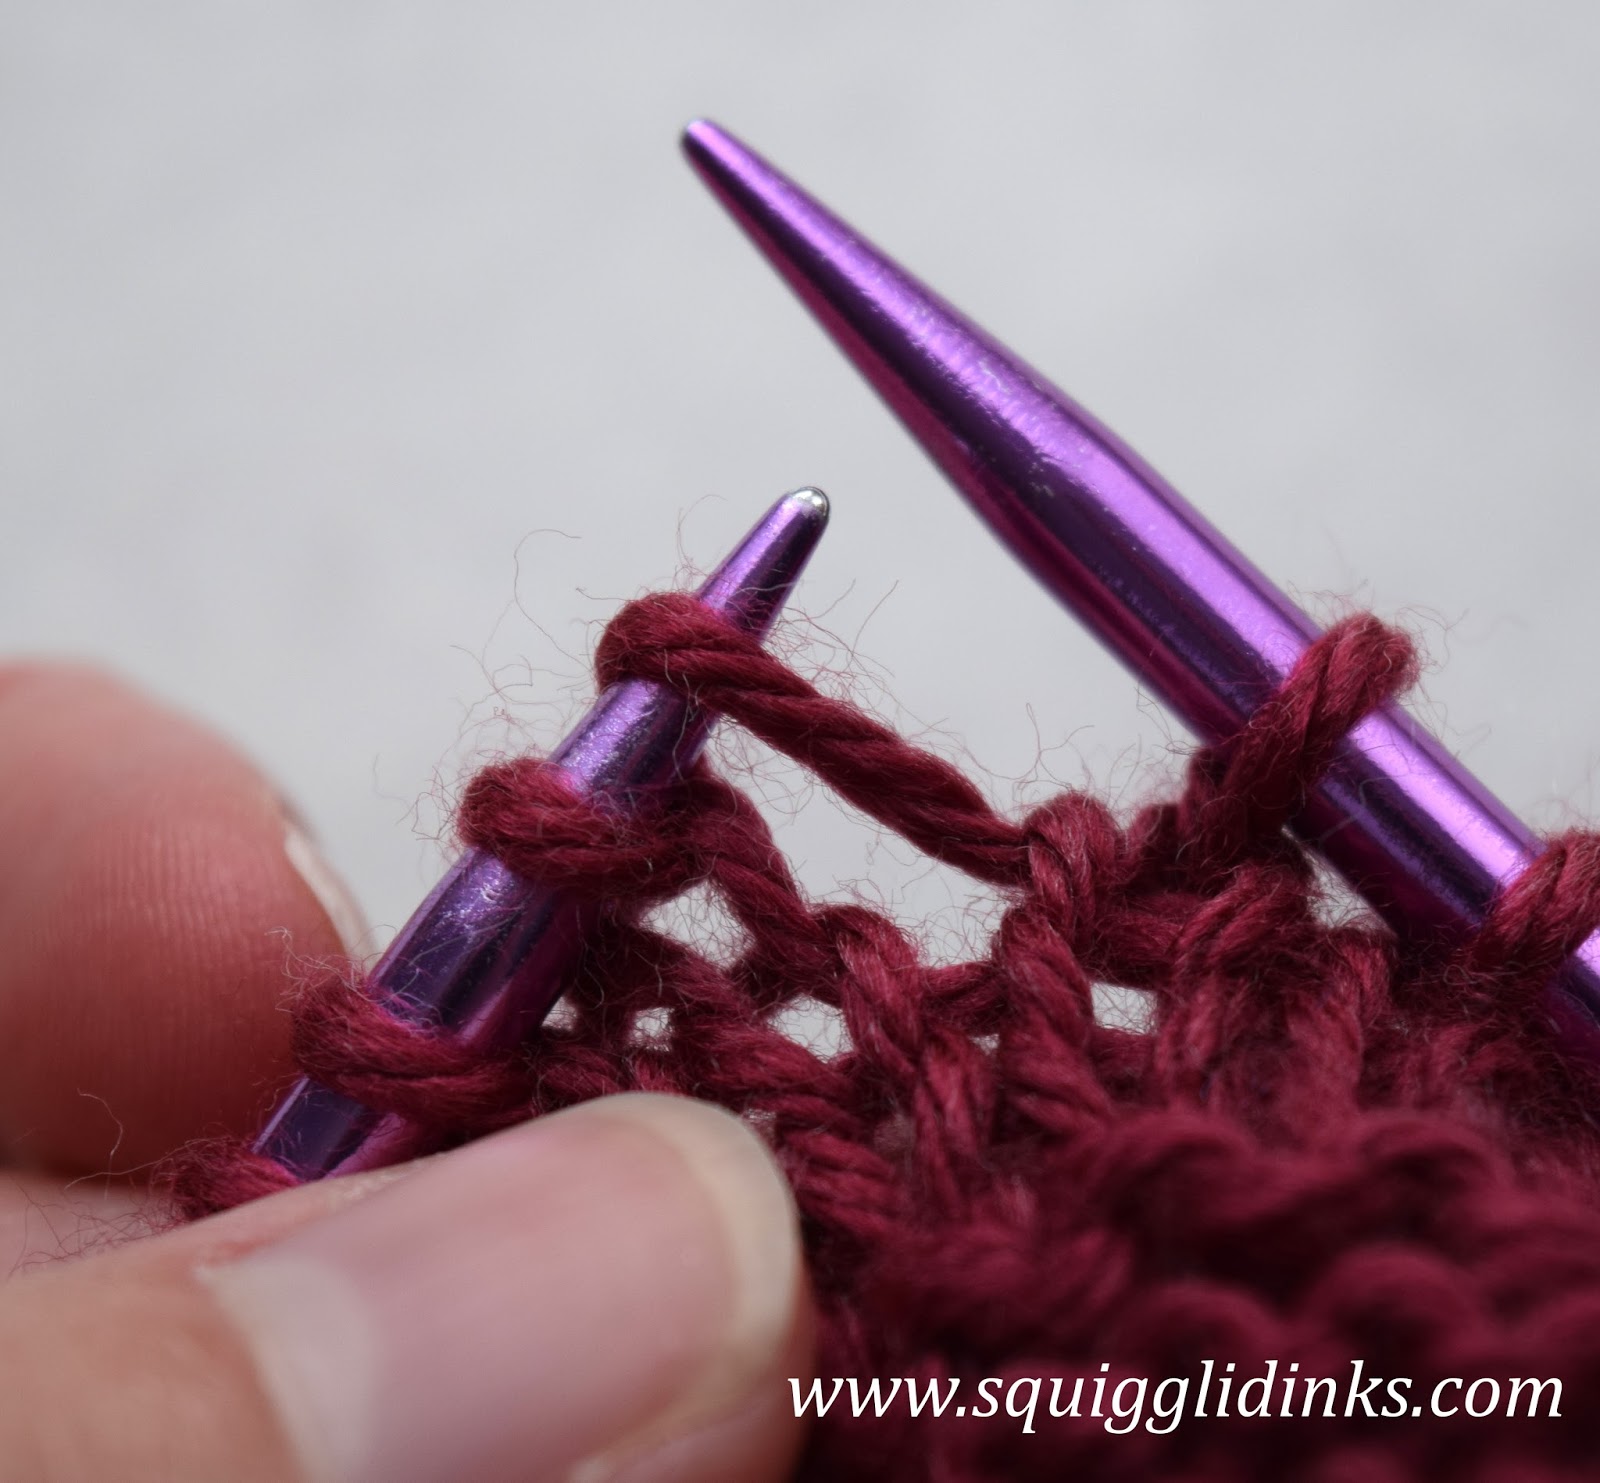
Knit the stitch through the BACK loop. (The loop should be twisted.)

Done! You have a left-slanting increase.

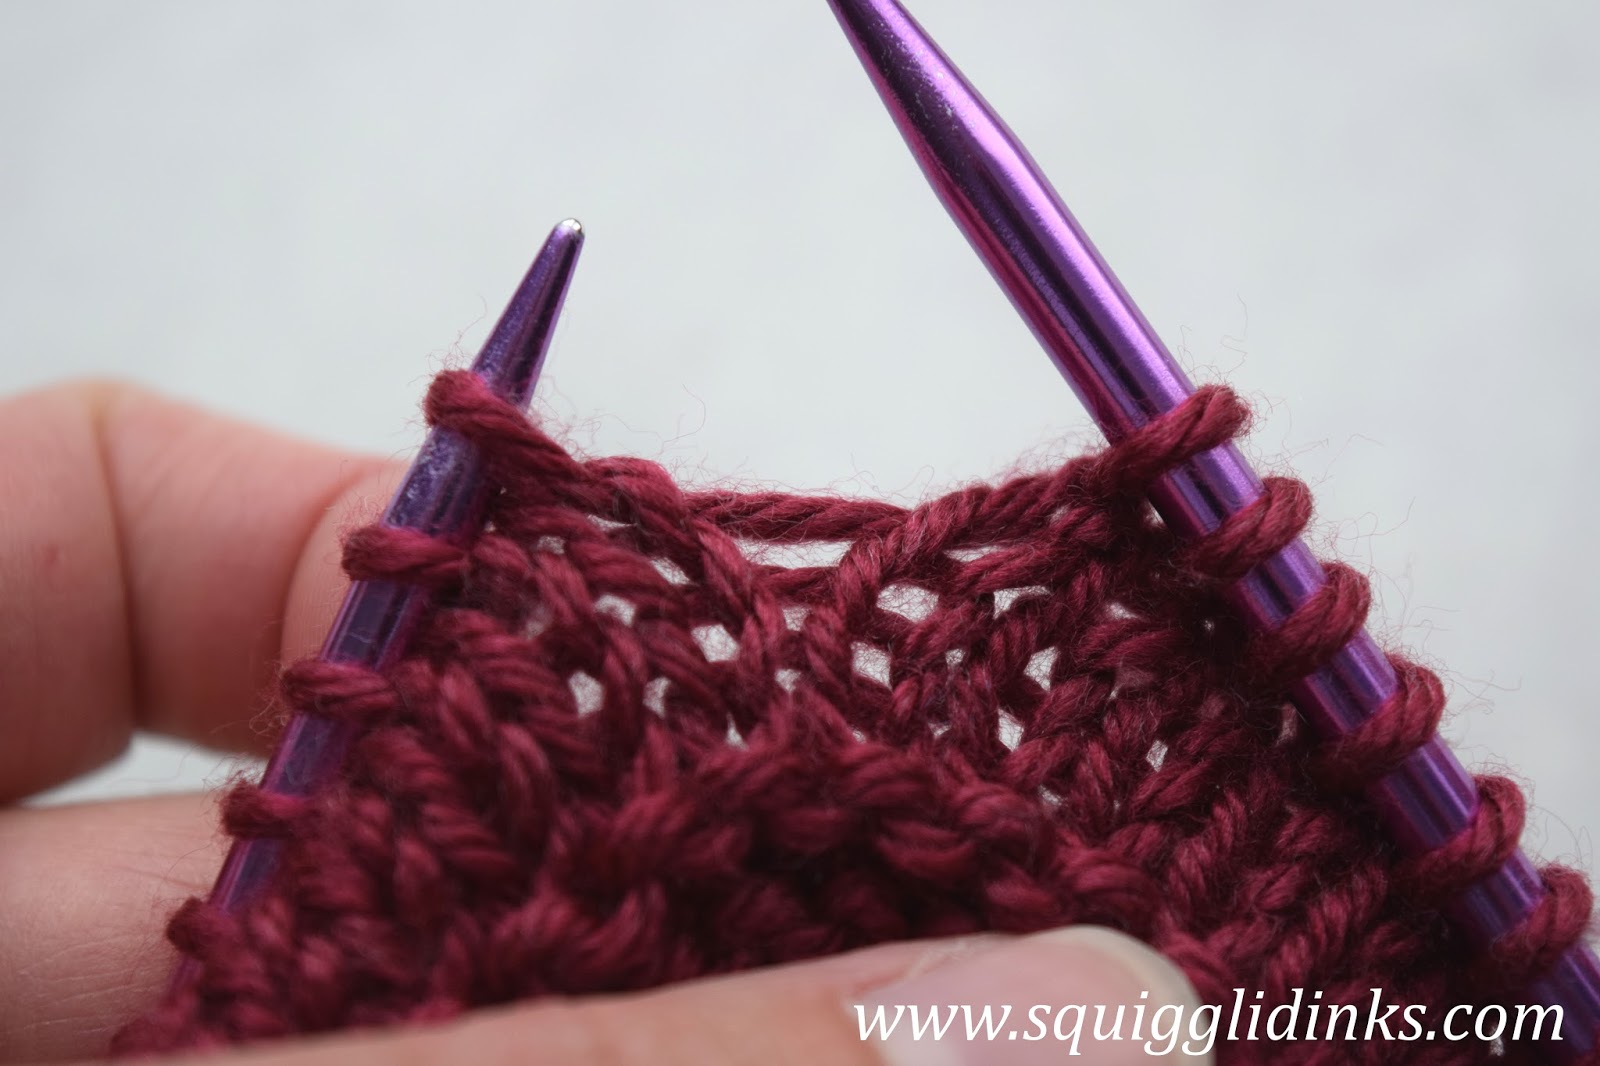
The opposite stitch, make one with a right slant, or m1r, is done very similarly. You start by finding the loop from the last row of stitches that crosses the gap where you want the stitch to go.

Pick up that loop with your left needle by inserting the needle below the loop moving BACK TO FRONT.
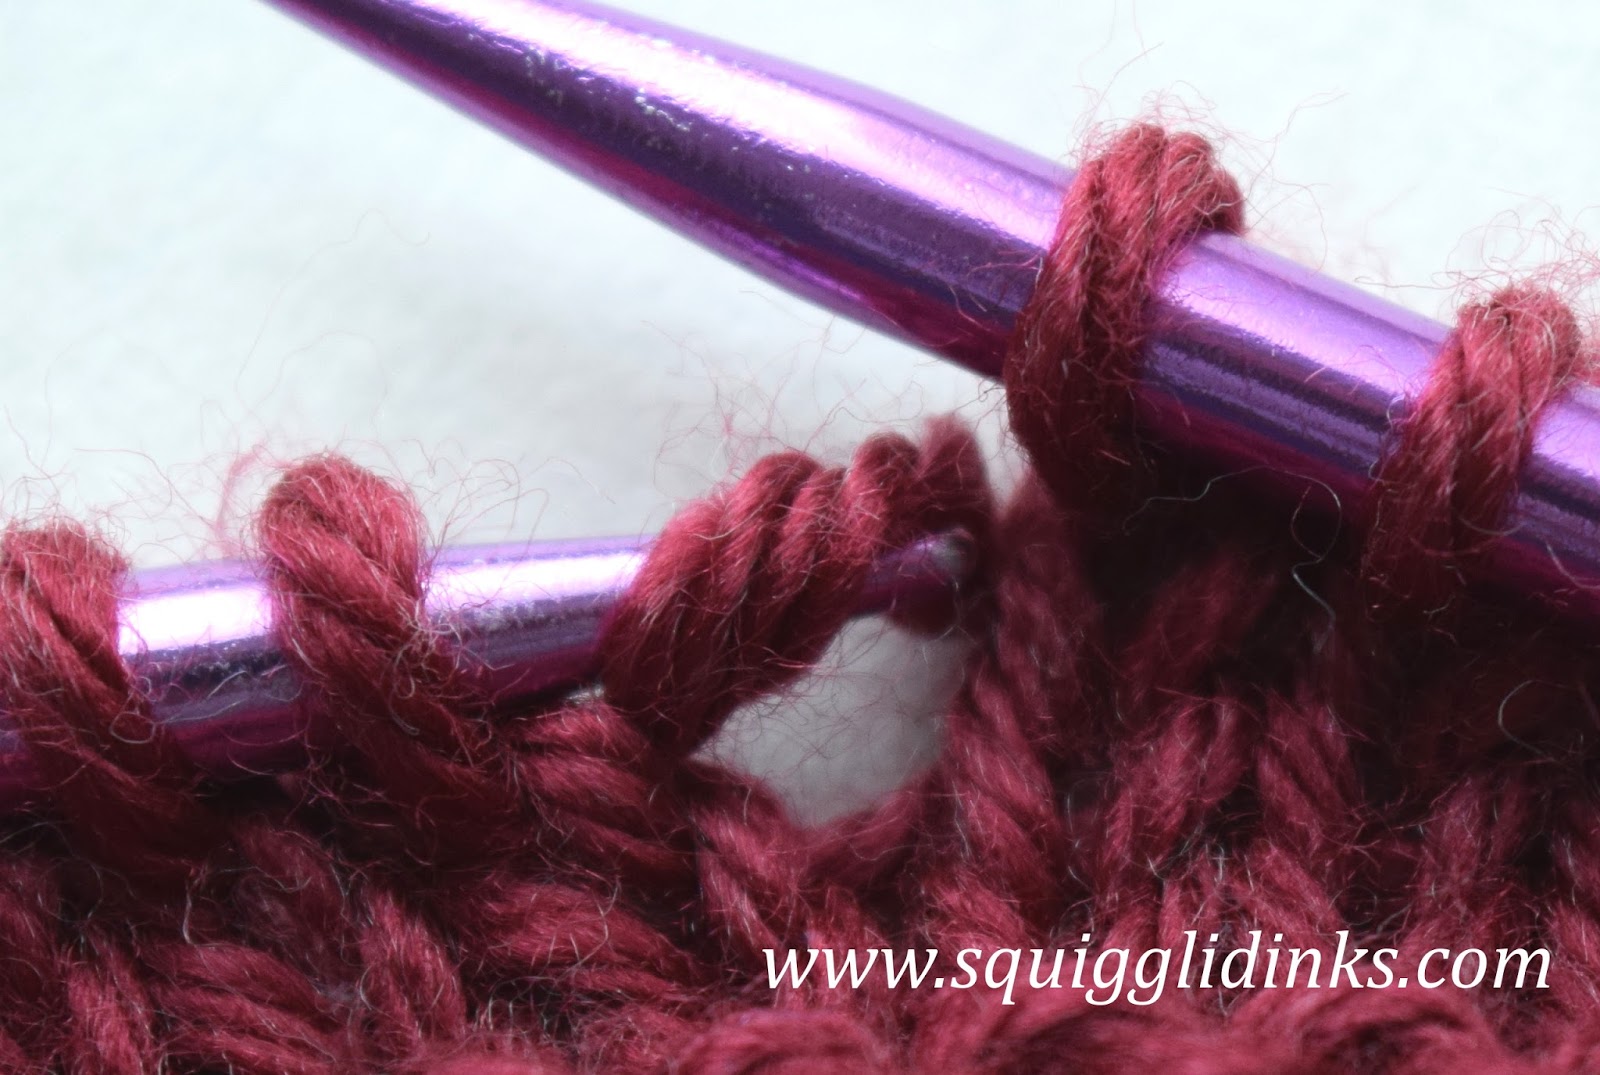

Knit the stitch through the FRONT loop. (The loop should be twisted.)

This gives you a right slanting increase.

M1 and m1r are great stitches for when you need symmetrical increases, as in certain clothing items or a chevron pattern.