
I didn’t bring any knitting supplies when I went to Ireland. I was afraid the needles would be confiscated by the TSA (this was only 2006), and I naively assumed that in a country so full of sheep, yarn shops would be easy to find.
Not so.
I went through withdrawal by my third day there. Our study abroad group was touring all kinds of amazing places, and I was screaming inside that I couldn’t knit on the bus. Fortunately, a much wiser friend had packed her knitting—and extra needles and yarn. I jumped at the chance to knit something, anything. She had also brought a pattern for a simple market bag, so I made one, not because I thought I would need it, but because I desperately needed something to knit.
Fast forward two weeks to when we had finished sightseeing and were settled on the NUI Maynooth campus. Unlike home, where you got your meals at the cafeteria or other eateries on campus, here we were responsible for buying our own groceries and cooking in our apartment kitchens. My friend and I ran across the street (which wasn’t especially pedestrian-friendly) to Aldi, only to discover that you needed to bring your own bags. They didn’t provide them at checkout. Needless to say, that first shopping trip was fairly small, since we only bought what we could carry in our arms. After that, we started bringing our tote bags and—you guessed it—the market bag I had knit.
The funny thing about all this is that I had never heard of Aldi before, even though it’s in the US as well. Now I live only a few blocks away from an Aldi and I shop there every week. And I always bring my own bags. (If you’re new to Aldi shopping, you also need a quarter to get a cart. You get it back when you return the cart.)
I sewed a bunch of big fabric bags from denim (not jeans, just denim I bought from the store because of how sturdy it is). If you like to sew, here’s a link to that pattern.
But I’ve always remembered that market bag and wanted to make another, just with a few tweaks. This grocery bag is for you if:
- you want a market bag
- you want it to be sturdy
- you want it to be stretchy
- you don’t want it to cost an arm and a leg
- and you don’t want to spend forever making it

A couple of notes about this bag:
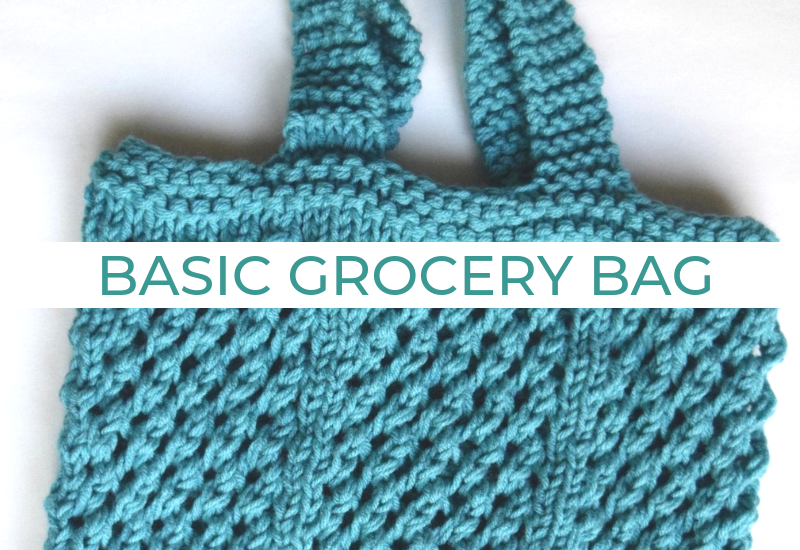
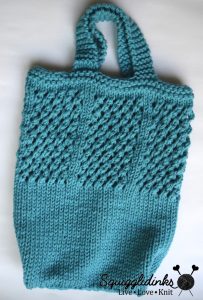
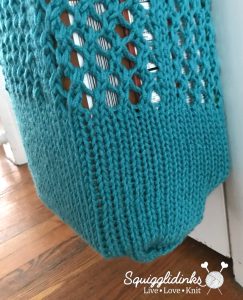
First, it stretches. It’s supposed to—that’s part of the beauty of mesh. I designed it a little smaller than I want it to be so that it has room to stretch to hold your groceries, and so that it doesn’t get huge once it has gotten permanently stretched out from a lot of use.
Second, the yarn. I used two skeins of Loops and Threads Impeccable yarn from Michaels. I held two strands together along with size 13 needles to make this a quick knit. (I think so many of the market bag patterns out there are absolutely beautiful, and I’m sure they’re quite useful, but I don’t think knitting a market bag needs to take forever.)
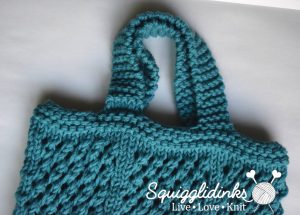
Third, I use the 3-needle bind off on the straps. If you’ve never done this before, you can follow this tutorial video from Purl Soho. It’s incredibly easy—no fear, even if you’re new to knitting.
(And for the record, we did eventually find a yarn shop in Dublin, and I did buy yarn and needles to knit a shawl that would take me the rest of the semester.)
On to the pattern:
Pattern notes:
This bag is knit with two strands of worsted weight yarn held together. I used Loops and Threads Impeccable Yarn because it’s soft, inexpensive, and has a lot of give, but any worsted weight yarn will work.
This pattern uses multiple repeats. In the interest of keeping things simple, I’ve condensed some of those repeats. When I say (yo, k2tog) 5x, it means yo, k2tog, yo, k2tog, yo, k2tog, yo, k2tog, yo, k2tog.
Needle: US size 13 (9 mm), 16 inches.
Yarns Used: Loops and Threads Impeccable Yarn (medium (4); 100% acrylic; 277 yards/127.5 grams), 2 skeins in Aqua.
Yardage: 554 yards (506.6 m).
Gauge: 10.5 stitches in 4 inches (10 cm).
Other Notions: two stitch markers (the kind that clips, not the circular kind), T pins or other sewing pins, yarn needle to finish.
Final Measurements: 16.25 inches (41.3 cm) long, 13.25 inches (33.7 cm) wide.
Abbreviations:
k = knit
yo = yarn over
k2tog = knit two together
sm = stitch marker
bo = bind off
RS = right side
WS = wrong side
Pattern:
Cast on 72 sts. Join into a round, being careful not to twist your stitches. Place marker to mark the beginning of the round.
First 30 rounds: knit all stitches.
Mesh pattern:
Round 1: *(yo, k2tog) 5x, k2, repeat from * to end.
Round 2: knit.
Round 3: *(k2tog, yo) 5x, k2, repeat from * to end.
Round 4: knit.
Repeat a total of 7 times.
Next 2 rounds: knit.
(You just ended the mesh pattern on a Round 4, which was a knit round, followed by two knit rounds, so there should be 3 knit rounds in a row.)
Garter edging:
Round 1: purl.
Round 2: knit.
Round 3: purl.
Clip your marker to the stitches at the start of the round (not the needle, or it will fall off and you will lose your place).
Bind off round: bo9, k5, bo8, k5, bo18, k5, bo8, k5, bo9.
Cut 8 inch tail, pull through last stitch.
Place all but first set of 5 stitches on stitch holders. Mark set 3 (2 over from the set on the needle) with another stitch marker.
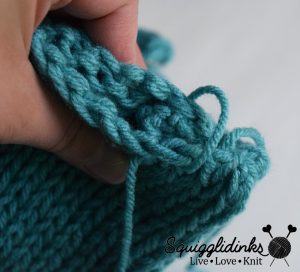
On WS, rejoin yarn and knit the 5 stitches remaining on the needles. Knit 56 rows (or about 15 inches) from the bind off row, ending on a RS row. Pick up the second set of 5 stitches (across the 8 stitch gap) and, with WS facing out, do 3 needle bind off. Cut 8 inch tail, pull through last stitch.
On WS, pick up 3rd set of 5 stitches (marked with sm) and knit them as set 1; continue for 56 rows. Pick up set 4 and do 3 needle bind of on WS.
Cut 8 inch tail.
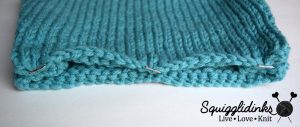
Lay bag flat so that sm that marks beginning of round is at one side. Line up bottom edges. Pin together.

Take each bottom corner and push the corner in toward the middle of the bag about 1-1.5 inches (2.5-3.8 cm). From the bottom it should look like you made a letter M with the cast on edge. Pin again.
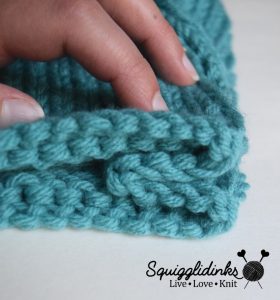
Sew the bottom seam, being careful to catch all layers of the side folds. (If you only catch the very front and back pieces, the corner will pop back out and come unfolded.)
Sew all ends under.
I have been crocheting ground mats for homeless people for years. Now, I’m trying to “get out of that business” and turn my efforts to other areas. So, I’m using grocery store bags to crochet/knit into totes and shopping bags. I love this pattern and will share a photo when finished. I use different colored bags in the pattern to make stripes, etc.
When making the ground mats, I’d use a pink (our grocery store had pink during October’s breast cancer month) and alternate with white or gray stripes. Very striking. Those mats I’d take to church for the pastor to bless and give them to a nurse who worked in a cancer center. She would give to a woman with breast cancer.
Bag looks lovely. I am excited about knitting it. Thank you for the lovely pattern.
Can this be knitted without knitting on the rounds??
I haven’t worked out a flat version of it yet, but I’ll consider releasing an alternate version. Thanks for the suggestion!