
Knitting in the round isn’t nearly as complicated as it seems. The beginning is the trickiest part; once you’ve started, you only need to work RS (right side) rows, never WS (wrong side – as in, if you’re using stockinette stitch, you only need to knit, never purl).
If you’re doing a larger project, like a hat or a sweater, you’ll use circular needles to knit in the round. (I like to use them for large projects that aren’t round also: when knitting a blanket, I like to spread my gazillion stitches out on a circular needle rather than trying to crowd them onto straight needles.) I’ll post a tutorial for using circular needles soon.
For smaller projects, though, like socks and mittens, some scarves, and baby hats, the best tool for the job may be double-pointed needles (dpn). These come in a set of four or five. (I have sets in just about all sizes, but these are my favorites–they’re the ones I used in this post.) When using dpn, your stitches are divided between three or four needles, leaving one needle empty. This empty needle is the one you’ll knit stitches onto (your right needle, unless you’re a lefty).
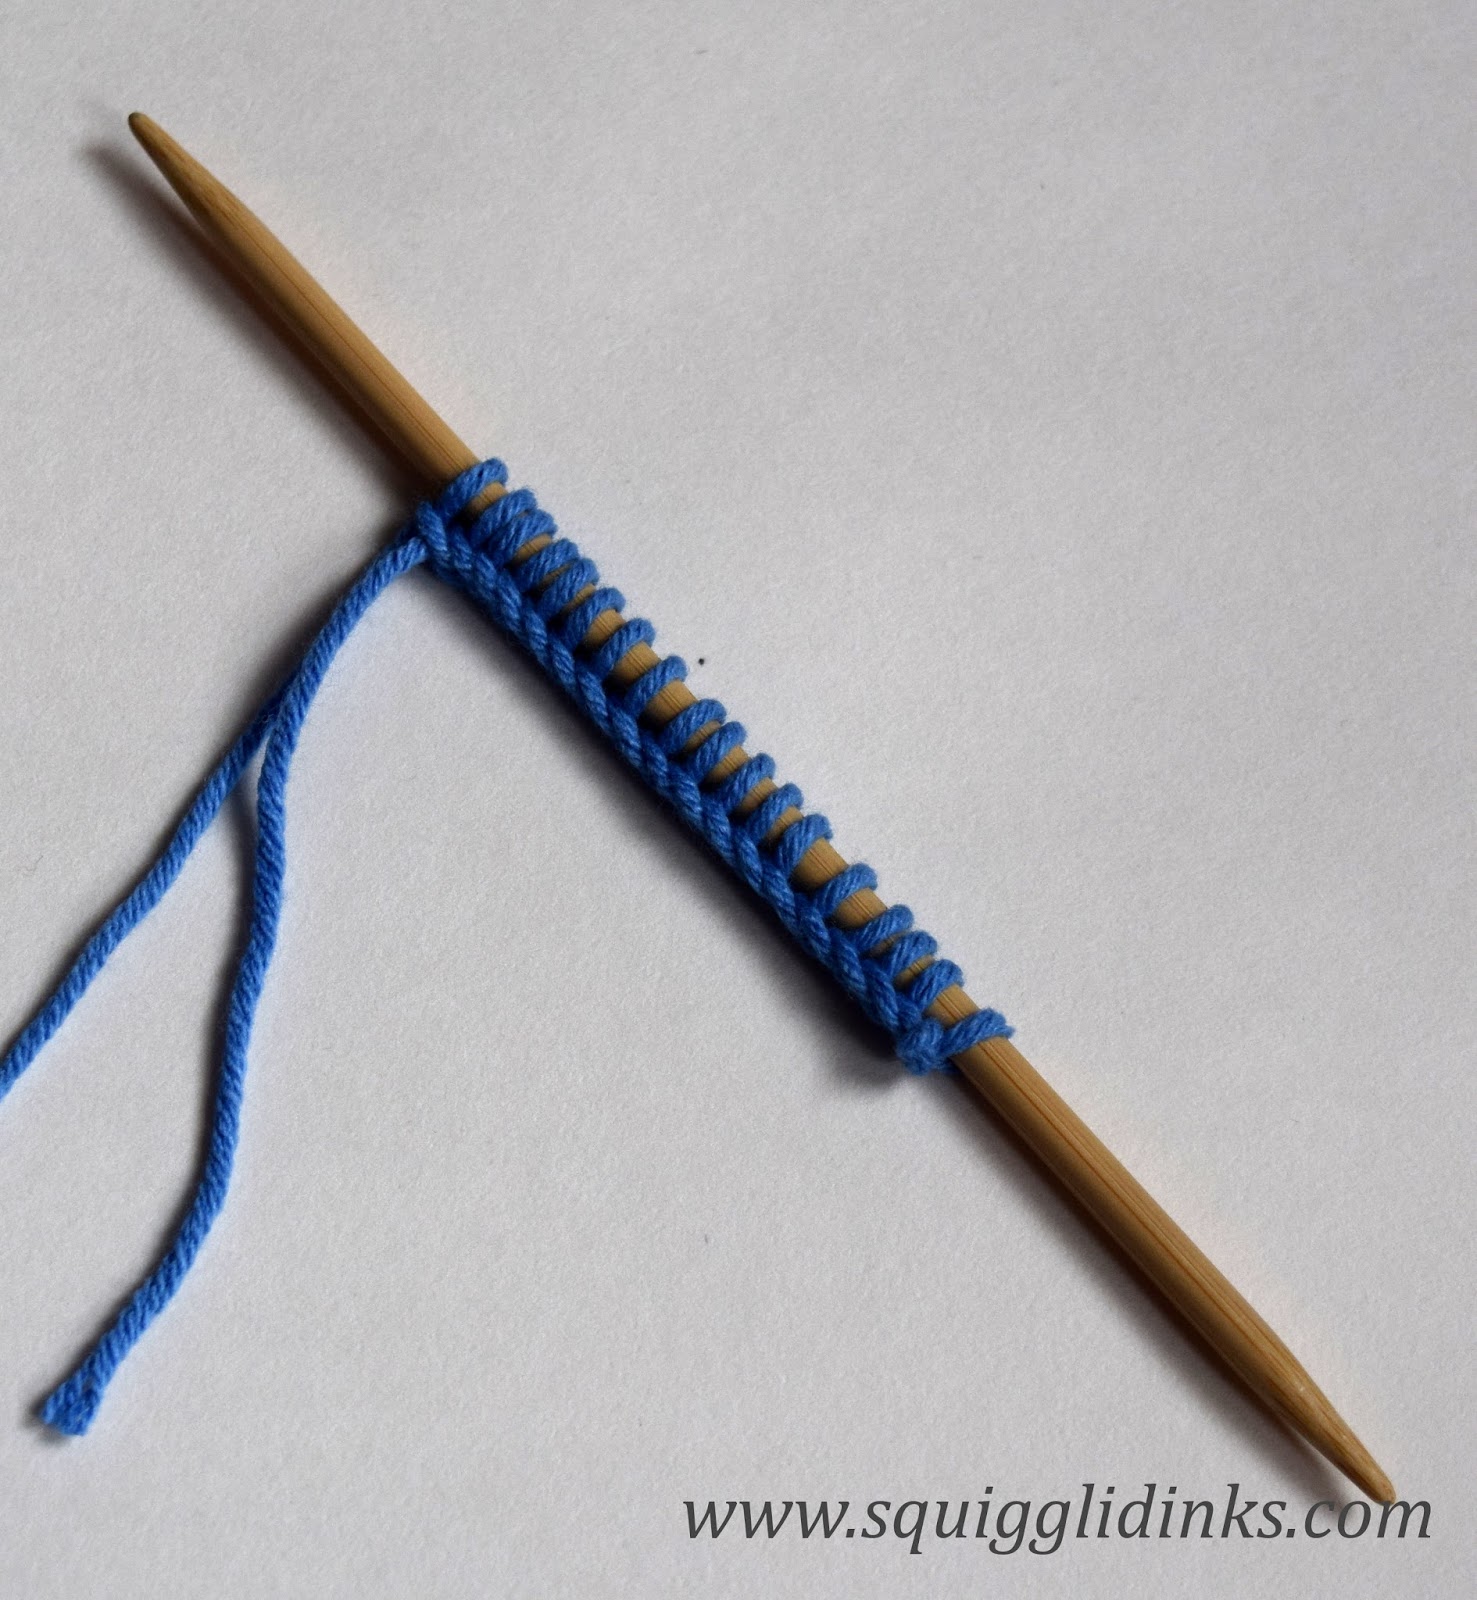
If you’re using a small enough number of stitches, the easiest way to cast on is to cast onto one needle just like normal, then separate the stitches onto multiple needles:

If, however, you’re using too many stitches to fit onto one needle, begin casting onto one needle. When you’ve cast on about 1/3 of the stitches, take a second needle and cast onto that, as though it were a continuation of the same needle. (You can let the first needle dangle while you do this.) Repeat with the third needle until all of your stitches are cast on. (Don’t worry–even though I couldn’t take good pictures of this process, there’s a video for how to do it at the end of the post.)
Now to join your needles into a circle:
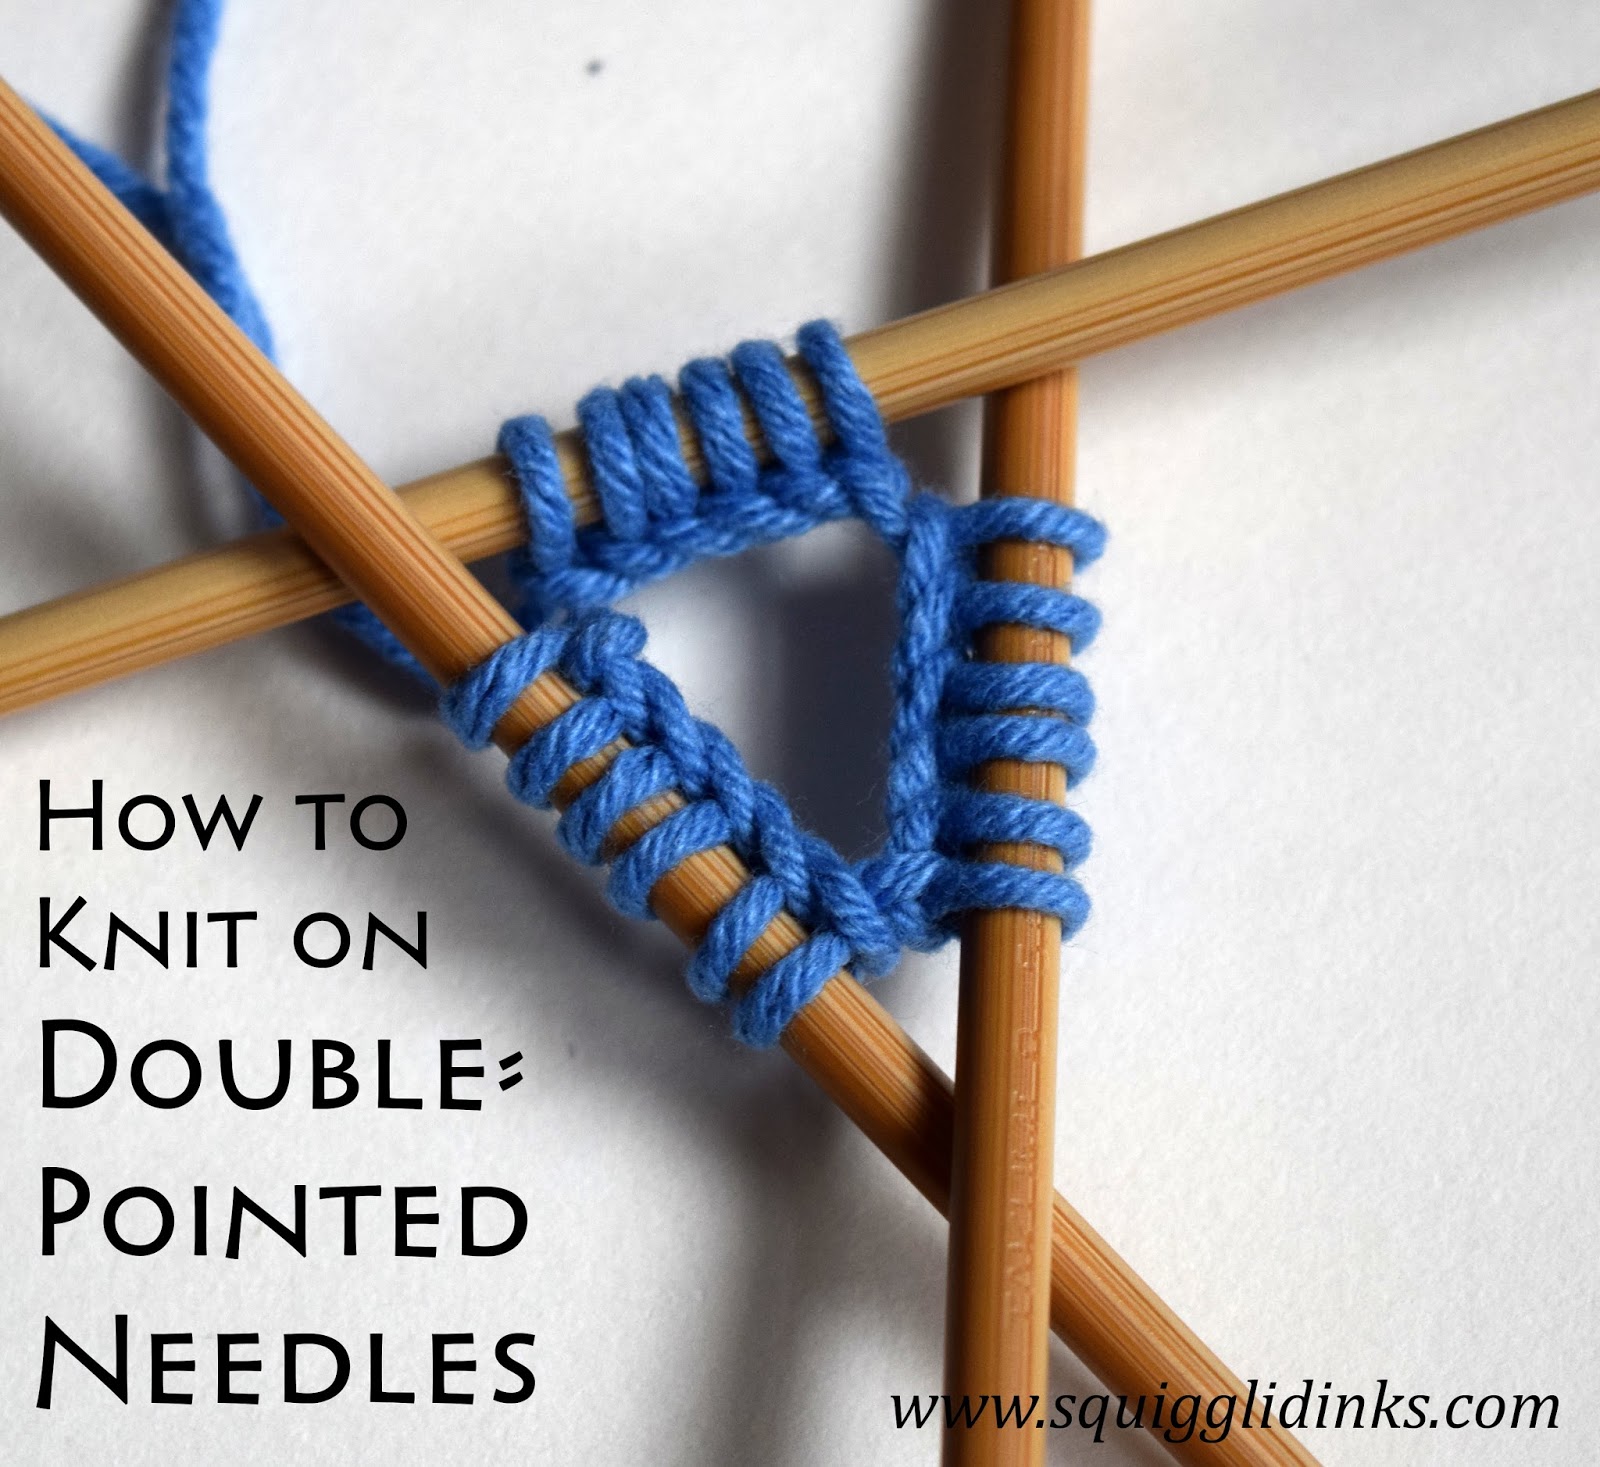
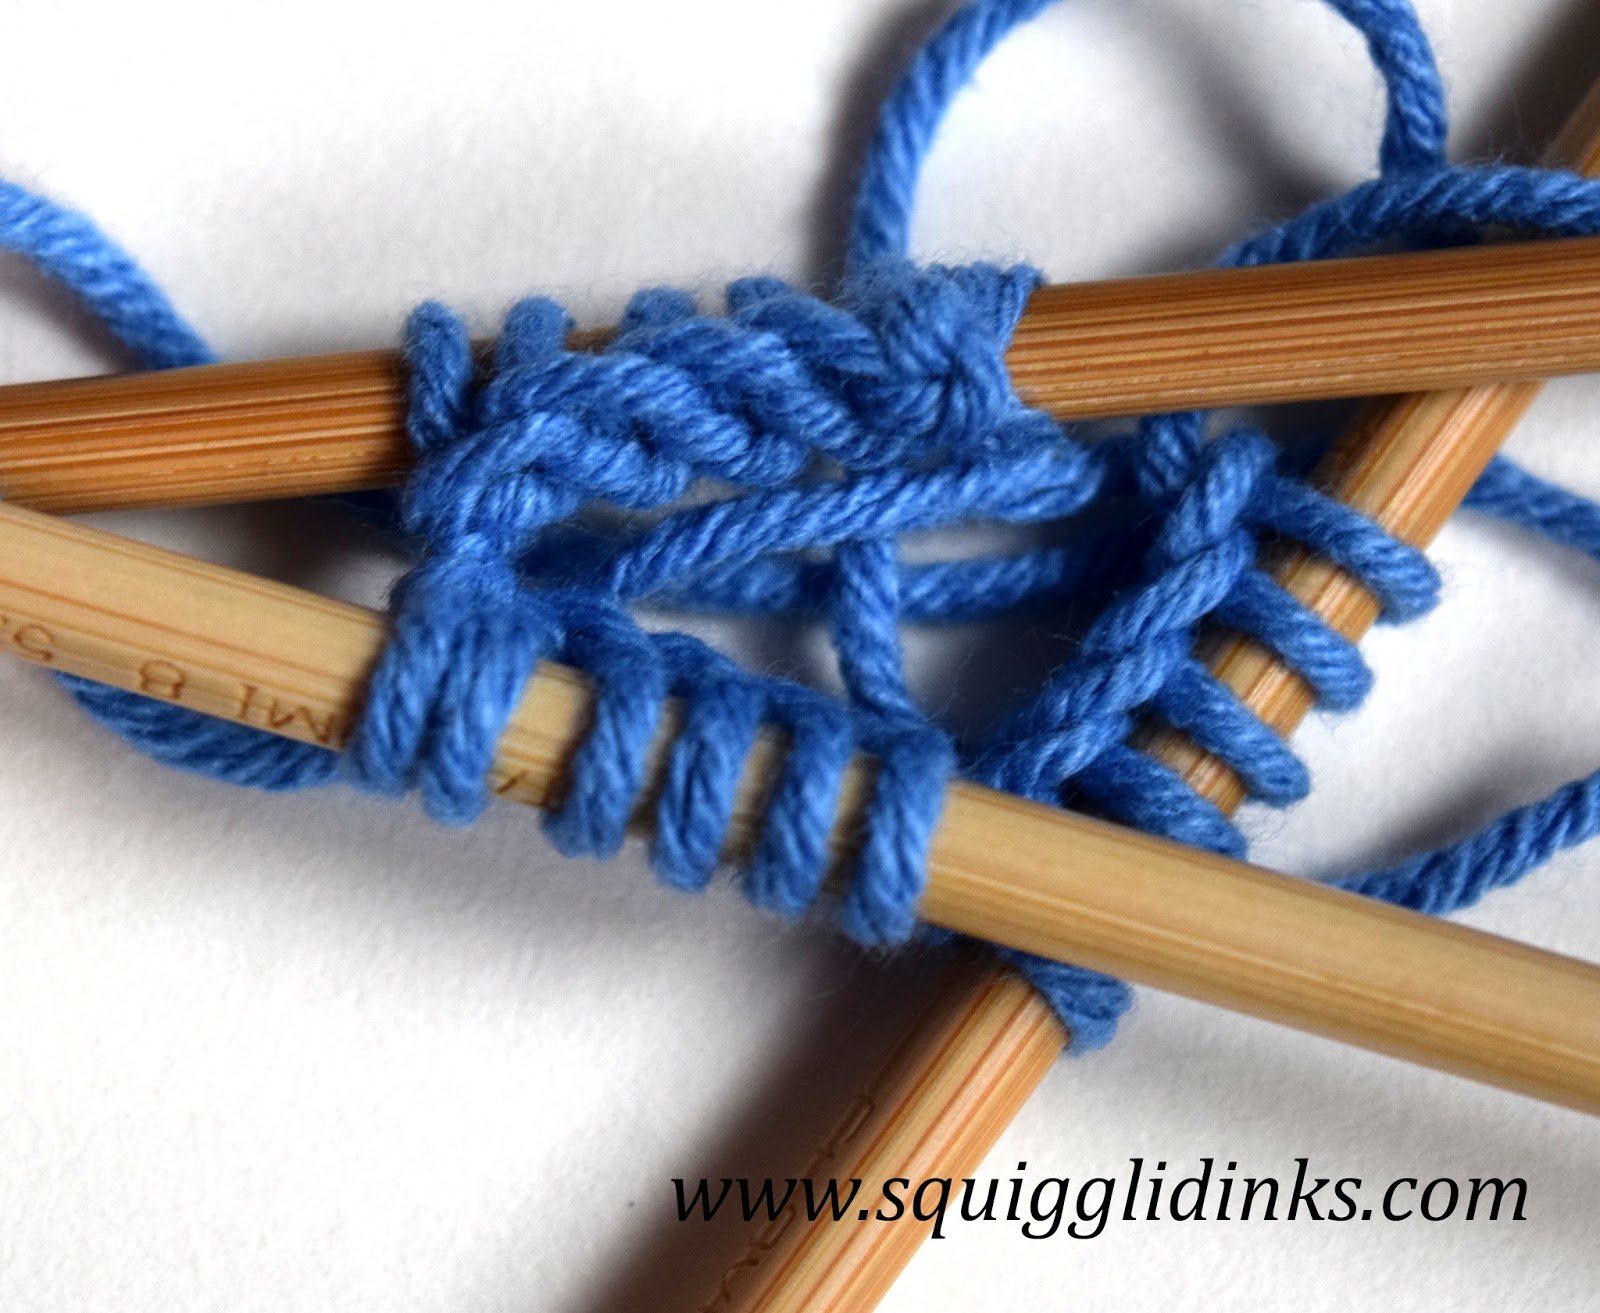
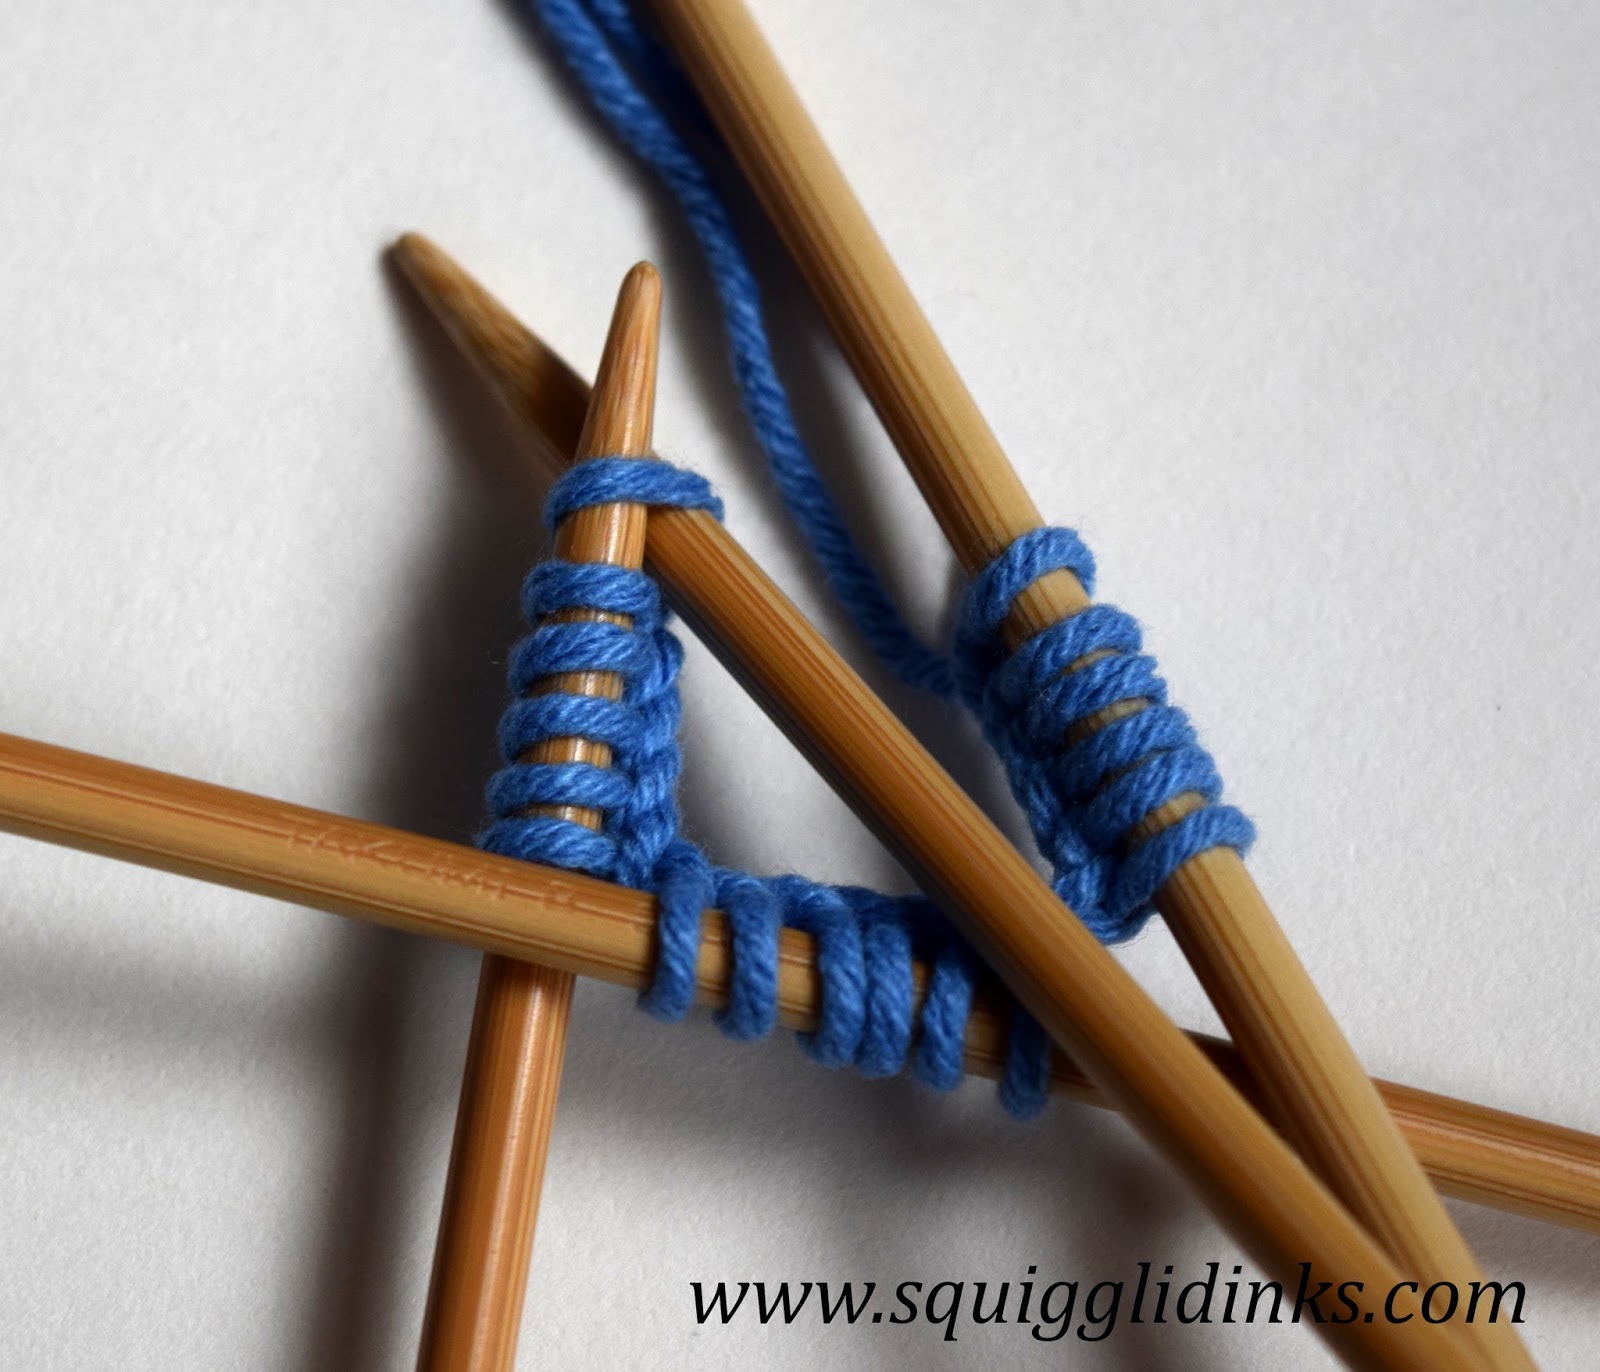
Lay your needles flat, on a table or wherever you have space. Form them into a triangle (or a square, if you’re using five needles), with the first cast on stitch on the first needle next to the last cast on stitch on the last needle.

You want your stitches to look like the photo above, with all of the stitches to form a nice triangle (or square) inside the needles. You do not want the stitches to twist around the needles or between the needles. Below are some pics of what you do NOT want to see:
 |
| WRONG: the stitches shouldn’t be twisted around the left needle. |
 |
| WRONG: the stitches are twisted at the left side of the picture between the two needles. This is less of a problem than the first picture, but it’s still not good. |
Again, you want your stitches to form a nice clean shape inside your needles. Now, to knit the first stitch:
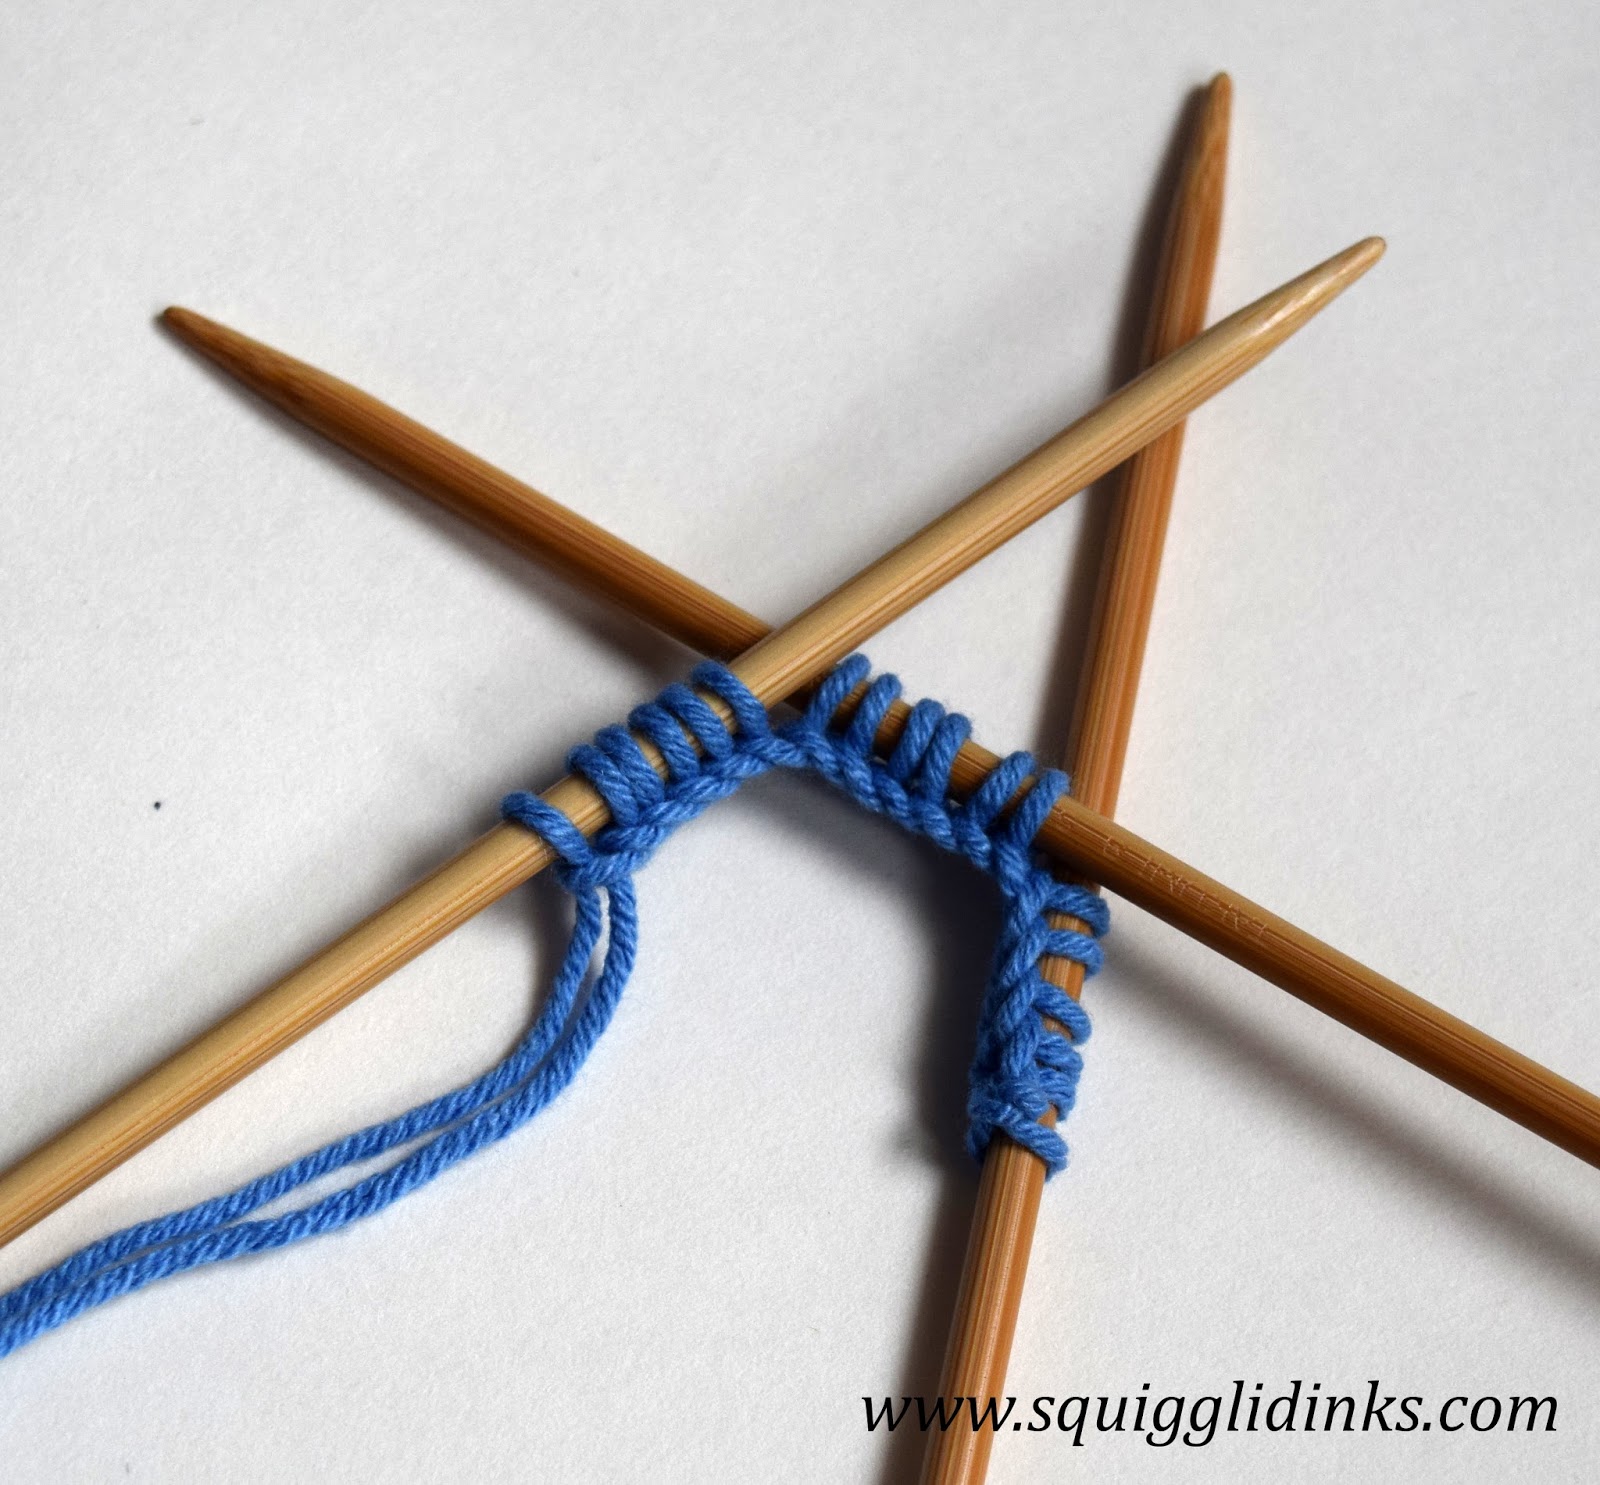
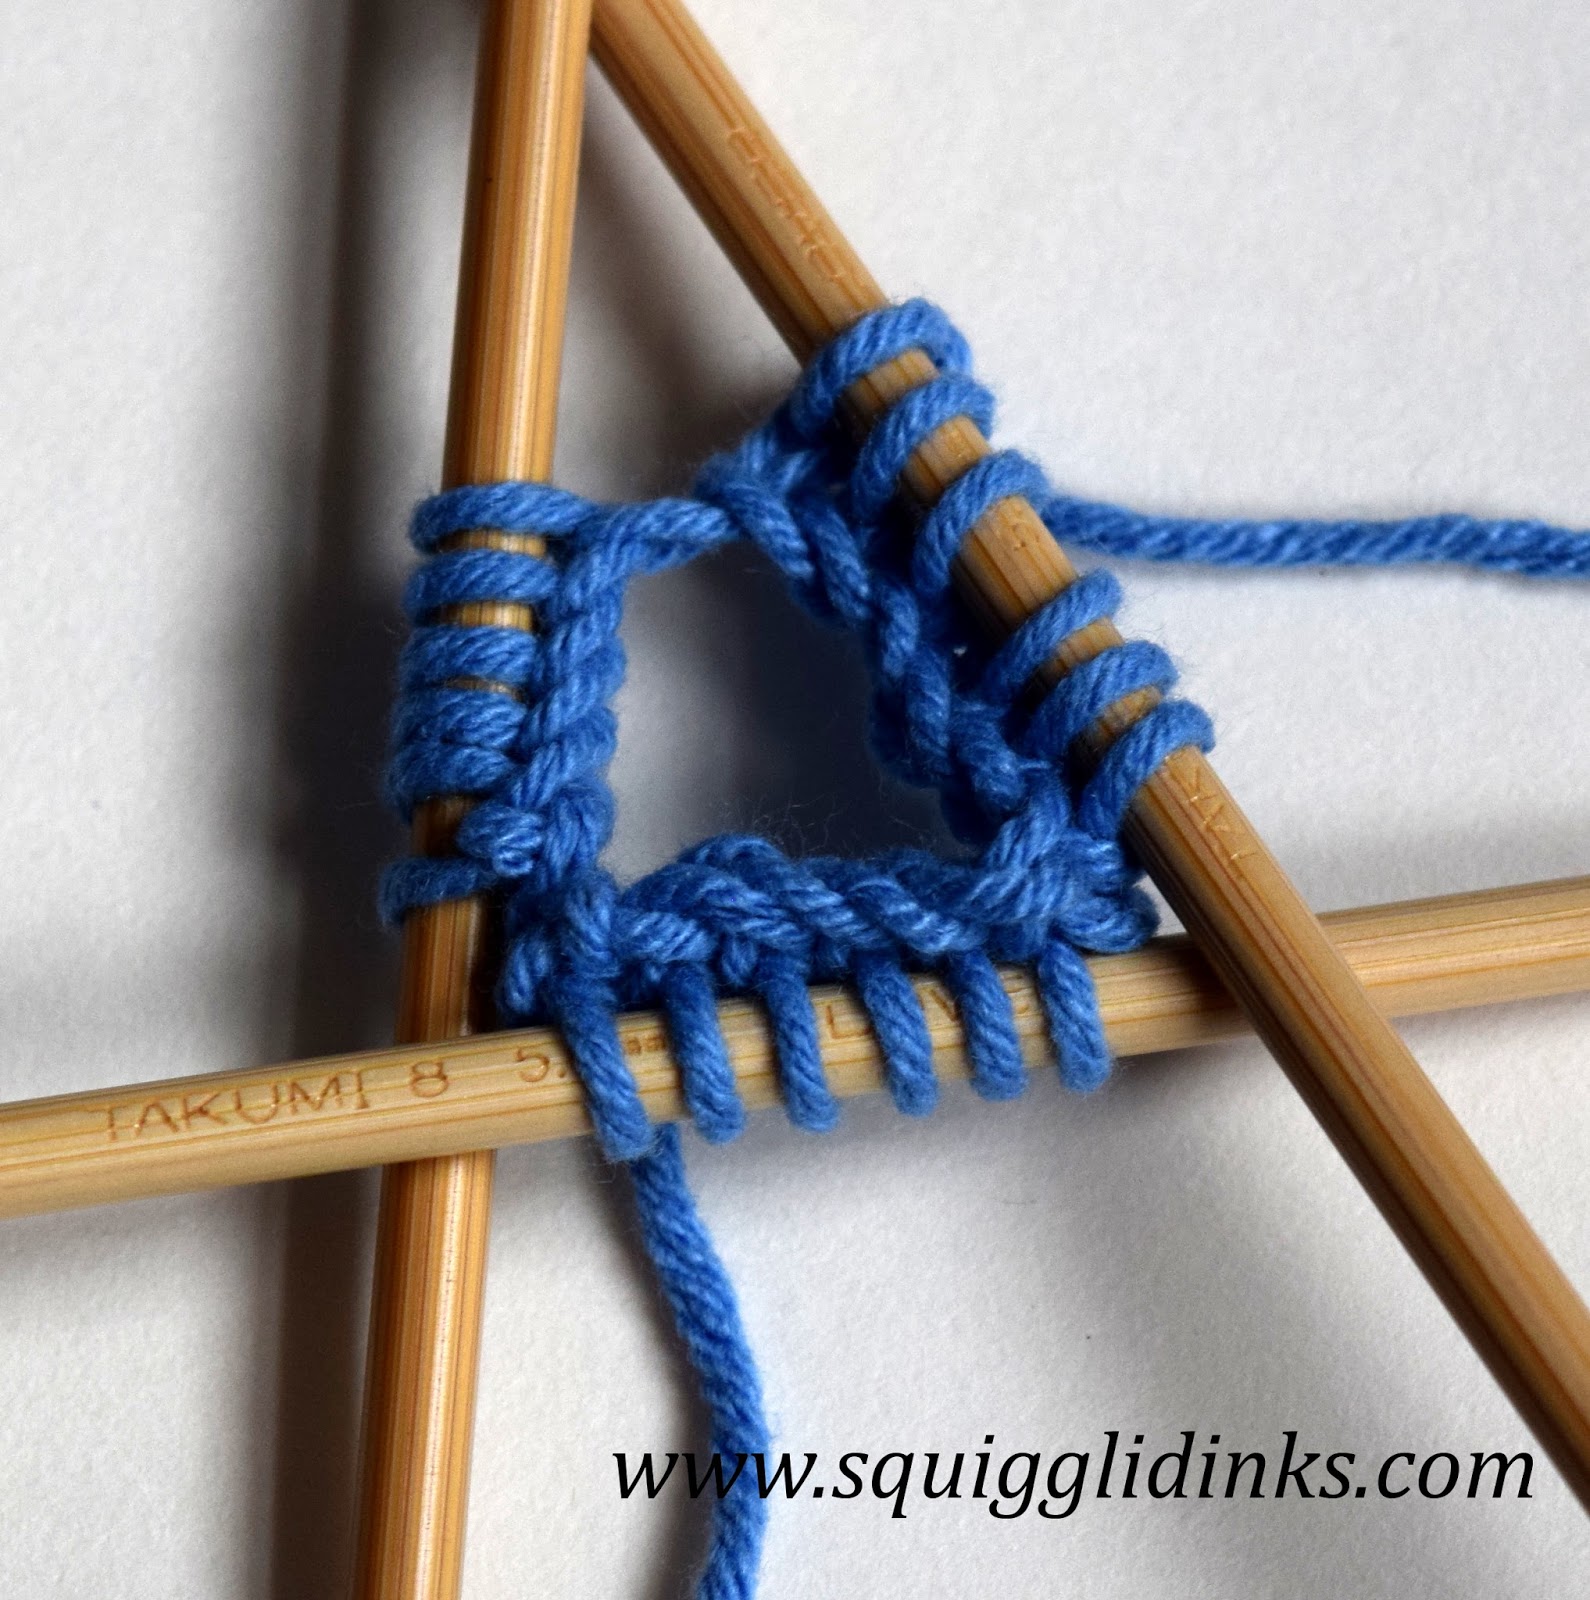
Lay your needles so that the first stitch on your first needle is on the left and the last stitch on the last needle is on the right. The working yarn is on the right.
Bring your empty needle up through the first stitch on the first needle and knit it using the working yarn from the last needle. You’ll want to make sure you pull this stitch extra snug to close the gap between the needles.

Keep knitting the stitches from that first needle onto your empty needle until your first needle is empty. Rotate your needles until the working yarn is at the top and the second needle is on the left.
 |
| The top right needle is the first needle that I knit; the second needle is now on the left. |
Using the newly empty needle, knit all the stitches from the second needle.
 |
| What it looks like halfway through knitting the second needle. |
 |
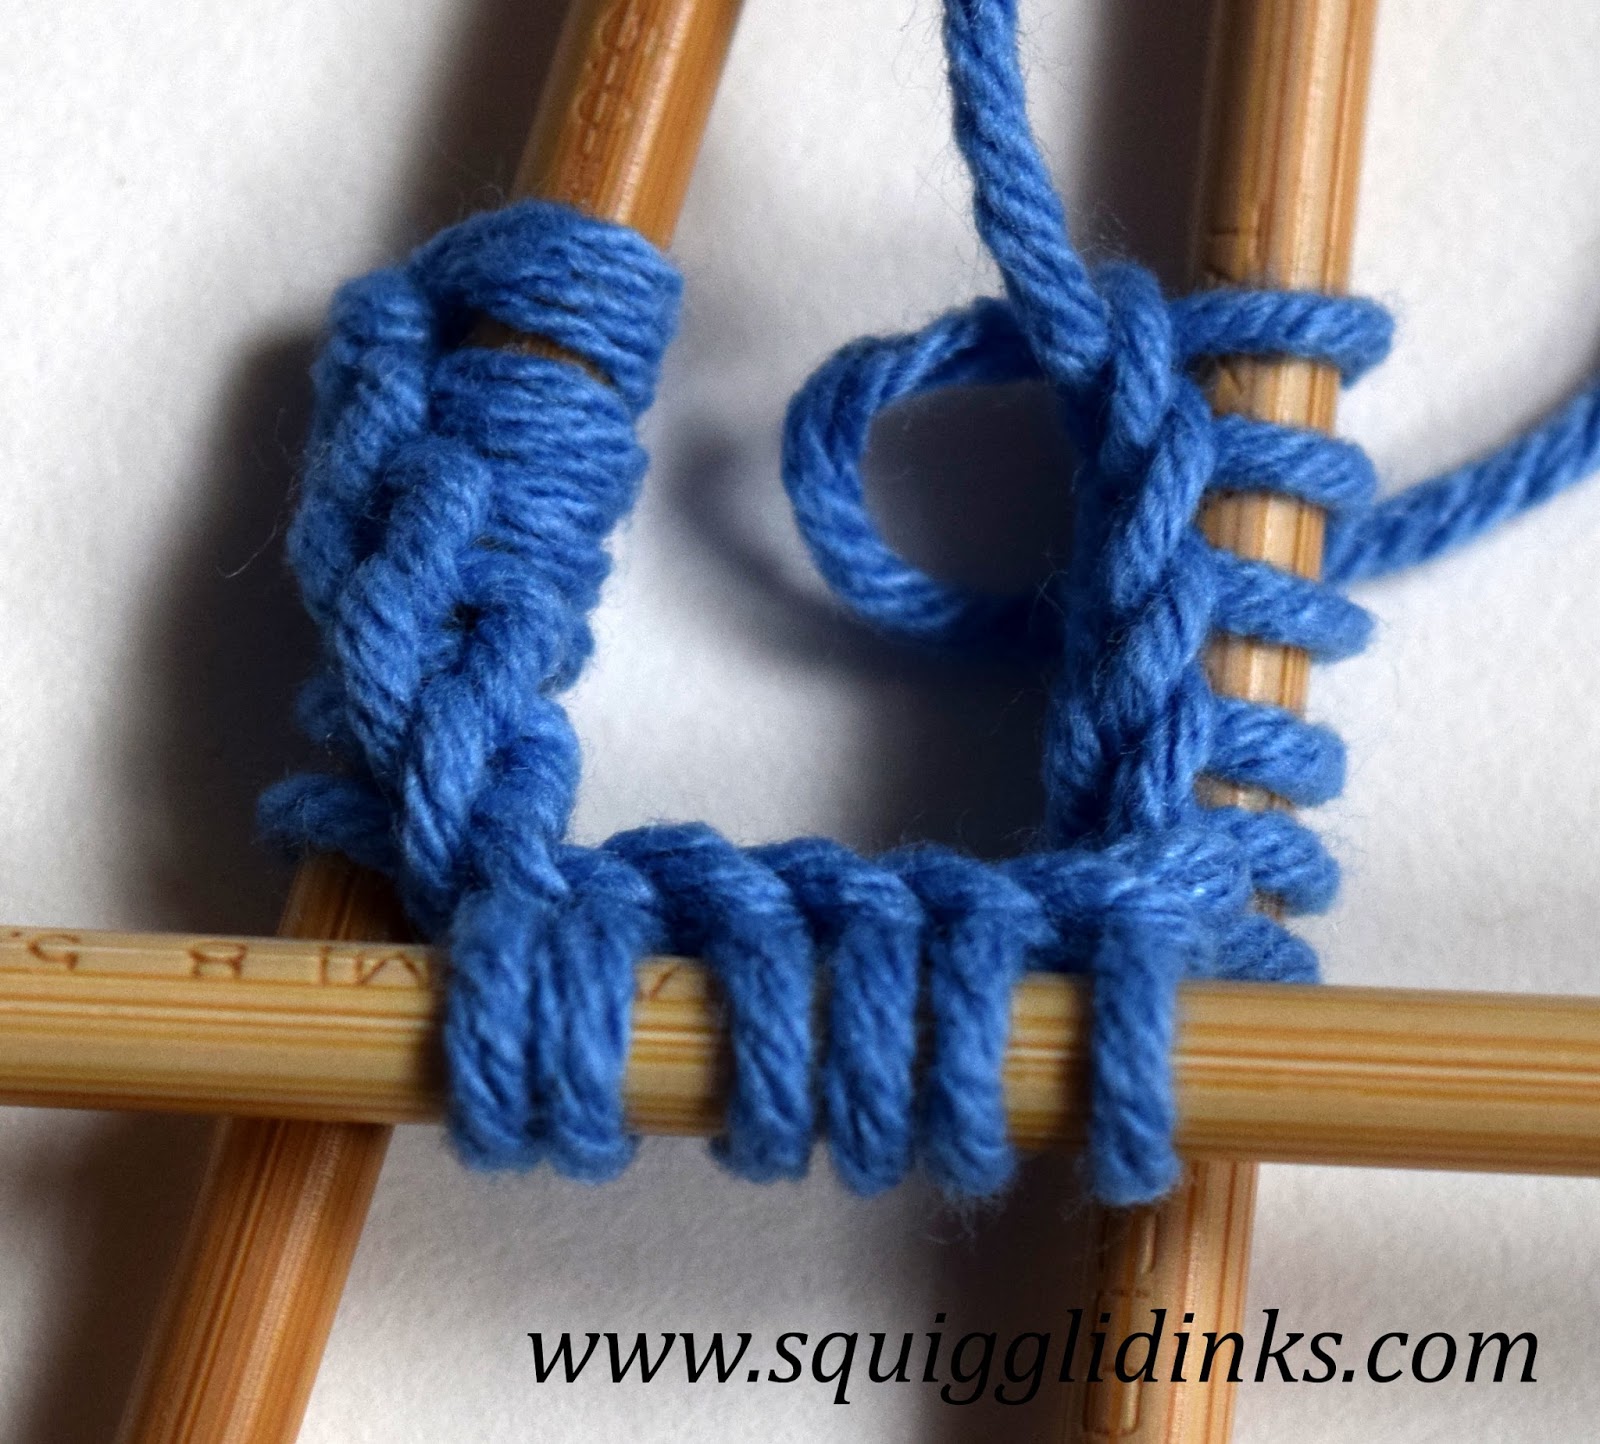
| The first and second needles have now been knit (bottom and right); the third needle is on the left, and the working yarn is at the top. |
Turn your work so that the working yarn is at the top again. Knit the third needle.
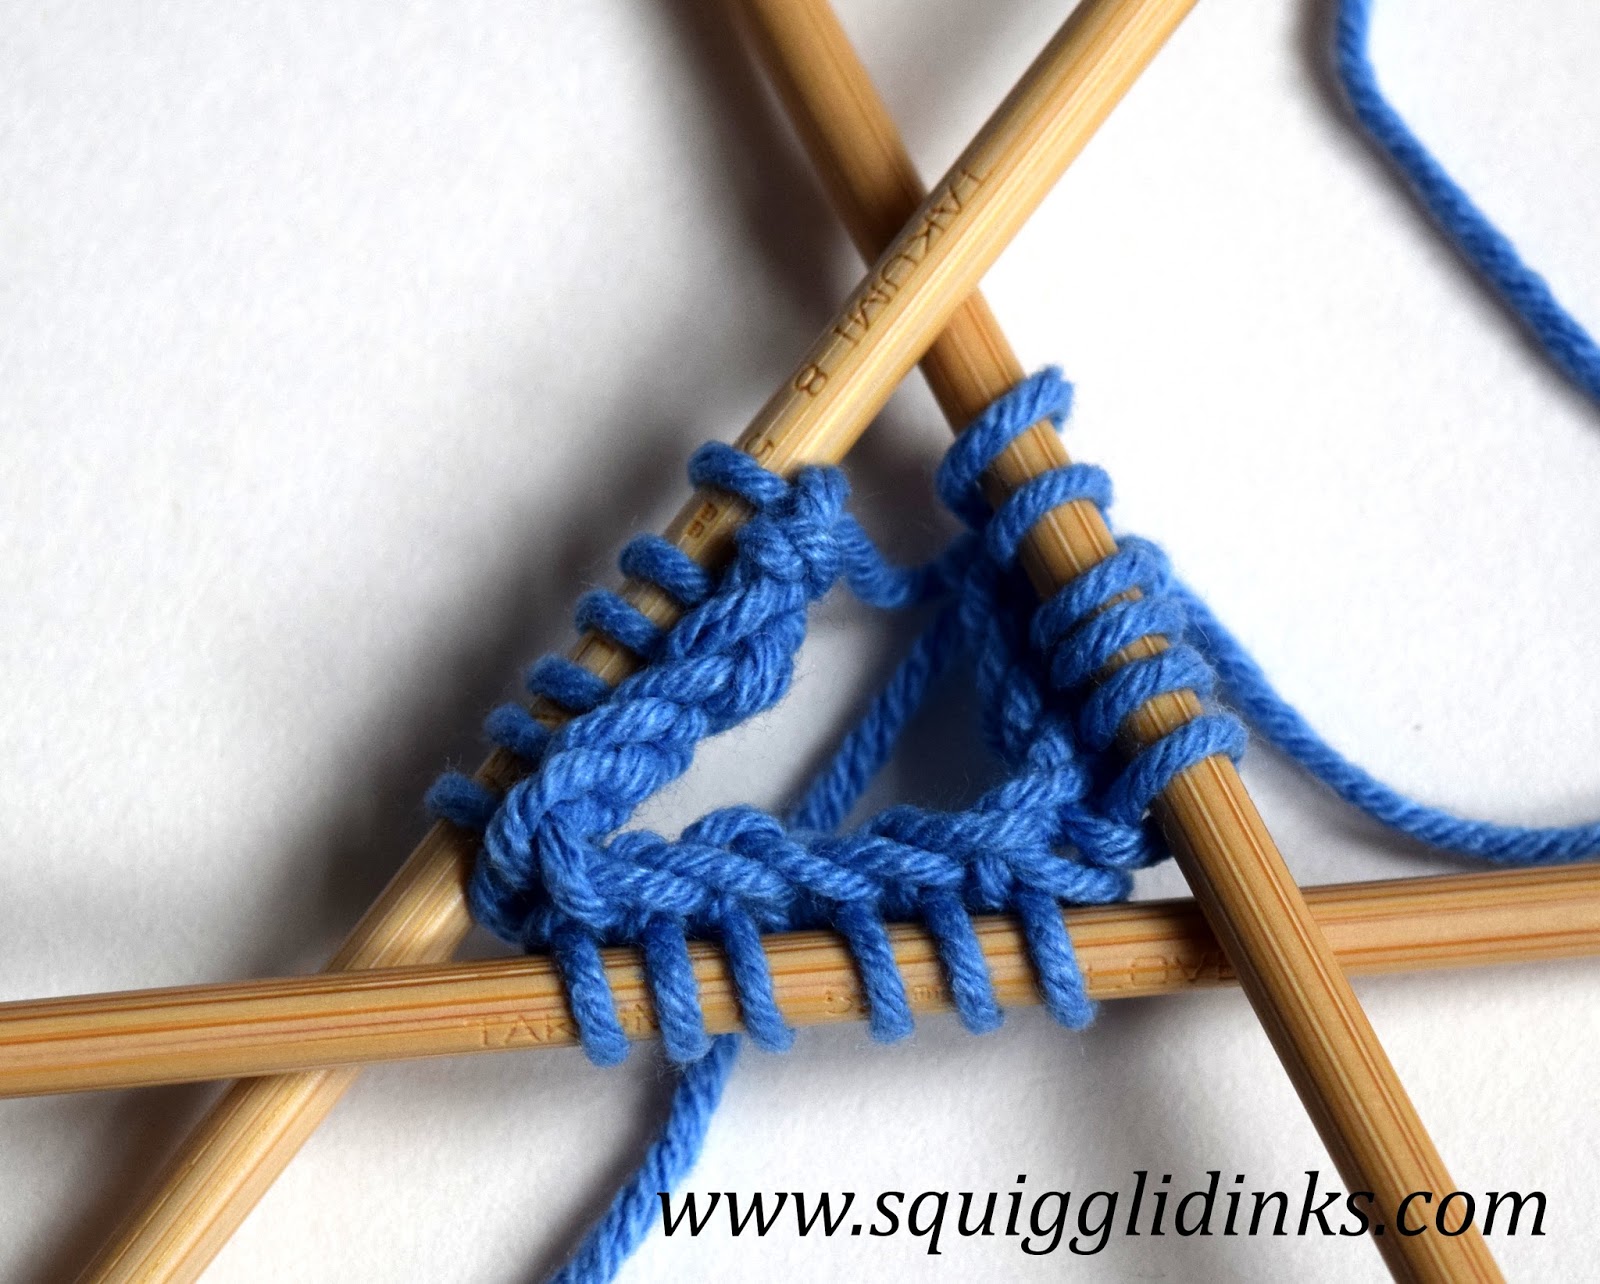
You have now knit one round on all three needles. There may be a bit of a gap between the last needle and the first needle (you can see the little loop at the top of the photo above, between the left and right needles). This is ok. The more you practice, the smaller and smaller that gap will be. Keep going, knitting one needle at a time and turning your work so that your empty needle is in your right hand, and the needle you’re knitting stitches from is in your left.
It’s generally a good idea to place a stitch marker at the beginning of the round so that you know where one round ends and the next one starts. I will often just remember that the tail of yarn left from casting on is at the beginning of the round, rather than using a marker. Some stitch markers clip onto your yarn–you could clip one of those onto your work in the gap left at the beginning of the round.
Other stitch markers are just loops that go over your needle and don’t actually attach to your yarn at all–with these, you’ll want to shift your needles a few stitches over by slipping stitches from one needle to another so that you have a couple of stitches on either side of your stitch marker (otherwise the marker will just fall off the needle and be useless).
I have two videos for you today–the first one walks you through the whole process I’ve just shown you. (My apologies for the videos–you’ll probably hear Munchkin in the background, and I babble a bit….)
The second shows how to cast on to multiple needles:
Now that you have the useful skill of knitting in the round, what projects are you going to try next?
I have gone through so many tutorials trying to learn how to knit in the round on dpn’s. Yours is the best and easiest one by far. Thank you. I can’t wait to try it.
Thank you so much! I hope it expands your knitting opportunities and gives you confidence to try new things!
Thank you for this. I’ve been putting off dpns for a long time, but found a sweater I want to make that starts with the sleeves in the round. Yay!. Am gonna plunge in and do this.
I’m so glad it’s given you confidence to try something new! I’m so excited for your new sweater!