I hate bandwagons. If something is trending, I stay away. I don’t consider myself a non-conformist, necessarily, I just avoid doing things simply because they’re popular. (I suppose that’s a very non-conformist thing to say, though, isn’t it?)
This applies to my knitting too. I was knitting long before it became a cool thing to do. I still haven’t made a messy bun hat, and I’ve avoided blanket sweaters and tape yarn and any number of other yarny bandwagons that have swept through. I’ve had other projects on my to-do list, and I wasn’t going to drop what I was working on to follow a trend.
So this project was not something I expected to make.
This past summer, I found myself wrapping up in a blanket in the evening because the A/C was just a tad too cool, but I was faced with the typical kitchen dilemma when I wanted a snack: leave the blanket behind or try to carry it along without it getting in the way. I decided I needed something blanket-like that I could take into the kitchen with me easily. And it would be nice to have something that could go outside when I took the dog out that wouldn’t be as much of a pain as putting on a sweatshirt. (I’m really lazy, aren’t I?)
The obvious answer was a blanket sweater. It’s a blanket; it’s a sweater; it just shrugs on and holds itself in place. I didn’t want to make one at first, as a matter of principle, so I tried to think of other options, but a shawl has some of the same issues as a blanket, and a poncho can be just as in-the-way. (Although a poncho may be on my to-make list someday for other reasons.)

Once I finally decided to make a blanket sweater, I had to settle on a yarn, which led me to Lion Brand Fast Track. I liked the idea of a bulky yarn for the fast knitting, and for warmth in cooler weather. But Fast Track is also cotton, so it’s cool enough for warmer weather too.
I’ll pause here to say a big thank you to Lion Brand for providing yarn support for this project, which means I got the yarn to design this blanket sweater for free. But, of course, all of the opinions I’m expressing are still 100% my own.
I love the feel of the Fast Track yarn and the resulting knit fabric, and I’m glad I gave it a try. But to be honest, I’m probably not going to use tape yarn often. I don’t like knitting with it much. It twisted a lot, and I kept having to stop and untwist it. It got really frustrating. I was glad to get back to plain, ordinary yarn again afterwards.
A couple of other notes before the pattern: First, I didn’t block this. I know, I’m setting a bad example, but this came to about the size and shape I wanted it without blocking, so I didn’t bother.
Second, this is the right size shrug for what I wanted, especially for summer nights, or for spring/fall. (Plus, I expect it to stretch the more I wear/wash it.) But if you’re looking for something bigger, cozier, and snugglier to keep you extra warm in freezing winters, check out some of Mama in a Stitch’s blanket sweater patterns. (Her designs were the first blanket sweaters I ever saw, and were a source of inspiration for my own design.) She has a number of beautiful patterns, both knit and crochet, that look so perfect for curling up with in front of a fire with a cup of cocoa.
And now on to the pattern.
What you’ll need:
- Lion Brand Fast Track yarn in Purple Train, 4 skeins
- In the interest of full disclosure, the above link will take you to the Lion Brand website, since they were so awesome as to provide me with yarn support for this project. But their site may not be the least expensive place for you to buy this yarn, so you may want to check other retailers before buying.
- If you wanted your shrug to be more winter-oriented and you weren’t interested in using tape yarn, you could substitute another bulky yarn, like Hometown USA or Wool-Ease Thick and Quick. Any time you make substitutions, though, check your gauge to make sure your final size comes out accurate.
- US size 15 circular needles, at least 36” or else your stitches will be really cramped
- Large yarn needle
- Small extra piece of yarn for transitioning between skeins (see below, “Joining tape yarn”)
Skills you’ll need:
- The basics
- Whip stitch
- Joining tape yarn—I found this great video tutorial for joining tape yarn. If you’re new to the yarn and you want to give it a try, check it out! You could still join it like regular yarn and sew the ends under, but I didn’t think it hid the ends as well, personally.
Gauge: 10.5 stitches per 4 inches
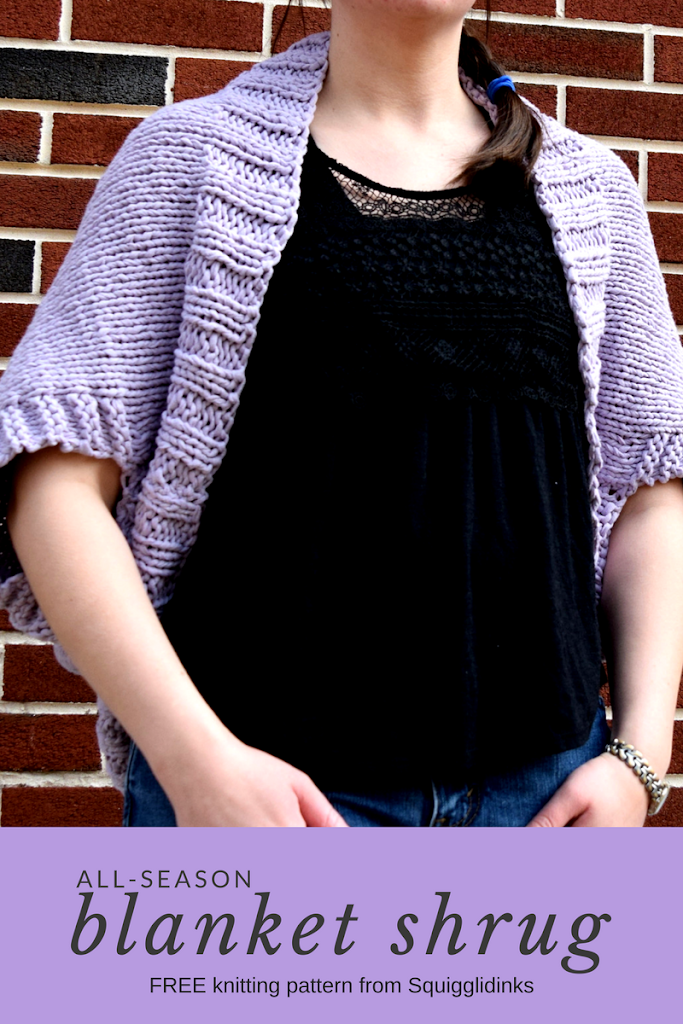
Finished measurements: 36” wide by 31.5” long
Cast on 92 stitches.
First 10 rows: k2, p2, repeat to end.
Knit next 16 rows in st st (knit all odd rows, purl all even rows).
Arm holes:
Row 1: p5, k to last 5 sts, p5
Row 2: k5, p to last 5 sts, k5
Row 3: k
Row 4: p
Repeat these 4 rows a total of 17 times.
Knit 16 more rows of st st.
Next 9 rows: p2, k2, repeat to end.
10throw: bind off in p2, k2 pattern.
Sew ends under. If you would like to block your sweater, this is when you would do it.
Fold it in half, matching the beginning k2, p2 ribs with the ending p2, k2 ribs, with the wrong side facing out. (See photo.)
Whip stitch along the side, joining the two sides, from the cast-on edge to the beginning of the arm hole. Repeat on the other side.
Sew these ends under.
Turn shrug right side out. Put arms through arm holes and get comfy!
| (The arm holes really are the same size, I just didn’t arrange it well for the photo. Sorry.) |


