
“The stockings were hung by the chimney with care…”
Okay, to be honest, we don’t really have a chimney. We’ve hung our stockings beside a door frame and across the top of our french doors, depending on which room we’ve put the Christmas tree in. But there’s something nice about having a set of matching stockings for the whole family lined up side by side, waiting to be filled on Christmas Eve, no matter where they’re hung.
Last year, my sister-in-law approached me about making a matching set for their family. They had gotten one stocking at a time as each of the kids was born, and now that they’re getting older, she wanted a set that they could keep as their own forever. She had seen these stockings from Land’s End on Pinterest, and she liked almost everything about them, but they were discontinued. So I had her choose her yarn colors and got to work.

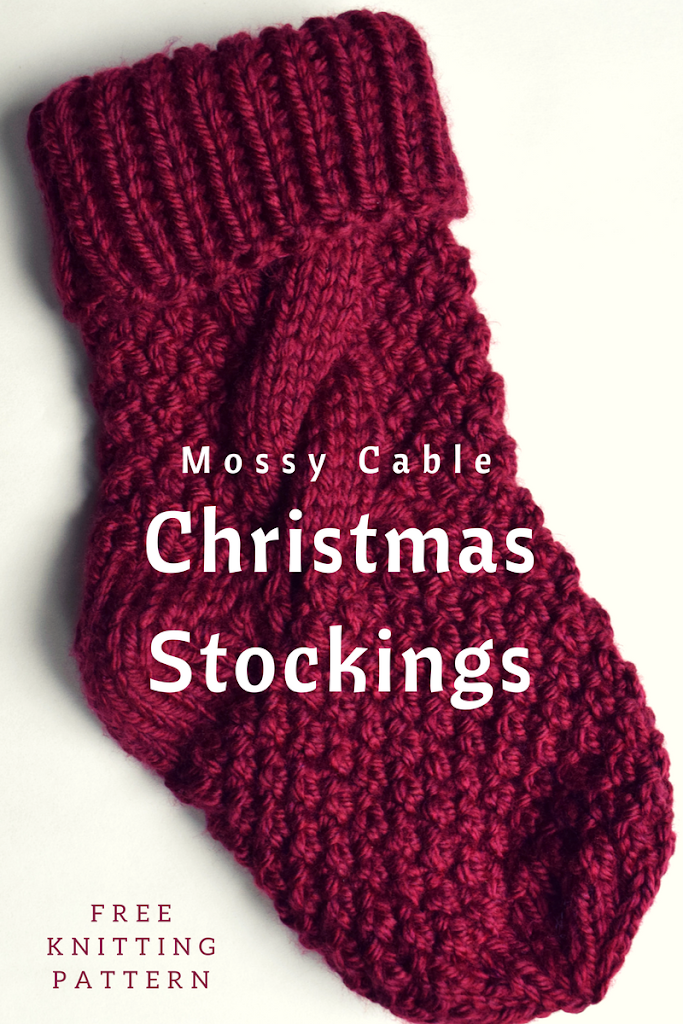
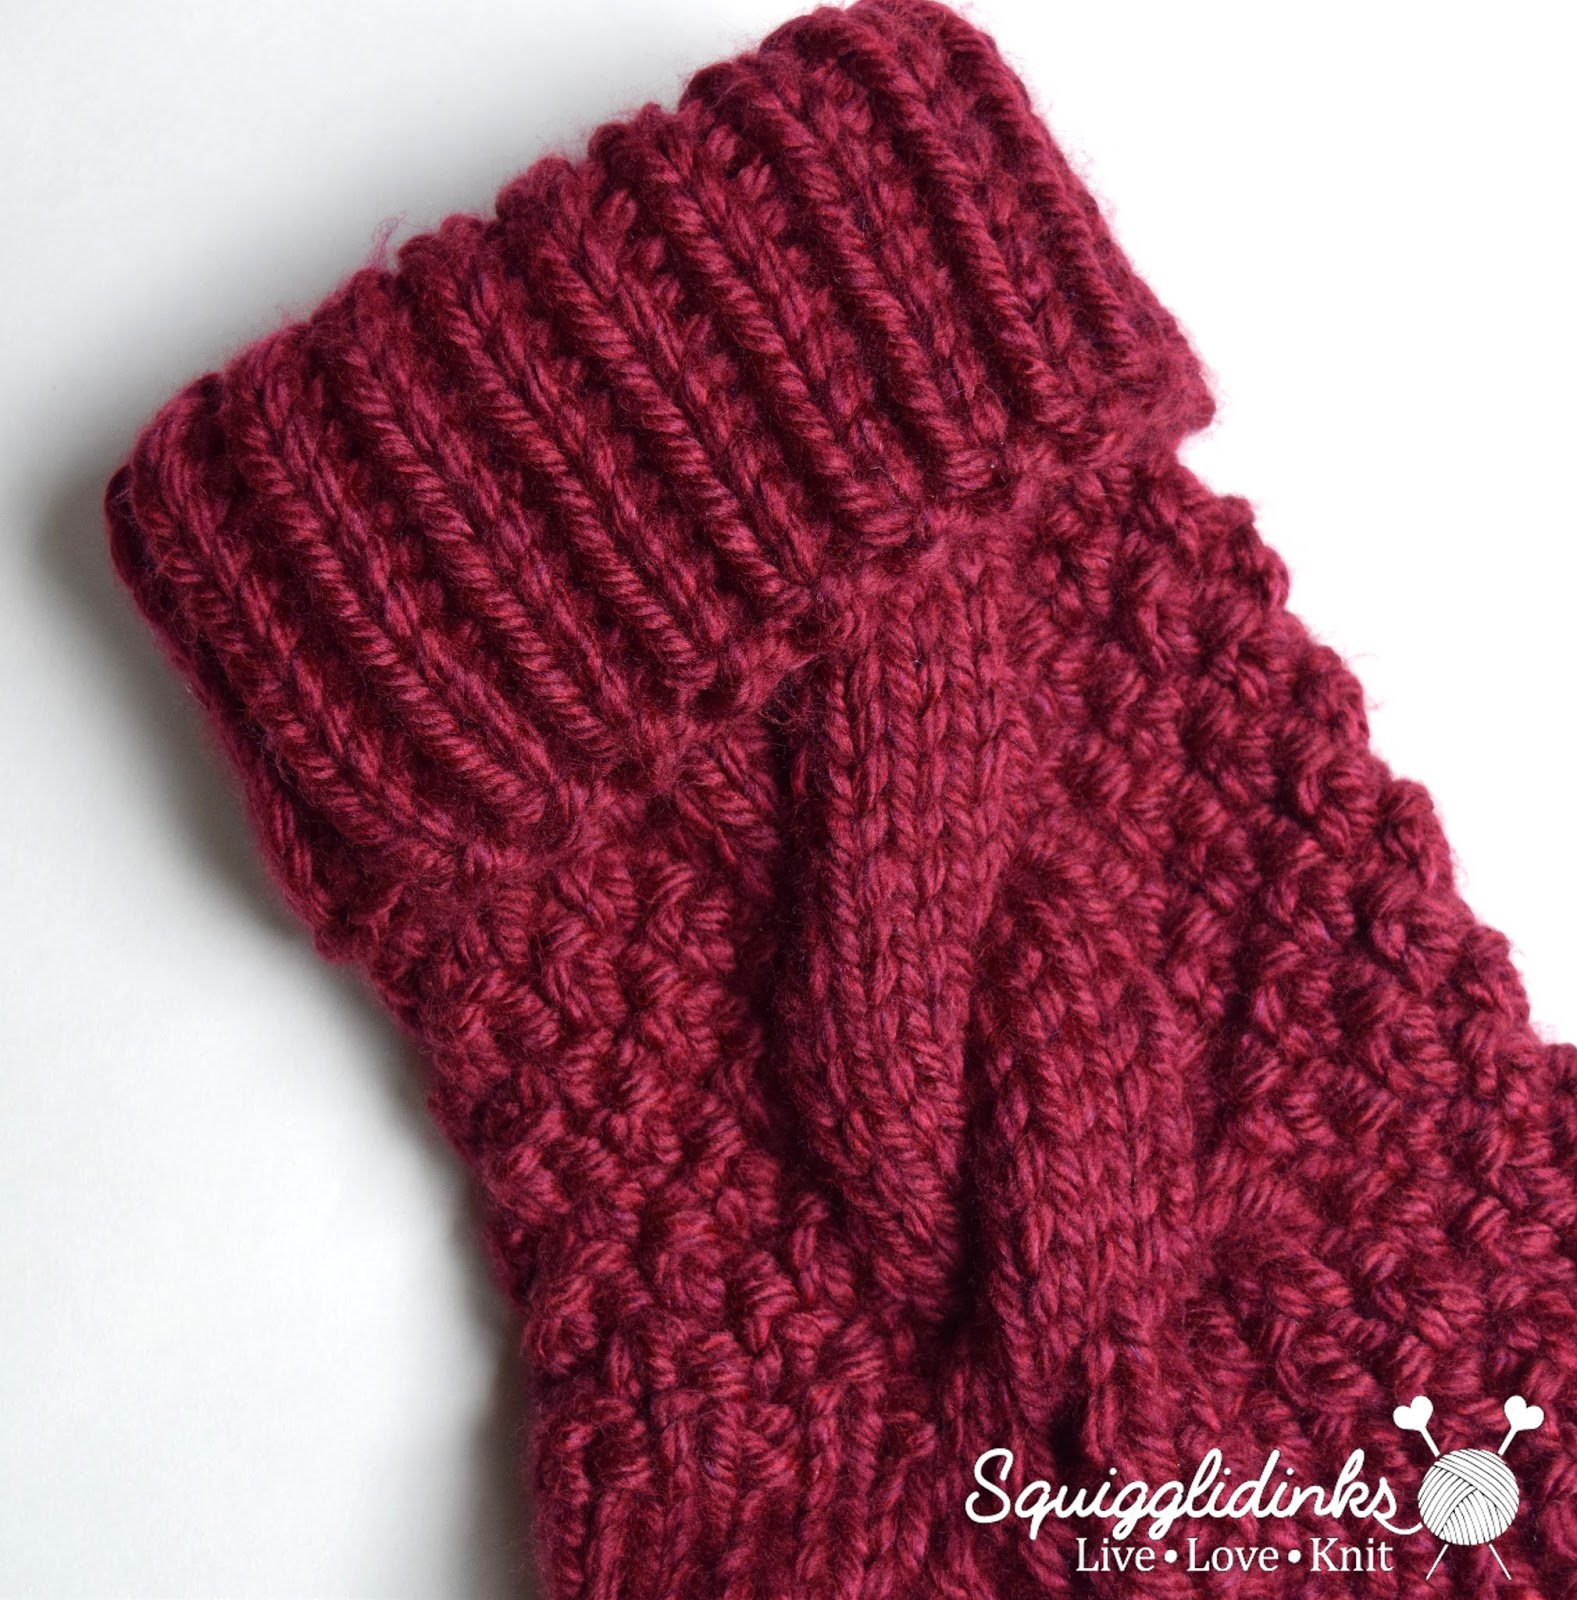
I had to frog the first one a couple of times before I got the gauge right, and the heel took three or four tries, but I like the final result. The stockings are knit ankle to toe, on circular needles, with a long cuff that folds over and a short-row heel with wrapped stitches (don’t worry–there’s a video for that). The whole stocking is done in moss stitch with one wide cable running down the ankle, and the toe is just simple k2togs. I didn’t line the stockings; I don’t think you need to, and I like letting them have some stretch for gifts. You could always line them if you prefer.
We used Lion Brand Hometown USA yarn, a bulky (weight category 6) yarn. It worked up really quickly on size 11 needles. I love the colors my sister-in-law chose, which we could only find in Hometown USA, and it’s really soft and squishy and fun to work with. But I have a few concerns about its longevity for Christmas stockings, and since I only made them this year, I won’t be able to give an experiential report on this for a while. I’m afraid that it’s too soft and not sturdy enough–that it’ll fuzz too much if it gets washed, or that gifts or decorations will get caught on it and pull strands. An alternative yarn you could try would be Lion Brand Wool Ease Thick and Quick, which was actually my first choice for the stockings, except that we couldn’t find the right color palette for what my sister-in-law was envisioning.

A couple of extra notes before we get to the pattern: I did not block the stockings before taking photos. I also did not attach strings for hanging. My sister-in-law was considering getting them professionally embroidered, so I gave them to her as-is with instructions where/how to attach strings. The cuffs in the photos look a lot tighter than they would if they were blocked, and they’ll stretch out a lot once there are presents inside. The cables will stretch out a bit too.
If you prefer an inexpensive printable PDF of the pattern, large print and ad-free, click here to visit my Ravelry page.
You will need:
- Size 11 circular needles, 16 inches
- Size 11 double pointed needles (optional)—I didn’t use these, but they would make the toe of the stocking easier
- Lion Brand Hometown USA yarn, 2 skeins (You’ll use about 120-140 yds)—I used 2 skeins each of Napa Valley Pinot, Dallas Gray, Fort Worth Blue, and Los Angeles Tan
- Cable needle
- Yarn needle for finishing
- 1 stitch marker
- Knitting in the round on circular needles
- Knitting in the round on double pointed needles (optional)
- Knit 2 together (k2tog)
- The basics: casting on, knit stitch, purl stitch
Sm = slip marker
Cast on 40 sts. Join into a circle; place marker to mark beginning of round.
Cuff:

The heel is worked in short rows as though you were using straight needles, turning your work when directed.
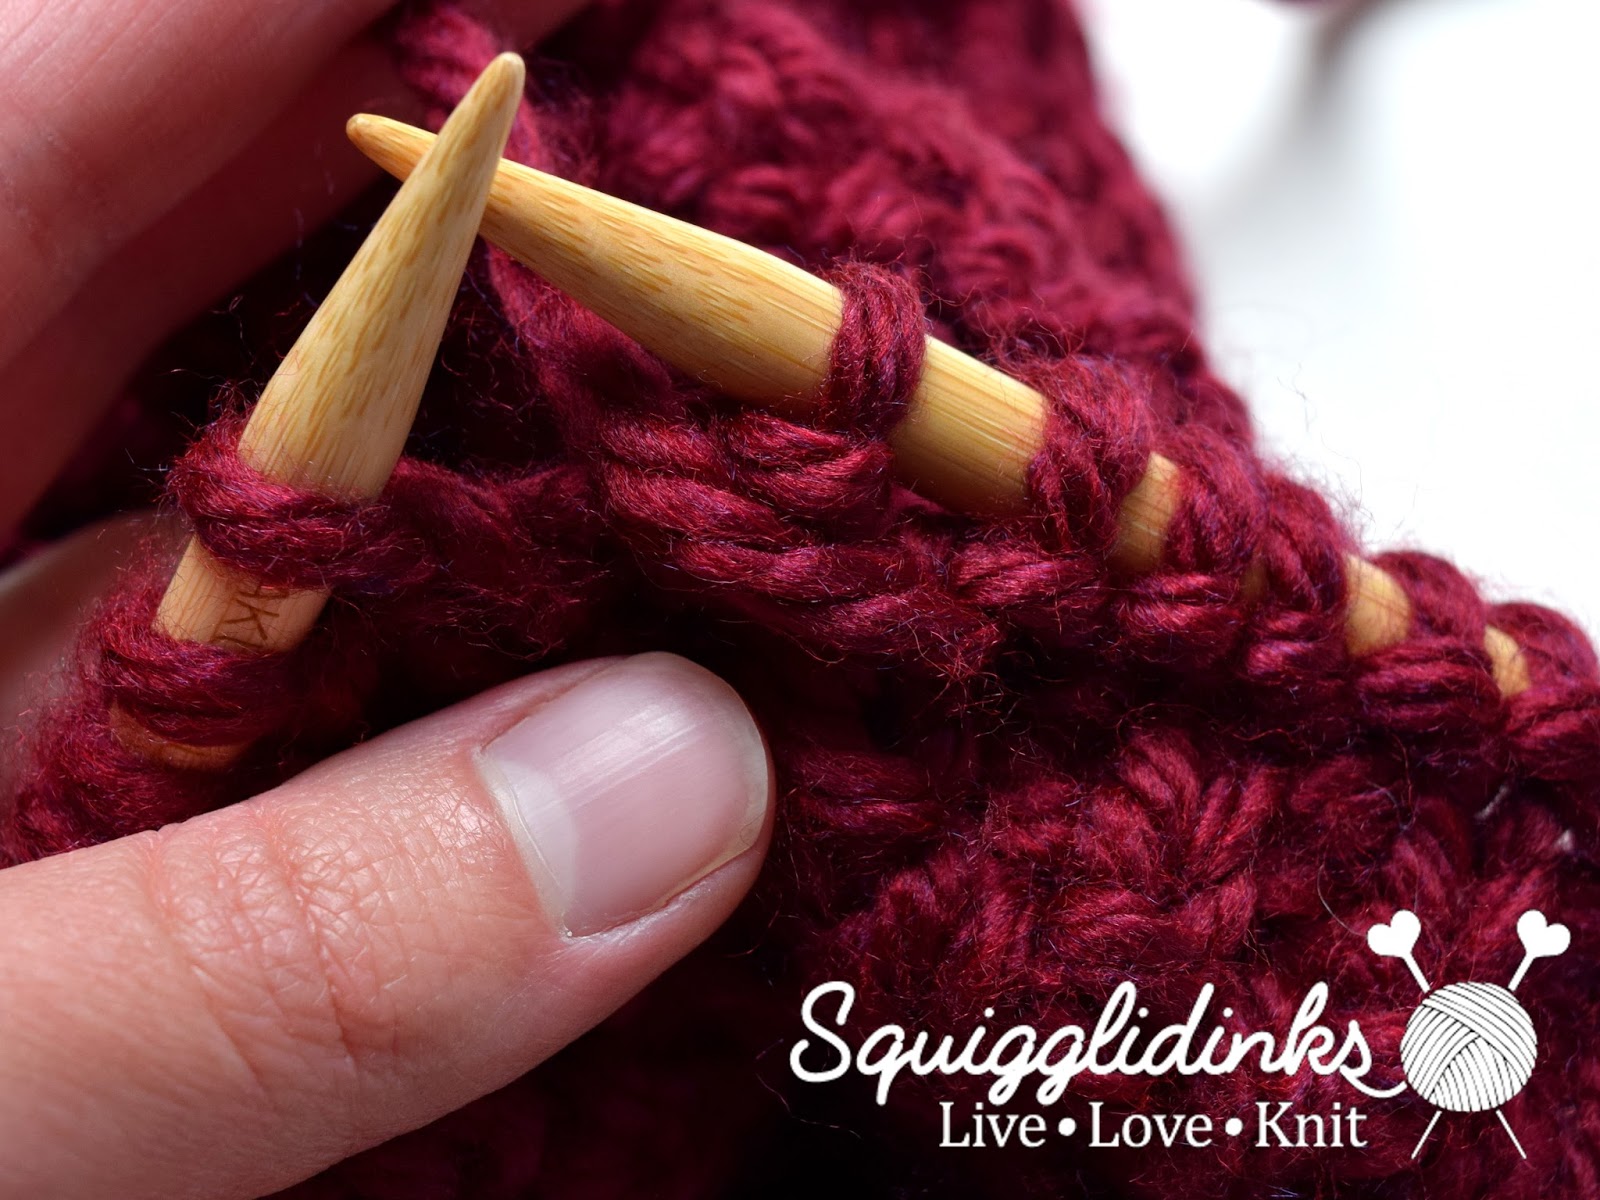
If you’ve done wrapped stitches before, feel free to skip over the photos for creating the wraps. I tried to be as detailed as possible for anyone who’s trying something new. (If you’re following the photos, odd rows follow the photos for row 1, even rows follow the photos for row 2.) I didn’t take photos of knitting the wraps; it was too hard to get a good shot. Follow the video for that part if the written instructions aren’t enough.
Row 1: k6, yf, sl1, yb, sl1 to ln, turn work
 |
| k6 |
 |
| yf |
 |
| sl1 |
 |
| yb |
 |
| sl1 to ln |
 |
| turn work |
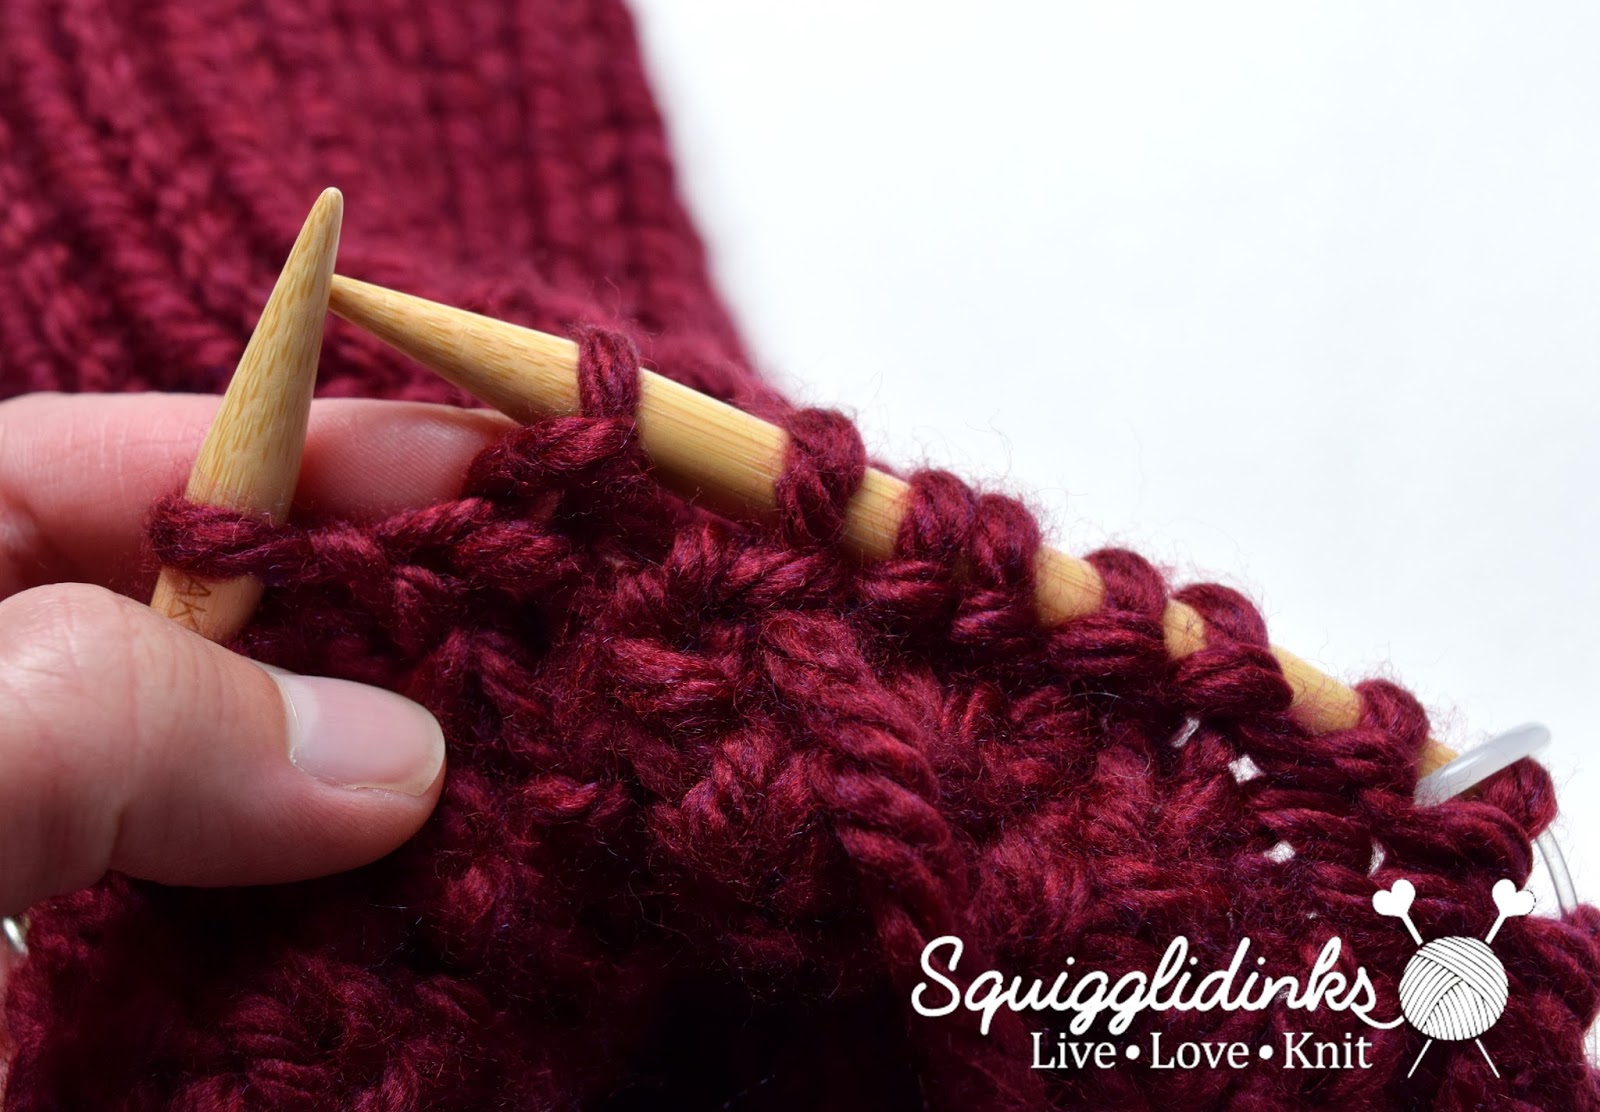
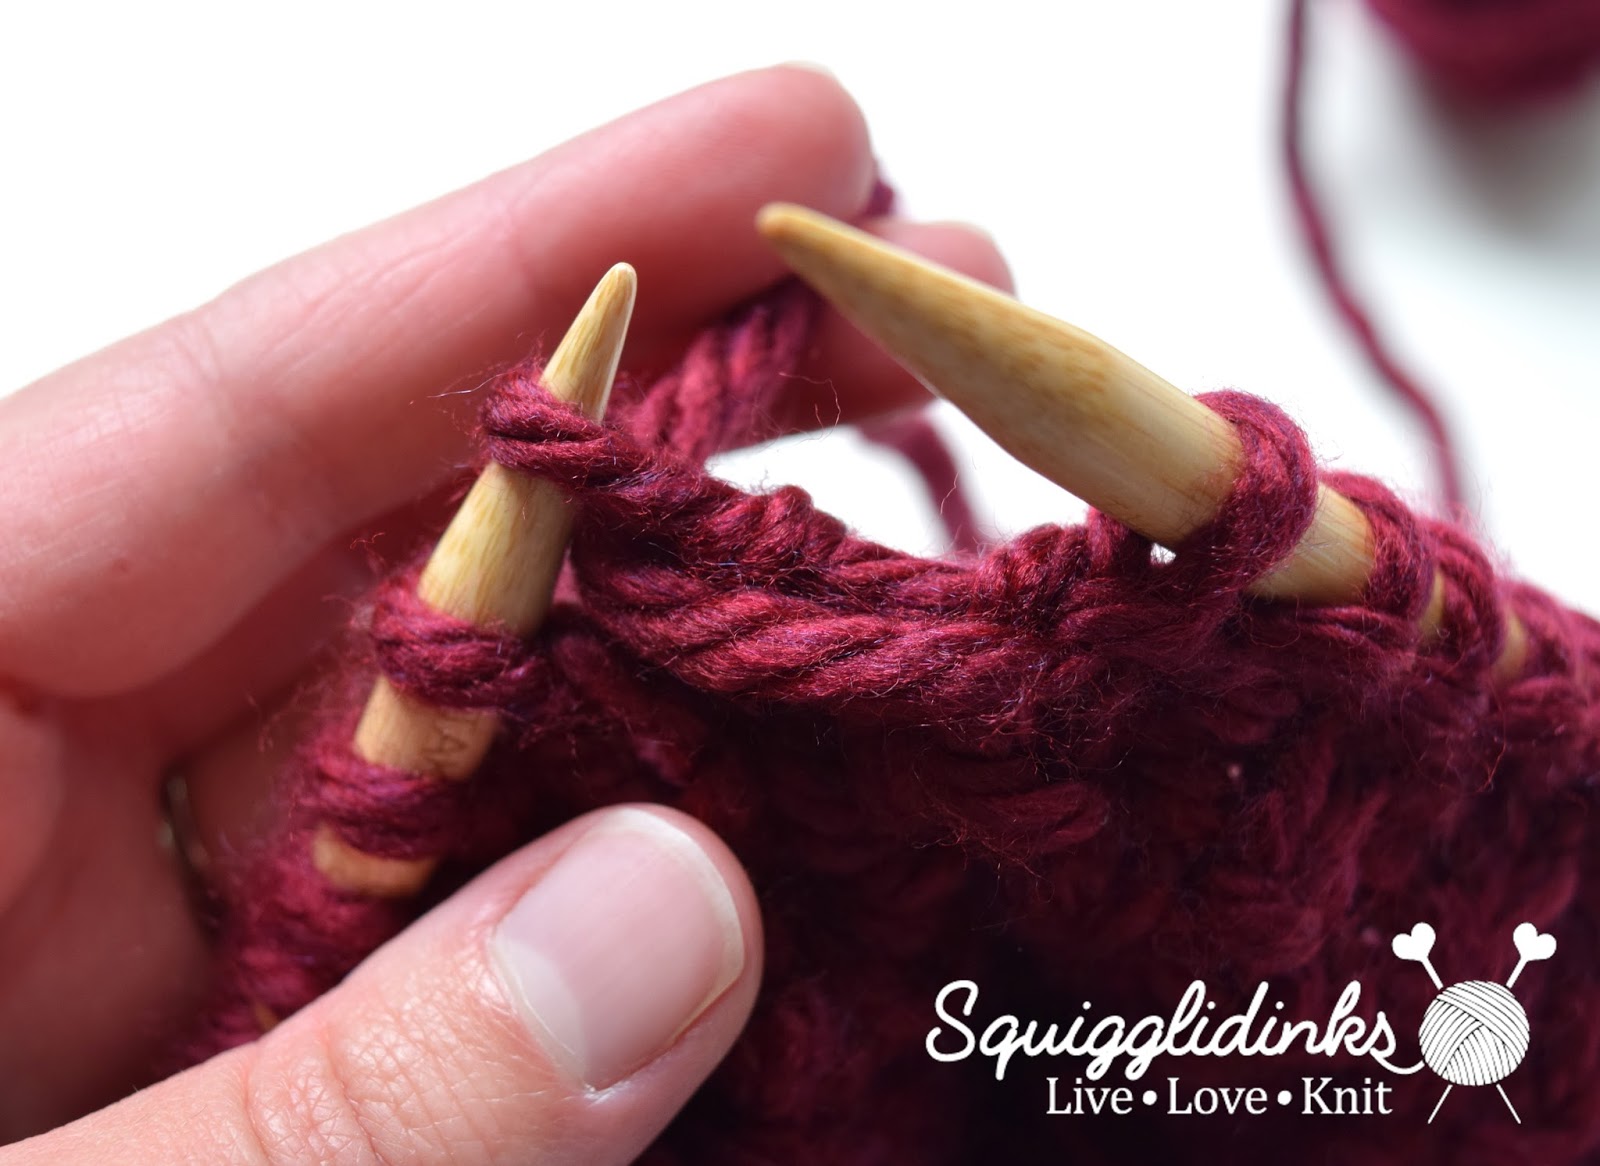
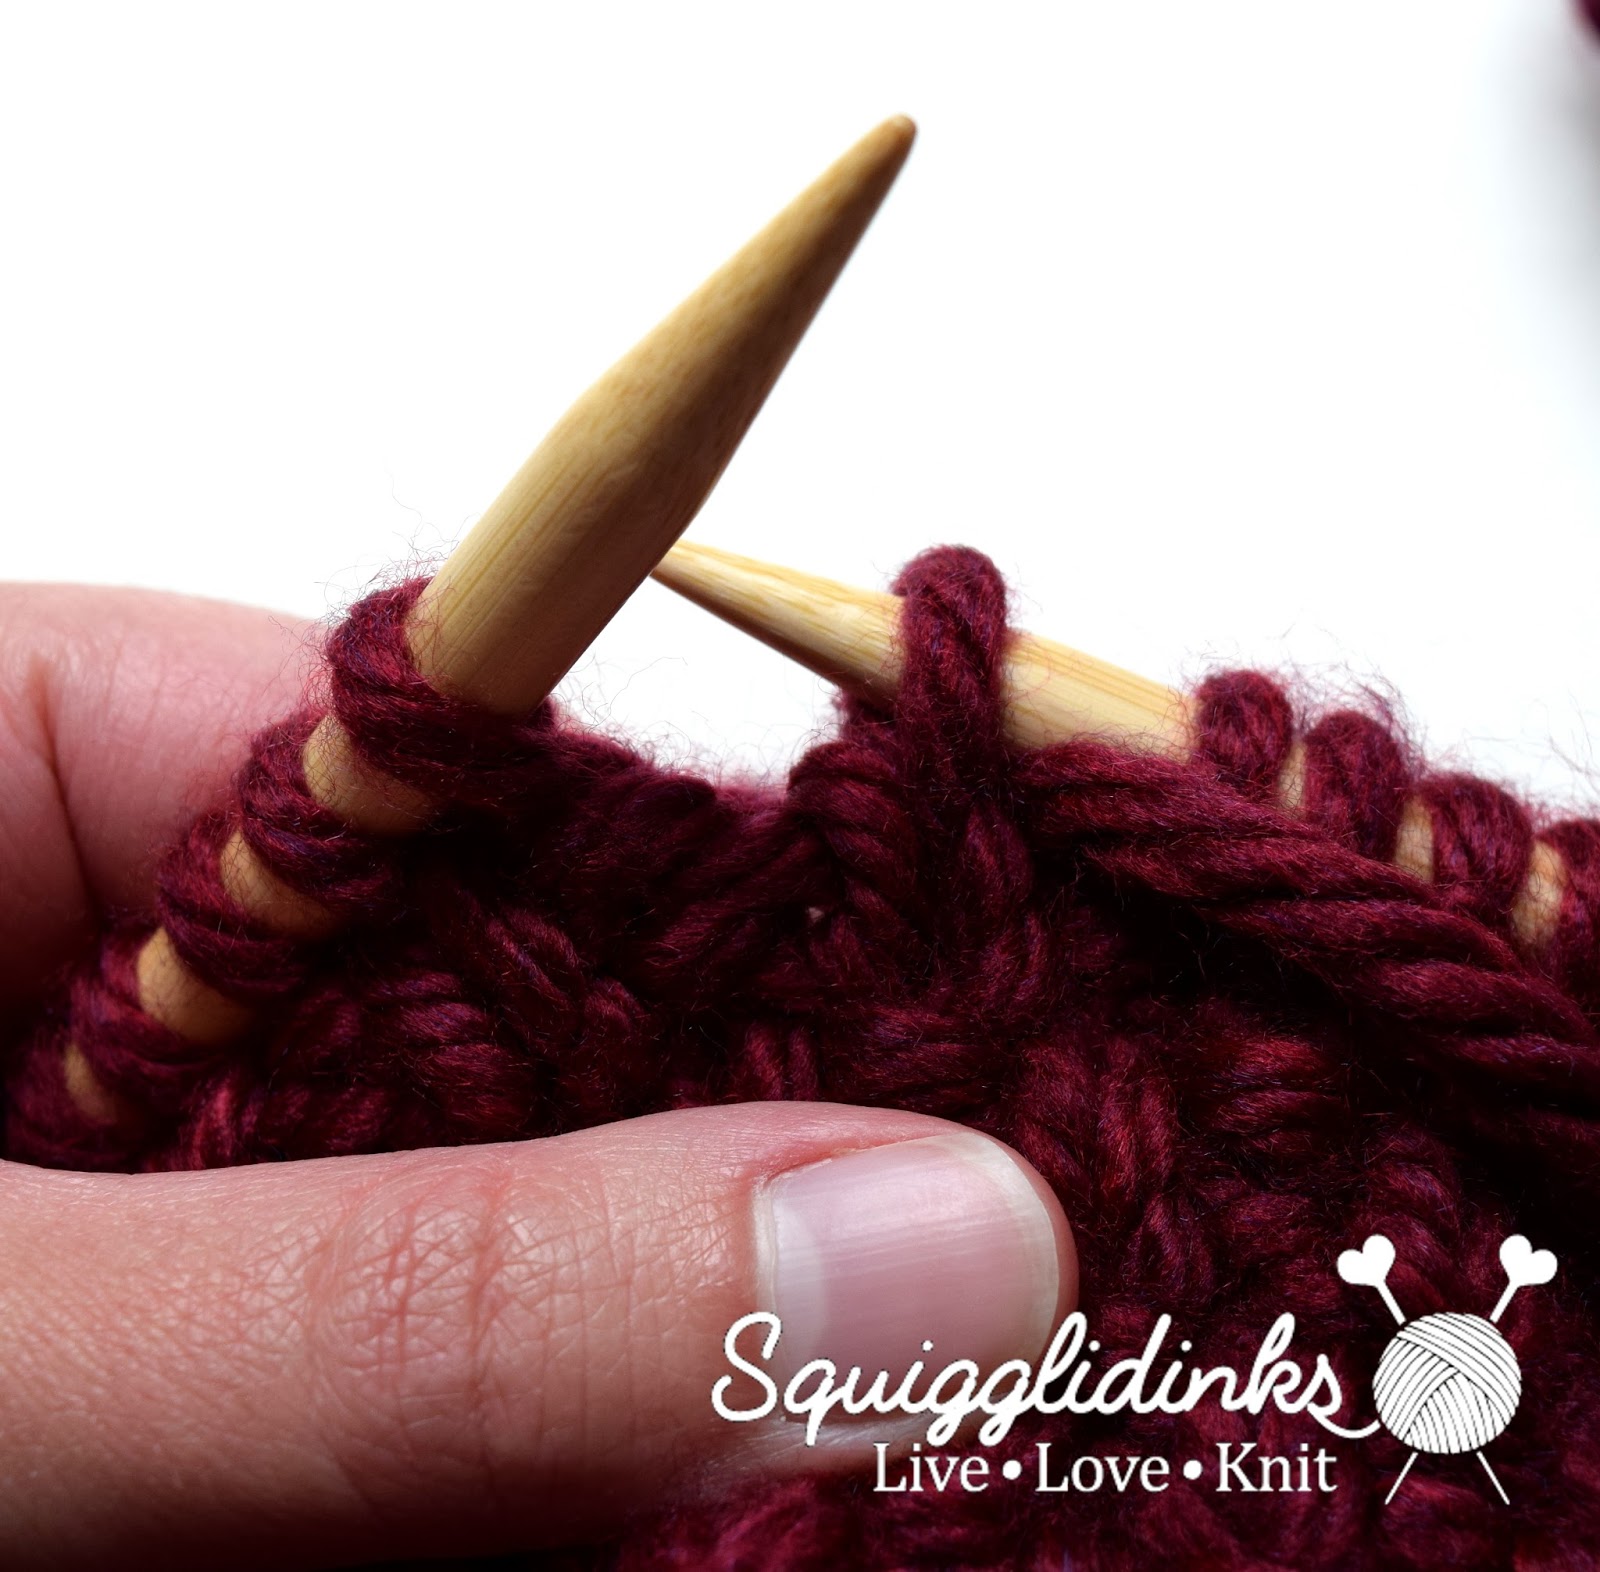
Row 2: p6, sm, p6, sl1, yb, sl1 to ln, turn work
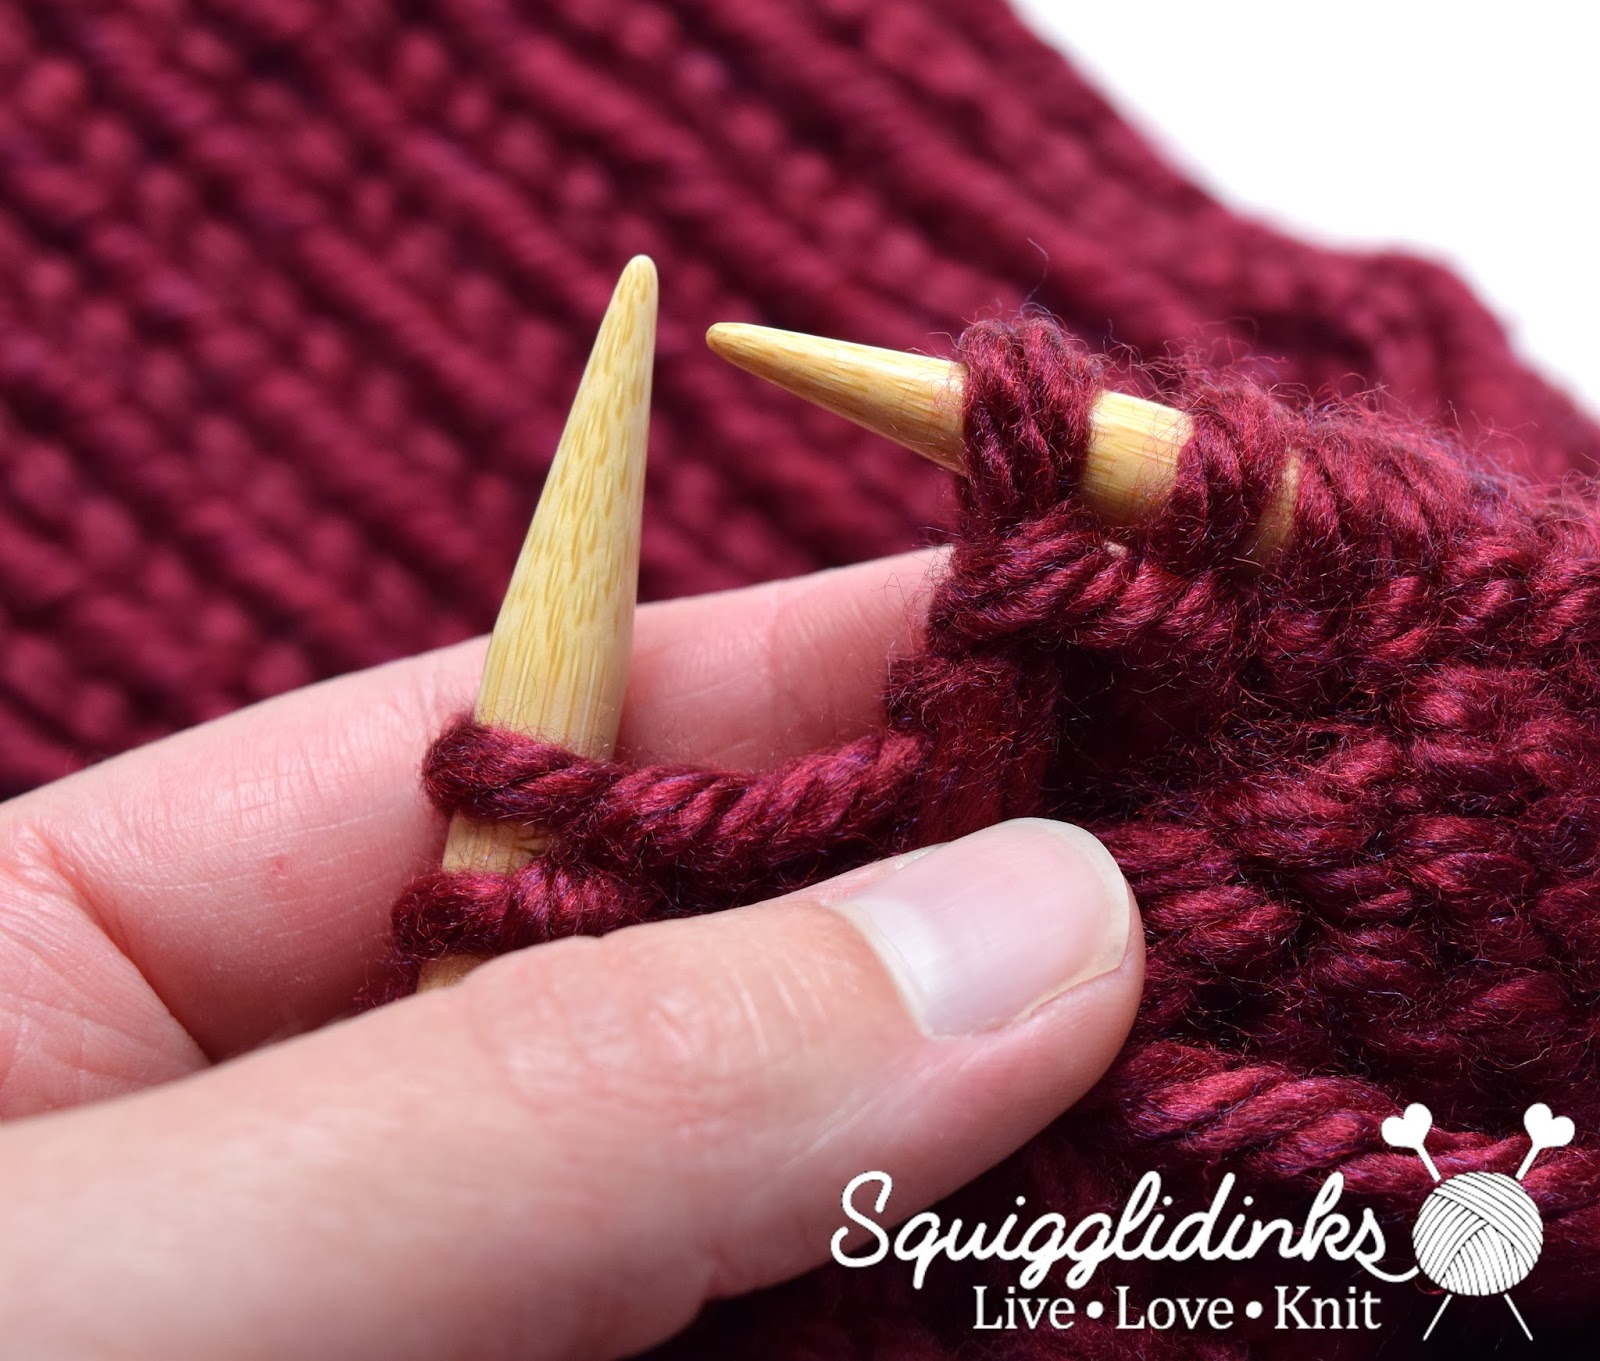 |
| This is the first purl stitch after you’ve turned your work. The wrap is around the second stitch on the right needle in the picture. Be careful not to pull this first purl stitch too snug or the wrap will be too tight and difficult to knit later. |
 |
| p6 |
 |
| sl1 |
 |
| yb |
 |
| sl1 to ln |
 |
| turn work |
 |
| yb (this is the start of row 3) |
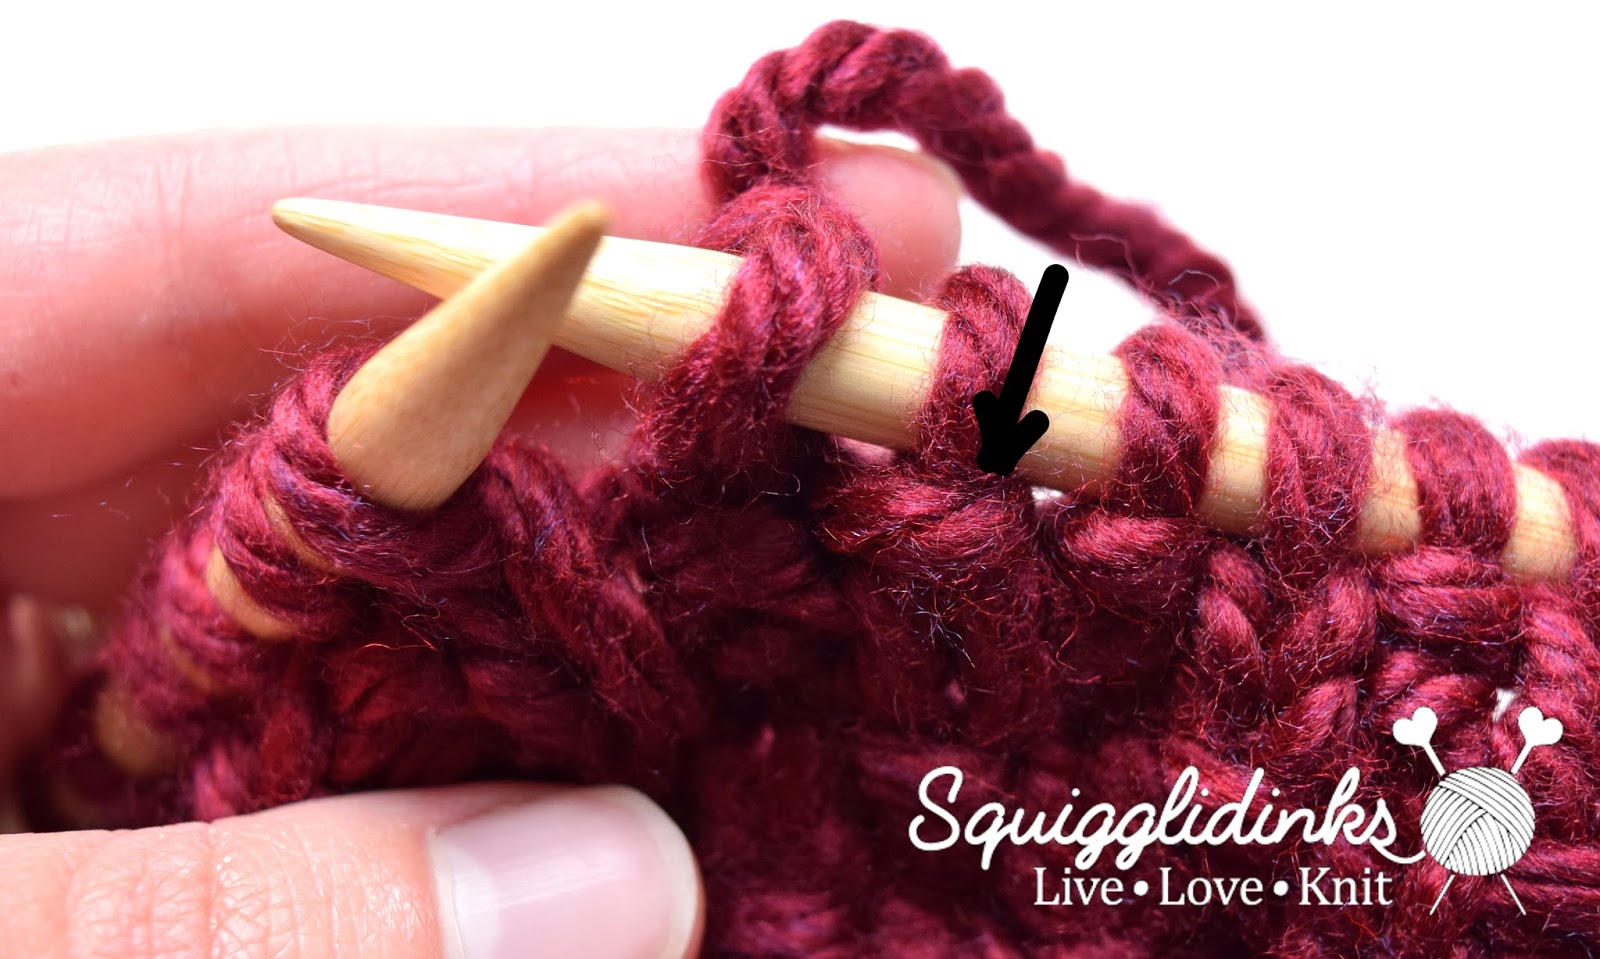 |
| This is the first knit stitch in row 3. The arrow is pointing to the wrap around the stitch. |


Fold cuff in half so that cast on edge is just covering the beginning of leg cable. Cut a ribbon or piece of yarn long enough to hang the stocking wherever you want it. Thread the tie through the fold in the cuff so that it’s looped through at least 3-4 stitches (remember the weight of whatever gifts are in the stocking will be held up by this point). Hang it by the mantle, the stair rail, the doorway, or wherever you like!
I love the look of this pattern! What are the finished dimensions? It seems somewhat short to me… how could I make it longer? Thanks!
It ended up being about 14-15″ long, although it would stretch a lot as soon as it had anything in it. You could make it longer by going back and knitting through rounds 1-10 or even 1-20 of the leg section again after knitting the whole leg section once.
What does In abbreviation in the toe directions mean?
I’m not sure which abbreviation you mean. The toe is all knit stitches and knit two togethers. The only other abbreviations I saw were dpn (double pointed needles) and sts (stitches). Let me know if I can clarify!
Eliza