
My newest nephew was born in November, so of course this summer I dropped everything to make a blanket for him. I wanted it to be simple and warm and—always my most important factor—machine washable. I used Loops and Threads Impeccable, one of my favorite basic worsted weight acrylic yarns, because it’s soft, easy care, and holds up to a lot of use.
But that wasn’t my original plan. My first design was a big square of the Tunisian crochet simple stitch (you can check out the stitch pattern on this charity block) with a crochet border. Using Bernat Baby Velvet. Velvet, my friends. The yarn was sooo soft, and I loved working with it. But I learned a bit late (as in, several inches into the blanket) that velvet yarn has a tendency to pull and create these weird loops on the wrong side of the work, especially with Tunisian crochet. The only solution I heard from my Instagram friends was to go down several hook sizes so that the yarn has no wiggle room to pull. But then it would be way too tight and dense. So I redesigned.
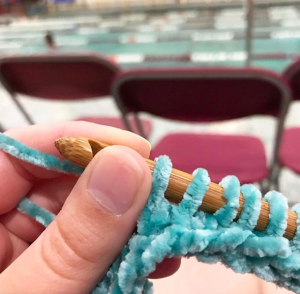
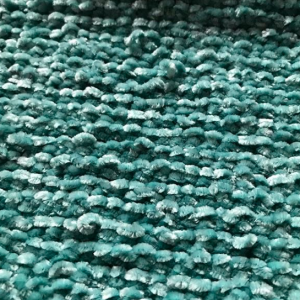
Plan B still involved velvet yarn, but I had switched to knitting. I didn’t end up with the same loops in the back, but if you tugged on a stitch, it would pull and create a loop. And let’s face it: baby fingers are really good at pulling on things.
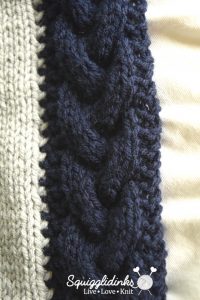
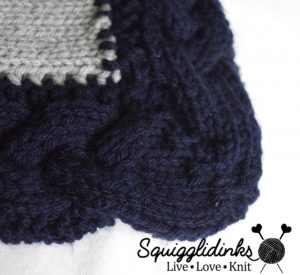
So I put away the velvet (with a deep sigh and a promise to find a project for it eventually) and switched to my standby classic, worsted weight acrylic. I knit the blanket quickly, then struggled a bit with the border. Finding the right gauge and stitch pattern (the braid was my first choice, but I tried a few things before coming back to it with larger needles) took longer than I thought. And then, once I’d decided, I had to wrangle the corners into shape. I knit the border counter-clockwise around the blanket, picking up stitches from the edge of the blanket at the end of each RS row. The corners are done in short rows, with an interesting technique for avoiding holes—rather than wrapping stitches, I knit two together in front and back. (I found this on a video tutorial, but I can’t find the video again to link to it–sorry!–but you can read the written instructions under “Stitch Abbreviations” below.)
Speaking of video tutorials, though, I do have a tutorial from Purl Soho on the kitchener stitch. The border is joined with the kitchener stitch, which I’ll admit is my least favorite thing to do. But if you get it right, it looks amazing.
I’m really pleased with how it turned out in the end, and I can say that all the frustrating steps backward were worth it. Give it a try and let me know what you think! I’d love to see your finished blankets—tag me on Instagram (@squigglidinks) or send me an email. What colors would you use?
Braided Baby Blanket
Do you prefer a printable, ad-free PDF? You can download an inexpensive copy here.
Pattern notes: This blanket is knit as a large gray rectangle on straight needles. The navy border is knit sideways around the edge, picking up a stitch from the gray blanket at the end of each RS row and passing the previous knit stitch over so that each row of the border always has 13 stitches. The slipped stitches at the beginning of each gray row make it easy to pick up these stitches—along the sides, one stitch is picked up in each slip stitch. Along the top and bottom edge, stitches are picked up in a pattern: pick up a stitch in each of 3 stitches, then skip 1 stitch; repeat this pattern a total of 4 times, then pick up 1 stitch in next stitch and skip 1 stitch (13 stitches picked up and knit across 18 stitches). Repeat the pattern ([pick up 3, skip 1] 4x, then pick up 1, skip 1) to the corner.
Corners are worked in short rows. To keep gaps from forming when working back across the rows, k2togfb across the gap. (The gap is closed by the k2tog, and knitting the stitch in front and back brings you back to the right number of stitches.)
Needles: US size 9 (5.5 mm); US size 10.5 (6.5 mm).
Yarns used: Loops and Threads Impeccable Yarn (worsted weight (4); 100% acrylic; 285 yards/127.5 grams), 2 skeins of Pale Gray and 2 skeins of Navy.
Yardage: 570 yards of Pale Gray; 380 yards of Navy.
Gauge: 4 stitches per inch.
Other Notions: cable needle, extra needle for kitchener stitch (doesn’t matter what size), yarn needle for finishing.
Final Measurements (Blocked): 38.5 inches (97.8 cm) wide and 32.5 inches (82.6 cm), including border.
Stitch Abbreviations:
- k = knit
- p = purl
- sl = slip
- k2togfb = knit two together in front and back = pick up and knit two stitches for k2tog, do not take stitches off of left needle. Reach right needle around behind the stitch and knit the two stitches again through the back loop. Slide stitches off left needle.
- 3/3 rc = 3/3 right cross = slip 3 stitches onto cable needle, hold behind work; k3, k3 from cable needle.
- 3/3 lc = 3/3 left cross = slip 3 stitches onto cable needle, hold in front of work; k3, k3 from cable needle.
Pattern:
Using Pale Gray and size 9 needles, cast on 132 stitches.
Row 1: sl1, k to end.
Row 2: sl1, p to end.
Repeat these two rows until piece measures 34 inches (86.4 cm), or until both skeins have been finished. Bind off.
Cable border:
Begin at a corner, working counter-clockwise. See Pattern Notes for where along blanket edge to pick up stitches.
Using Navy and size 10.5 needles, cast on 13 stitches using a provisional cast on.
Row 1: k13, pick up one stitch along edge of blanket, pass previous stitch over.
Row 2 and all even rows: k2, p9, k2.
Row 3: k2, 3/3 rc, k5, pick up one stitch along edge of blanket, pass previous stitch over.
Row 5: k13, pick up one stitch along edge of blanket, pass previous stitch over.
Row 7: k5, 3/3 lc, k2, pick up one stitch along edge of blanket, pass previous stitch over.
Repeat Rows 1-8 until you reach the corner. Stop the pattern at the corner, ending on an even row (doesn’t matter which one).
Corner:
Begin creating short rows:
Row 1: k12, turn.
Row 2: k1, p9, k2.
Row 3: k11, turn.
Row 4: p9, k2.
Row 5: k8, k2tog, turn.
Row 6: p7, k2.
Row 7: k6, k2tog, turn.
Row 8: p5, k2.
Row 9: k4, k2tog, turn.
Row 10: p3, k2.
Row 11: k3, turn.
Row 12: p1, k2.
Row 13: k2, turn.
Row 14: k2.
Work back along the short rows:
Row 15: k1, k2togfb, turn.
Row 16: sl1, k2.
Row 17: k2, k2togfb, turn.
Row 18: sl1, p1, k2.
Row 19: k3, k2togfb, pick up top loop of k2tog from Row 9 and knit, turn.
Row 20: p4, k2.
Row 21: k5, k2togfb, pick up top loop of k2tog from Row 7 and knit, turn.
Row 22: p6, k2.
Row 23: k7, k2togfb, pick up top loop of k2tog from Row 5 and knit, turn.
Row 24: p8, k2.
Row 25: k9, k2togfb, turn.
Row 26: sl1, p8, k2.
Row 27: k10, k2togfb, turn.
Row 28: sl1, p9, k2.
Row 29: k5, 3/3 lc, k2togfb, pick up one stitch along edge of blanket, pass previous stitch over.
Row 30: k2, p9, k2.
Repeat Rows 1-8 of cable border to next corner.
Repeat short-row corner.
Continue in this way until border is knit all the way around the blanket. End the final corner on Row 29. Place provisional cast-on edge onto extra needle. Use kitchener stitch to join. (The kitchener stitch takes the place of Row 30. If you knit Row 30 before joining, there will be an extra row between the two cable twists.) Cut 6 inch tail; sew all ends under. Block to proper size.