Before we get into how to begin knitting on circular needles, let’s talk about how to choose the circular needles for your project. Besides needing to know the size (in US sizes or mm) of the needles, like you would with any other type of needle, you also need to know the length. Circular needles come in multiple lengths, including 9, 16, 24, 36, and 48 inches.
So how do you decide which length you need for your project?
You want something that’s a few inches smaller than your project circumference.
|
Needle Length |
Projects |
|
9” |
Baby/toddler hats (head circumference approximately 16-19”), leg warmers |
|
16” |
Child/teen/adult hats (head circumference approximately 19-24”), baby/toddler sweaters, cowl/snood |
|
24” |
Small sweaters (chest sizes less than 39-40”) |
|
36” |
Large sweaters (chest sizes larger than 40”), infinity scarf |
This isn’t a comprehensive list at all. But it’s a starting point at least.
(You can also use the longer circular needles for knitting blankets, shawls, and other large flat projects. Just knit with them like you would straight needles, letting the cable between the needles hold your stitches for you as you work.)
Once you have the right needle length for the circumference of the project, it’s time to start knitting:
Cast on the number of you stitches that you need. You’ll cast on to one needle just like you would with a straight needle, allowing the stitches to slide along the cable section between the two needles.
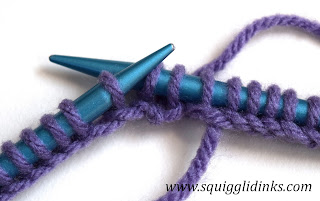
Once all your stitches are on, stretch the stitches across to the other needle, so that your stitches start about an inch in from the end of either needle (see photo below).
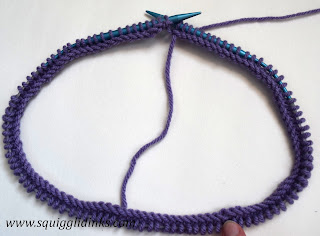
Lay your needles flat on the table or another flat surface so that they form a circle. (If you’re a righty, it’s best to do this with your working yarn at the end of the needle on the right.) Your cast on stitches should make a nice, clean circle around the inside of your needles. You do NOT want them twisting around your needles.
 |
| RIGHT — The stitches are making a neat circle inside the needles. |
 |
| WRONG — You do NOT want stitches twisting around your needles like they are at the left of this picture. |
Once you have your stitches in a neat circle inside your needles, pick your needles back up as you would to knit.
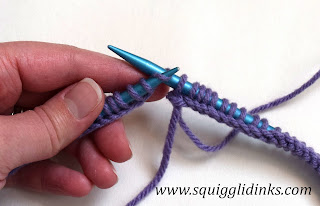
Knit the first stitch on your left needle, using the working yarn from the right needle. You may need to pull the stitch a little extra tight to make sure that the stitch is nice and snug against the stitches already on the right needle.
Keep knitting (or knitting and purling, following the pattern for the first row).
 |
| Two stitches have been knit. |
 |
| Five stitches have been knit. |
When you get to the end of the first row (you can tell when you reach the tail again), you’ll want to place a marker so that you always know where the beginning of the row is. (You can do this at the beginning before you join the stitches if you want, but it’s one less thing to deal with at the beginning if you just wait a row, and I’m all for keeping things simple.)
There may be a little gap in between the last stitch and the first stitch (where you’re placing the marker), and that’s ok. Just keep going. As you practice, that gap will get smaller and smaller, and you won’t notice it at all once you’ve knit a few rows further.
 |
| You can see the little gap between the last stitch and the first stitch after I knit the first row. This will disappear after I’ve knit a few more rows. |
It’s always a good idea to check every so often in the beginning (for the first couple rows at least, especially if you’ve had to put it down for a while) to make sure your knitting is still making a nice circle inside your needles:
 |
| After one row, my stitches are still a nice, neat circle inside the needles. |
Here’s a little video showing how to join your knitting in a circle. (Sorry, I babble in this video…)
Is there a project that you’ve been wanting to try but haven’t started because it’s worked on circular needles? Are there still questions holding you back? Ask me in the comments!


